

Broken iPhone speaker: causes, fixes, and repair costs
TL;DR:
- Testing speakers independently helps identify whether the earpiece or loudspeaker is faulty. Moisture exposure and hardware damage are common causes of iPhone speaker problems that require different repairs. Proper diagnosis, gentle cleaning, and professional repair are essential for fixing persistent or severe issues.
A broken iPhone speaker is defined as any condition where the device’s audio output becomes muffled, distorted, or completely silent due to obstruction, software misconfiguration, or physical hardware damage. The iPhone contains two distinct speakers: the earpiece at the top of the screen, used for calls, and the loudspeaker at the bottom, used for media and speakerphone. Both can fail independently, and the cause is rarely obvious at first glance. A properly functioning speaker produces between 80–100 dB at maximum volume. Readings below 75 dB combined with muffled output typically point to blockage rather than hardware failure, which changes the repair approach entirely.
How do you know if your iPhone speaker is broken?
Testing each speaker independently is the single most important step before spending money on a repair. Replacing the wrong component wastes both time and money, and it happens more often than most people realise.
Follow these steps in order:
- Test the loudspeaker. Play a video or music through the native Music or YouTube app without headphones connected. If sound is absent or distorted, the bottom loudspeaker is the likely culprit.
- Test the earpiece. Make a standard phone call and listen through the top of the handset. A muffled or silent earpiece during calls points to the earpiece speaker specifically.
- Check audio routing. Open Control Centre and confirm no Bluetooth device is active. Audio routed via Bluetooth or a device stuck in headphone mode is one of the most common reasons iPhone sound stops working, and it requires no repair at all.
- Disable silent mode. Check the physical mute switch on the left side of the phone. Many users overlook this entirely.
- Run a tone generator test. Free apps such as Decibel X or a browser-based tone generator can play frequencies across the audible range. Silence at specific frequencies, while others play normally, suggests partial hardware damage.
- Check volume settings per app. Some apps manage their own volume independently. Confirm the issue persists across multiple apps before concluding the speaker is at fault.
Pro Tip: Pull out the SIM tray and look inside the slot with a torch. The Liquid Contact Indicator turns pink or red when exposed to moisture. A triggered LCI alongside speaker problems strongly suggests water damage rather than a simple blockage.
What causes iPhone speaker problems?
Speaker faults split into three categories: software, physical obstruction, and hardware failure. Knowing which category applies determines the correct fix.
- Software issues. Roughly 1 in 10 speaker complaints resolve through software fixes alone. iOS bugs, incorrect audio output settings, or conflicts with third-party apps can silence a speaker without any physical damage present.
- Physical blockage. Dust, pocket lint, and debris accumulate in the speaker grille over time. Moisture from sweat or rain can also settle inside the mesh. Both reduce volume and clarity without causing permanent damage, provided they are addressed promptly.
- Hardware failure. Buzzing, rattling at any volume, silence at specific frequencies, or distortion that persists after cleaning all point to hardware failure. These symptoms do not improve with software resets.
- Liquid exposure. Water damage corrodes internal contacts and speaker components. Even brief exposure to rain or a splash can cause progressive deterioration that worsens over days.
- Impact damage. Dropping the phone can dislodge internal speaker connections or crack the speaker membrane. Crackling and silence during movement are classic signs of a loose internal connection that will worsen if left unaddressed.
- Battery swelling. A swollen battery places pressure on surrounding components. Battery expansion can cause secondary audio faults that look like speaker failure but actually require battery replacement first.
- Board-level faults. The audio amplifier sits on the logic board, not inside the speaker module. When this chip fails, swapping the speaker achieves nothing. This is a less common but important cause to rule out.
How to fix iPhone speaker issues at home
Many iPhone audio issues resolve without professional help. Work through software fixes before touching the hardware.
Cleaning the speaker grille is the first physical step. Use a soft-bristled toothbrush or an anti-static brush to sweep debris away from the grille in short, light strokes. Cleaning putty pressed gently against the grille can lift embedded lint without pushing it deeper. Compressed air forces debris further into the mesh and can damage the delicate speaker membrane. Never use it. Equally, avoid liquids, cotton buds, or sharp objects near the grille.
Software troubleshooting steps, in order of least to most disruptive:
- Restart the iPhone. A full power cycle clears temporary audio routing errors and app conflicts.
- Update iOS. Apple regularly patches audio bugs in point releases. Go to Settings, then General, then Software Update.
- Reset all settings. This restores audio routing defaults without deleting personal data. Go to Settings, then General, then Transfer or Reset iPhone, then Reset All Settings.
- Check app permissions. Some apps require microphone and audio permissions to function correctly. Revoke and re-grant these in Settings if a specific app is the problem.
- Restore via iTunes or Finder. A full restore is the last software option. Back up first, then restore to factory settings.
After each step, play audio through both speakers and compare the result to your baseline test. Stop DIY attempts if you hear rattling, if the phone has visible impact damage, or if the LCI is triggered. These signs call for professional diagnosis.
Pro Tip: Test your speakers briefly once a month using a tone generator app. Catching a gradual volume drop early means cleaning resolves the problem before debris causes permanent mesh damage.
When should you get professional iPhone speaker repair?
Professional repair is the right call when cleaning and software fixes produce no improvement, or when hardware damage is confirmed. Understanding what the process involves helps you set realistic expectations and avoid being overcharged.
- Get a proper diagnosis first. Professional repair covers more than swapping the speaker module. A technician should test related components, including the audio IC, flex cables, and charging port, before ordering parts. Skipping this step leads to repeated failures.
- Identify which speaker needs replacing. Earpiece repairs and loudspeaker repairs are separate jobs with different parts and different costs. Confirm the fault location before agreeing to any work.
- Ask about board-level capability. Audio amplifier faults on the logic board require microsoldering, a specialist skill not all repair shops offer. If a standard speaker swap fails to fix the problem, board-level work may be needed.
- Factor in liquid damage. Water-damaged phones require corrosion cleaning before any component replacement. Skipping this step means new parts fail quickly.
- Check reassembly standards. Inadequate reassembly after opening a sealed iPhone can degrade the phone’s IP water resistance rating. Ask the technician how they restore seals after the repair.
Repair costs vary by iPhone model, the specific speaker involved, and whether board-level work is required. Newer models with more complex assemblies cost more to repair. Always ask for a written quote that separates parts from labour, and confirm whether the replacement parts carry a warranty.
| Repair type | Typical complexity | Key risk |
|---|---|---|
| Loudspeaker module swap | Low to moderate | Incorrect diagnosis wastes cost |
| Earpiece speaker replacement | Moderate | Proximity sensor damage during disassembly |
| Board-level audio IC repair | High | Requires microsoldering expertise |
| Liquid damage treatment | High | Corrosion must be fully cleared first |
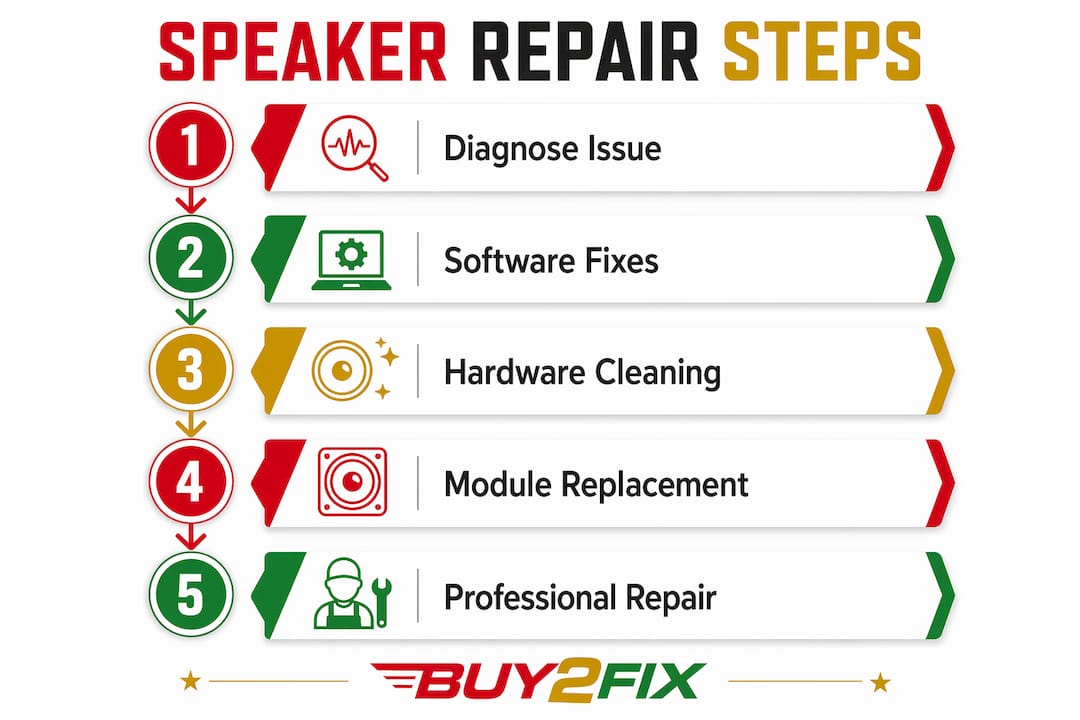
For UK-based repairs, use a provider that offers a diagnostic check before committing to parts. Buy2fix supplies quality-checked iPhone earpiece speaker modules for DIY repairs and supports professional technicians with a broad parts inventory.
Key takeaways
A broken iPhone speaker is most accurately diagnosed by testing the earpiece and loudspeaker independently before attempting any repair or cleaning.
| Point | Details |
|---|---|
| Test both speakers separately | Earpiece and loudspeaker faults require different parts and different fixes. |
| Rule out software first | Around 1 in 10 speaker faults resolve with a restart, update, or settings reset. |
| Clean safely | Use a soft brush or cleaning putty; compressed air and liquids cause further damage. |
| Check the LCI | A triggered Liquid Contact Indicator confirms moisture damage and changes the repair approach. |
| Get a full diagnosis | Board-level faults and battery swelling can mimic speaker failure and need separate treatment. |
What I’ve learned from watching people get this wrong
The most common mistake I see is people skipping straight to a hardware repair without ruling out software first. A technician replaces the loudspeaker, charges £60–£80, and the phone sounds exactly the same because the real problem was an iOS audio routing bug. That outcome is entirely avoidable with five minutes of software testing beforehand.
The second mistake is cleaning with compressed air. People assume that blowing air into the grille clears debris, but it pushes lint deeper into the mesh and can rupture the thin speaker membrane. A soft brush takes thirty seconds and does the job properly.
Liquid damage is where I see the most expensive errors. Someone drops their phone in water, the speaker sounds muffled a week later, and they assume it just needs a new speaker module. In reality, corrosion has been spreading across the board since the moment the water got in. Replacing the speaker without treating the corrosion means the new part fails within weeks. The Liquid Contact Indicator check takes ten seconds and tells you immediately whether moisture is involved.
My honest advice: test methodically, clean gently, and get a full diagnostic from a qualified technician before agreeing to any parts replacement. Routine monthly sound checks cost nothing and catch problems before they become expensive.
— Adewale
iPhone speaker parts and repair support from Buy2fix
Buy2fix is a UK-based specialist in mobile repair parts, and the iPhone repair parts we stock cover earpiece modules, loudspeaker assemblies, and related components for a wide range of iPhone models. Every part goes through a quality check before dispatch, and eligible items carry warranty cover. Orders to UK mainland addresses ship free, and a 30-day return policy applies if a part does not perform as expected. Whether you are a DIY repairer working through a methodical fix or a professional technician sourcing parts for a client, Buy2fix offers fair pricing and dependable stock. Check the iPhone UK repair guide for model-specific guidance before ordering.
FAQ
How do I know if my iPhone speaker is broken or just blocked?
Play audio at maximum volume and measure the output with a decibel app. A reading below 75 dB with muffled sound usually indicates blockage rather than hardware failure. Buzzing or rattling that persists after cleaning confirms hardware damage.
Can I fix an iPhone speaker without replacing it?
Yes, in many cases. Software resets and safe cleaning with a soft brush resolve a significant proportion of speaker complaints without any part replacement needed.
How much does iPhone speaker repair cost in the UK?
Cost varies by model and fault type. A straightforward loudspeaker module swap is generally less expensive than an earpiece repair or board-level audio IC work. Always request a written quote that separates parts from labour.
What is the Liquid Contact Indicator and why does it matter?
The Liquid Contact Indicator is a small strip inside the SIM tray that turns pink or red when exposed to moisture. A triggered indicator alongside speaker problems confirms water damage, which requires corrosion treatment before any speaker replacement.
Can a swollen battery cause speaker problems?
Yes. Battery expansion places physical pressure on internal components and can cause audio faults that mimic speaker failure. A technician should check battery condition as part of any speaker diagnosis.
Recommended
Let customers speak for us
The acid test of any company is how they respond when things go wrong. The Buy2Fix team were efficient in dealing with my emails and resolved the issue to my complete satisfaction

For Samsung Galaxy A26 SM-A266B Original Earpiece Speaker with Cable

Very good communication throught. Good product

Well made part very strong easy to fit great value for the money

Well packed, with fast shipping :)

Exactly what the doctor ordered…great color, comfort, and durability. Trust this watch band!

Brilliant strap, second purchase, bought bracelet before. Excellent value. Thank you

Great item for splitting your Audio signal

Outstanding product!
Next level customer service.

Very satisfied but the delivery needs to get more faster...

Good price,quick delivery

Best phone case ever! This is my second one as I broke my first. Would defo recommend

Great fitting Apple Watch bands

For Apple Watch Ultra 3 / 2 / 1 49mm RedPepper Armor Metal Case Integrated Silicone Watch Band(Steel Black White)

Good price and quick postage
