

Car battery troubleshooting: a complete DIY guide
TL;DR:
- Car battery troubleshooting involves diagnosing faults in the battery and charging system to prevent unnecessary replacements.
- Testing both resting voltage and load capacity is essential, as surface charge can mask internal damage.
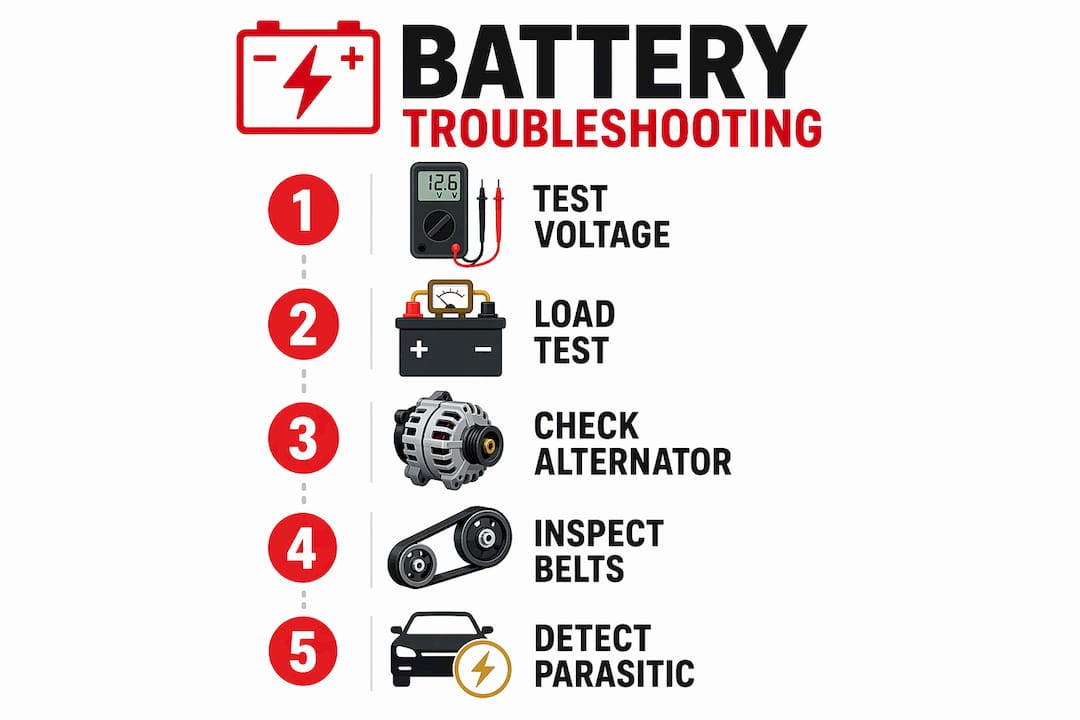
Car battery troubleshooting is the process of diagnosing faults in your battery and charging system to find the root cause of starting failures or electrical problems. Most drivers assume a flat battery means a dead battery. That assumption costs money. A healthy lead-acid battery shows a resting voltage of 12.6–12.8V; anything below 12.2V points to failing cells. Before you buy a replacement, you need to test the battery under load, check the alternator output, and rule out a parasitic drain. This guide walks you through each step using a standard multimeter and, where needed, a battery load tester.
How to test your car battery accurately
Testing resting voltage is the starting point for any car battery diagnosis, but it is not the whole picture. A battery can sit at a healthy 12.6V and still fail the moment you turn the key. That happens because of surface charge, a temporary voltage layer that masks internal cell damage. Surface charge makes voltage alone unreliable as a diagnostic tool, which is why load testing matters.
Step-by-step battery testing procedure
- Rest the battery first. Switch off the vehicle and leave it for at least one hour. This lets surface charge dissipate and gives you a true resting voltage reading.
- Set your multimeter to DC voltage. Connect the red probe to the positive terminal and the black probe to the negative terminal. Read the voltage.
- Interpret the reading. 12.6–12.8V means the battery is in good condition. 12.4–12.5V is borderline. Below 12.2V points to a failing battery, and below 11.8V indicates a dead or damaged cell.
- Perform a cranking voltage test. Ask someone to crank the engine while you watch the multimeter. Voltage should not drop below 9.6V during cranking. A deeper drop suggests the battery cannot deliver enough current.
- Follow up with a load test. A battery load tester draws current at the battery’s rated cold cranking amps (CCA) for around 15 seconds. If voltage collapses below 9.6V under that load, the battery is failing regardless of its resting voltage.
Pro Tip: Many motor factors and auto parts shops will run a free conductance test on your battery. Conductance testing measures internal cell resistance directly and catches failures that a basic multimeter misses entirely.
The conductance test is the most reliable DIY-accessible method because it bypasses the surface charge problem. If you only own a multimeter, always combine the resting voltage reading with a cranking voltage test before drawing any conclusions about battery condition.
How to check your alternator and charging system
A failing alternator is the most common reason a new battery goes flat within days. Alternator output should sit between 13.7V and 14.7V with the engine running. Below 13.5V, the battery is not receiving enough charge. Above 15.0V, the alternator risks overcharging and damaging the battery.
Testing the alternator takes less than five minutes with a multimeter.
- Start the engine and let it idle for two minutes.
- Connect your multimeter across the battery terminals as before.
- Read the voltage. A healthy charging system produces 13.7–14.7V at idle.
- Switch on high-load accessories: headlights, rear demister, air conditioning. Voltage should stay above 13.5V under this combined load.
- Rev the engine to around 2,000 RPM. Voltage should rise slightly, not drop.
If voltage sags below 13.5V under load, the alternator is struggling. If it climbs above 15.0V, the voltage regulator inside the alternator has likely failed.
One symptom drivers often miss is a slipping or worn serpentine belt. The belt drives the alternator, and a loose belt causes the alternator to underperform even when the unit itself is fine. Check belt tension and condition before condemning the alternator.

Pro Tip: Never replace the battery before testing alternator output and belt tension. Replacing the battery without checking the alternator wastes £150–£300 and leaves the actual fault in place. The new battery will go flat within a week.
If you are already dealing with battery charger problems, a faulty alternator is often the underlying cause rather than the charger itself.
What is parasitic drain and how do you find it?
Parasitic drain is the electrical current your vehicle draws from the battery when the ignition is off. Every modern car draws some current to keep the clock, alarm system, and ECU memory alive. Normal parasitic draw sits between 25–85mA; anything above 100mA will drain a healthy battery within days.
Finding the source of excessive drain requires patience and a methodical approach.
- Wait for modules to sleep. Modern vehicles take 15–20 minutes after the ignition is switched off for all electronic modules to enter sleep mode. Start your test too early and you will get a falsely high reading.
- Set your multimeter to DC milliamps (mA). Disconnect the negative battery cable and connect the multimeter in series between the cable and the negative terminal. You are now measuring all current flowing out of the battery.
- Read the baseline current. If the reading exceeds 100mA after the sleep period, you have an excessive drain.
- Pull fuses one at a time. With the multimeter still in circuit, remove fuses from the fuse box one by one. When the current drops sharply, you have identified the circuit causing the drain.
- Inspect the identified circuit. Common culprits include a glovebox light stuck on, a faulty relay, or an aftermarket accessory such as a dashcam or amplifier wired directly to a live feed.
Cold weather makes parasitic drain far more damaging. A battery already weakened by age loses capacity in low temperatures, meaning even a modest drain of 80mA can leave you stranded overnight in winter. If your battery is 3–5 years old, its reserve capacity has dropped enough that a borderline drain becomes a real problem.
Common car battery issues beyond voltage readings
Voltage tests tell you about charge state, but several physical problems cause battery failure without showing up on a multimeter.
- Terminal corrosion. White or blue-green powder on the terminals creates resistance that prevents proper charging and can cause a no-start even with a fully charged battery. Corroded or loose terminals cause high resistance that mimics a dead battery.
- Loose cable connections. A terminal that moves when you push it is not making full contact. Clean it, tighten it, and retest before assuming the battery is at fault.
- Swollen battery case. A bulging or bloated battery casing means the internal cells have been damaged, usually by overcharging or extreme heat. A swollen battery must be replaced immediately. Do not attempt to charge it.
- Battery age. Most lead-acid batteries last 3–5 years under normal conditions. Cold climates and frequent short trips shorten that lifespan considerably.
Battery maintenance tips that extend service life
Keep terminals clean using a wire brush and a baking soda solution. Apply a thin layer of petroleum jelly after cleaning to slow future corrosion. Avoid leaving the vehicle unused for more than two weeks without connecting a trickle charger. Short journeys under 15 minutes do not give the alternator enough time to fully recharge the battery after starting.
A note on LiFePO4 batteries
Lithium iron phosphate (LiFePO4) batteries are appearing in more modern vehicles and leisure applications. They behave differently from lead-acid units. A LiFePO4 battery showing 0V is not necessarily dead. The battery management system (BMS) triggers a safety lockout under fault conditions, and the battery can often be revived by resetting the BMS once the underlying fault is corrected. Do not apply a standard lead-acid charger to a LiFePO4 battery; you need a charger with a dedicated lithium programme.
Key takeaways
Effective car battery troubleshooting requires testing resting voltage, load capacity, alternator output, and parasitic drain before replacing any component.
| Point | Details |
|---|---|
| Resting voltage benchmarks | A healthy battery reads 12.6–12.8V at rest; below 12.2V indicates failing cells. |
| Load testing is non-negotiable | A battery can read 12.6V and still fail under load; always follow up with a load or conductance test. |
| Test the alternator first | Alternator output must sit between 13.7–14.7V; replacing the battery without this check wastes money. |
| Parasitic drain threshold | Current above 100mA after the module sleep period will drain a battery within days; use the fuse-pull method to isolate the circuit. |
| Physical inspection matters | Corroded terminals, loose cables, and a swollen case cause failures that voltage tests alone will not reveal. |
Why I always test the whole system before touching the battery
People ask me all the time why their brand-new battery went flat after two weeks. The answer is almost always the same: they replaced the battery without testing the alternator or checking for parasitic drain. I have seen this happen repeatedly, and it is an expensive lesson to learn twice.
The mistake is understandable. A flat battery is the obvious symptom, so replacing it feels like the logical fix. But the battery is usually the victim, not the cause. A weak alternator, a slipping belt, or a relay stuck in the on position will kill a new battery just as efficiently as it killed the old one.
My advice is to treat every battery fault as a system fault until proven otherwise. Spend 20 minutes testing alternator voltage and checking for parasitic draw before you spend £100 or more on a new battery. A basic multimeter costs very little and gives you the data you need to make the right call. If you want more confidence in your readings, a conductance tester is worth the investment for anyone who works on their own vehicles regularly.
The one thing I would add for anyone dealing with a modern vehicle: do not skip the module sleep wait before testing parasitic draw. I have watched people pull fuses in a panic two minutes after switching off the ignition, get a reading of 400mA, and assume the worst. Wait the full 15–20 minutes. The reading often drops to a perfectly normal 40mA once the modules settle.
— Adewale
Parts and tools for battery diagnosis at Buy2fix
Buy2fix stocks a practical range of automotive electronics and repair parts for drivers who prefer to sort problems themselves. Whether you need replacement battery terminals, terminal repair kits, or battery maintenance accessories, the Buy2fix catalogue covers the components that make the difference between a reliable fix and a repeat fault. The automotive electronics section at Buy2fix includes parts for common battery and charging system repairs, backed by free UK mainland shipping and a 30-day return policy. For guidance on specific faults, the Buy2fix blog covers topics from terminal corrosion diagnosis to charging system issues in plain language that DIY drivers can act on immediately.
FAQ
What voltage should a healthy car battery show?
A healthy lead-acid car battery reads 12.6–12.8V at rest after sitting for at least one hour. Below 12.2V indicates failing cells.
How do I know if my alternator or battery is the problem?
Start the engine and measure voltage across the battery terminals. A reading of 13.7–14.7V confirms the alternator is charging correctly; below 13.5V points to a charging fault rather than a battery fault.
What is a normal parasitic drain for a car?
Normal parasitic draw sits between 25–85mA with all modules in sleep mode. Any reading above 100mA after a 15–20 minute wait is excessive and will drain the battery within days.
Can a car battery read 12.6V and still be faulty?
Yes. Surface charge can hold voltage at 12.6V even when internal cells have failed. A load test or conductance test is the only reliable way to confirm whether the battery can deliver current under real conditions.
How long does a car battery typically last?
Most lead-acid car batteries last 3–5 years. Cold climates, frequent short trips, and persistent parasitic drain all shorten that lifespan significantly.
Recommended
Let customers speak for us
Great

I saw this item and it was just what I was looking for. I found it here but not in Amazon or e-bay. However, it was in UK, I was surprised to find that they were able to ship it to the US. Excellent company, would do business with again

This is great for when out and about, to sharpen either coloured pencils, or watercolour pencils….would order again.

Great items would bye again

I have purchased several items from this store before. Recently, I encountered an issue with my latest order. After reporting the problem to customer support, they were consistently attentive and made every effort to resolve the situation. Upon investigation, they acknowledged the issue and promptly fixed it. This experience has increased my level of trust in this store.
Thank you so much. I'm so happy.

très bien

BC70 Car Bluetooth 5.0 FM Transmitter Radio Adapter Dual Display Wireless Handsfree Call MP3 Music Player QC3.0 PD USB Charger

A quite sturdy cover, if you are looking for full protection and a more business-like style, this cover perfectly fulfills its purpose.
The shipping was fast, and it was delivered in perfect condition.

For LG TV Bluetooth Handheld Infrared Voice Multi-Function Remote Control(AKB75855501)

Tusen tack för bästa service och produkt som jag vänlig önskar dig tack

Works correctly and no issues so far

Took a while to get here but it was all good, watch looks brand new after replacement

What a fantastic 👏🏻 stylish case that has helped my phones temperature in the heatwave!!
Perfect 👌🏻 also it's cool as f##k

I love it!
