

Laptop battery replacement guide: DIY steps that work
TL;DR:
- Replacing a laptop battery restores portability and battery life by removing degraded cells and installing new ones. Proper diagnosis, compatibility, and careful disassembly are essential for a safe, effective DIY replacement. Maintaining the new battery through correct usage extends its lifespan and preserves performance.
Laptop battery replacement is the process of safely removing a degraded or faulty battery and fitting a compatible new one to restore your device’s portability and runtime. Most laptop batteries lose 20–30% capacity after 3–5 years of regular use. That figure matters because it means a laptop that once lasted six hours on a charge may now barely manage four. Replacing the battery costs between £30 and £150 depending on the model, which is a fraction of the price of a new machine. This guide covers every stage of the process: diagnosing the problem, gathering tools, replacing both removable and internal batteries, and keeping the new battery healthy for years.
How do you know if your laptop battery needs replacing?
The clearest sign is a dramatic drop in runtime that cannot be explained by software changes. A battery that drains from full to empty in under two hours, shuts down without warning, or refuses to charge past a low percentage is almost certainly degraded beyond normal use.
Windows users have a precise diagnostic tool built into the operating system. Running powercfg /batteryreport in an elevated Command Prompt generates a detailed HTML report showing original design capacity versus current full-charge capacity, plus total charge cycles. A significant gap between those two figures confirms the battery needs replacing, not just a software fix.
Physical symptoms are equally telling. Watch for these warning signs:
- Swelling or bulging beneath the trackpad or base panel. A swollen battery is a safety risk and needs immediate replacement.
- Rapid discharge where the battery drops from 80% to 20% in under 30 minutes during light tasks.
- Inconsistent charge readings that jump erratically, such as showing 60% one moment and 20% the next.
- Laptop only works when plugged in, with the battery showing as connected but not charging.
- Excessive heat from the battery area during normal use, not just under heavy load.
Pro Tip: Before assuming the battery is faulty, rule out software causes. Update your operating system, close background apps, and reset your power plan to defaults. If the problem persists after those steps, the battery itself is the issue.
Swelling is the one symptom that skips the diagnostic step entirely. A visibly deformed battery is a fire risk. Stop using the laptop and replace the battery without delay.
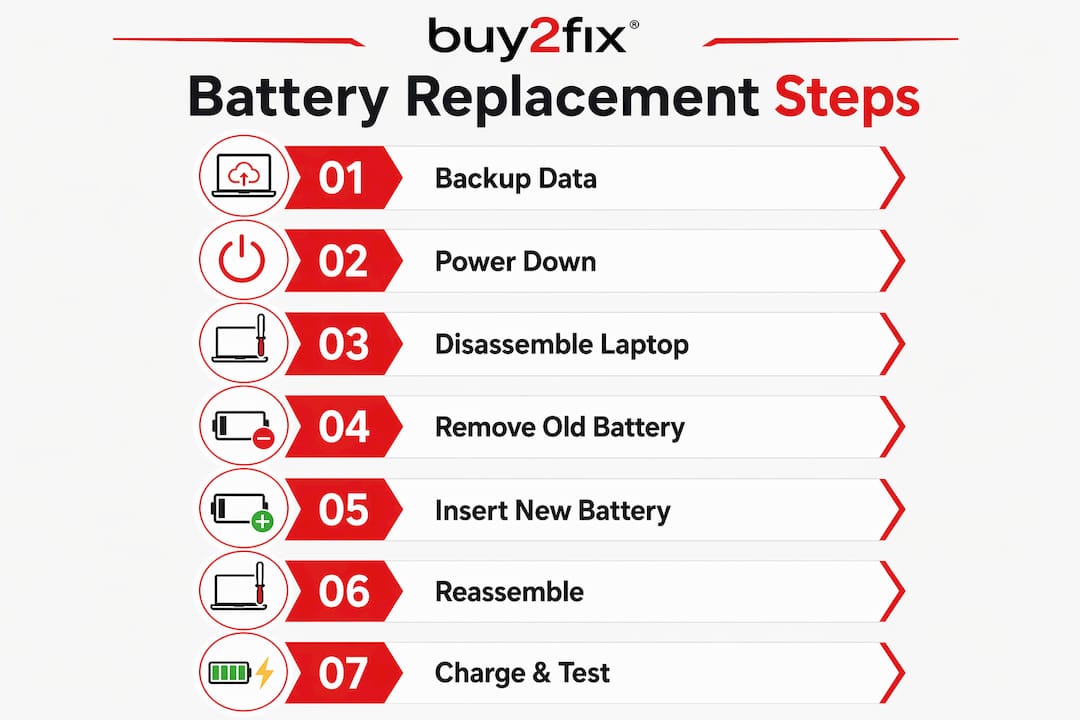
What tools and preparation do you need?
Preparation is what separates a clean replacement from a damaged motherboard. Gather everything before you open the laptop.
Essential tools:
- Phillips head screwdrivers in sizes PH0 and PH1
- A plastic prying tool or spudger for lifting panels without scratching
- An anti-static wrist strap to prevent electrostatic discharge
- A magnetic parts tray or small labelled containers for screws
- A clean, well-lit, flat surface
Backing up your data and powering down the laptop completely before starting prevents data loss and eliminates electrical hazards. This is not optional. Shut down fully rather than using sleep or hibernate mode. Disconnect the charger, remove any USB devices, and close the lid for at least two minutes to allow residual charge to dissipate.
Static electricity is the hidden danger in DIY repairs. Even a small electrostatic discharge can damage memory chips or the motherboard without leaving any visible mark. An anti-static wrist strap grounded to a metal surface costs very little and eliminates that risk entirely.
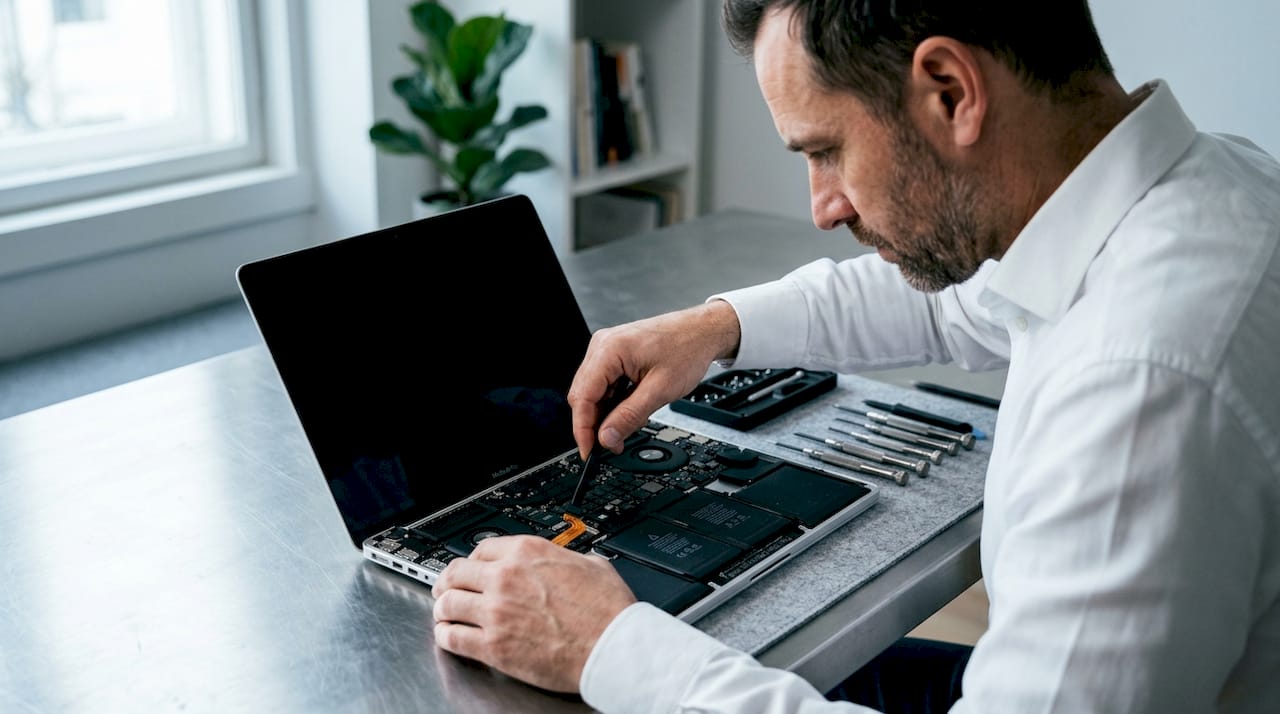
Work on a hard, flat table rather than a carpet or fabric surface. Fabric generates static. Keep liquids away from the workspace. Good lighting is not a luxury; it is how you spot the difference between a screw that is seated correctly and one that is cross-threaded.
How to replace a removable vs internal laptop battery
The replacement process splits into two distinct paths depending on whether your battery is externally removable or internally fitted.
Replacing a removable battery
Older laptops and many budget models use batteries that clip into the base without requiring any disassembly.
- Power down completely and disconnect the charger.
- Turn the laptop upside down on a clean surface.
- Slide the battery release latch or latches to the unlocked position.
- Lift the battery straight out of the bay.
- Align the new battery with the connector and press firmly until the latch clicks.
- Power on and verify the battery is recognised in your system settings.
The whole process takes under five minutes. The only mistake people make here is forcing a battery that is not quite aligned. If it does not click easily, recheck the orientation.
Replacing an internal battery
Internal batteries require disassembly and more care. Steps vary by model, so check your manufacturer’s service manual before starting.
- Power down, disconnect the charger, and remove all peripherals.
- Remove the base panel screws. Organise screws by location using a labelled tray, because modern laptops often use screws of different lengths in the same panel. Mixing them during reassembly can crack the chassis.
- Use a plastic prying tool to separate the base panel. Start at a corner and work around the edge. Never use a metal tool here.
- Locate the battery. It will be connected to the motherboard via a ribbon cable or a small plug connector.
- Disconnect the battery connector first before touching anything else. This cuts power to the board.
- Remove any screws or adhesive securing the battery. Some batteries use light adhesive strips; warm the panel gently with your hands for 30 seconds to soften the adhesive before lifting.
- Lift the battery out carefully. Do not bend or puncture it.
- Place the new battery in position and secure it with screws or fresh adhesive strips.
- Reconnect the battery cable. The ribbon cable connector must seat perfectly square and must not be forced at an angle. Misaligned pins on the motherboard connector are extremely difficult to repair.
- Replace the base panel, starting screws by hand before tightening to avoid cross-threading.
- Power on and confirm the battery is detected.
Pro Tip: Take a photo of the internal layout before disconnecting anything. It takes three seconds and saves you from guessing where cables route during reassembly.
For a more detailed walkthrough of the disassembly process, the Buy2fix beginner’s guide covers model-specific variations and common pitfalls in plain language.
What are the best practices for sourcing a compatible battery?
Compatibility is the single most important factor when buying a replacement battery. A battery that fits physically but carries the wrong voltage can damage your laptop’s charging circuit.
Start with your laptop’s model number, which is printed on the base panel or in your system settings under “About this PC.” Match the replacement battery to that model number exactly. Also check:
- Voltage (V): Must match the original. Even a 0.5V difference can cause charging problems.
- Capacity (mAh or Wh): Higher capacity is generally fine and gives longer runtime. Lower capacity reduces battery life.
- Connector type: The physical connector must match the socket on your motherboard.
- Charge cycle rating: A battery rated for more cycles will last longer before degrading again.
Poorly made batteries risk overheating and shortened lifespan. That risk is not theoretical. Low-quality cells have caused fires in consumer electronics. Buy from a supplier that quality-checks stock before dispatch and offers a warranty.
Pro Tip: Avoid batteries listed with no brand name, no warranty, and prices significantly below the market average. The savings are not worth the risk of a battery that fails within months or, worse, overheats.
Original equipment manufacturer (OEM) batteries are the safest choice. High-quality third-party batteries from reputable suppliers are a sound alternative, provided they carry the correct specifications and come with a warranty. Check reviews specifically for your laptop model, not just the seller’s overall rating. For guidance on reading battery specifications, the Buy2fix 2026 tips guide breaks down what each number on the label actually means.
How to maintain your new laptop battery for longer life
Installing a new battery is only half the job. How you charge and store it determines how long it lasts.
Calibrate the battery after installation by charging it fully, running it down until the laptop shuts off, then charging it back to 100% without interruption. This process improves the accuracy of the battery meter, so your laptop displays a reliable remaining charge figure rather than a guess.
After calibration, adopt these daily habits:
- Keep charge between 40% and 80%. Charging within this range reduces chemical stress on the cells and extends battery lifespan. Regularly charging to 100% or draining to 0% accelerates degradation.
- Avoid leaving the laptop plugged in at 100% for extended periods. Many modern laptops have a battery limit setting in their power management software. Set it to 80% if your model supports it.
- Keep the laptop cool. Heat is the primary enemy of lithium-ion cells. Avoid using the laptop on soft surfaces like beds or sofas that block ventilation.
- Store correctly if unused. If you plan to store the laptop for more than a month, charge the battery to around 50% before switching it off. Storing at full charge or empty charge both damage the cells over time.
For more detail on extending battery life across all your devices, the battery life tips guide at Buy2fix covers the full range of practical steps.
Key takeaways
Replacing a laptop battery is a straightforward DIY task when you diagnose correctly, source a compatible part, and follow a methodical installation process.
| Point | Details |
|---|---|
| Diagnose before buying | Use the Windows powercfg battery report to confirm capacity loss before purchasing a replacement. |
| Match specifications exactly | Voltage, mAh, and connector type must all match your laptop model to avoid damage. |
| Organise screws during disassembly | Label screws by location and length to prevent chassis damage on reassembly. |
| Handle ribbon cables with care | Seat connectors square and never force them at an angle to protect motherboard pins. |
| Maintain charge between 40% and 80% | Keeping within this range reduces cell stress and extends the new battery’s lifespan. |
What I have learned from replacing laptop batteries
By Adewale
The step that most people skip is screw organisation, and it is the one that causes the most damage. I have seen laptops returned for repair where the only problem was a cracked chassis caused by a longer screw driven into the wrong hole during reassembly. A magnetic parts tray with labelled sections costs almost nothing and prevents that entirely.
The other mistake I see regularly is forcing the ribbon cable connector. People assume that if it is almost in, a firm push will seat it. It will not. A connector that is even slightly off-angle will bend the motherboard pins, and those pins cannot be straightened by hand. The fix is to slow down, look at the connector under good light, and press it in straight.
What surprises people most is how much money a battery replacement saves. Buying a new laptop because the old one will not hold charge is one of the most unnecessary purchases in consumer electronics. A £50 battery and an hour of careful work restores a machine that may have years of useful life left. There is also a genuine environmental benefit. Keeping a laptop running longer reduces the demand for new manufacturing and keeps electronics out of landfill.
If you follow the steps in this guide carefully, the replacement is well within reach for most people. The tools are inexpensive, the process is logical, and the result is a laptop that feels new again.
— Adewale
Where to find the right battery for your laptop
Buy2fix stocks replacement batteries for a wide range of laptop brands and models, including parts compatible with major manufacturers. Every part goes through a quality check before dispatch, and orders to UK mainland addresses ship free. The 30-day return policy and warranty support on eligible items mean you are not taking a risk on an unknown part.
If you are ready to replace your battery, browse the laptop parts range at Buy2fix to find a compatible replacement for your model. The Buy2fix blog also carries detailed guides on related repairs, from laptop screen replacement to diagnosing specific brand issues, so you have support at every stage of the repair.
FAQ
How long does a laptop battery typically last?
Most laptop batteries degrade noticeably after 3–5 years, losing 20–30% of their original capacity. After 5–7 years, replacement is almost always the most cost-effective option.
Can I replace my laptop battery myself?
Yes. Removable batteries require no tools at all. Internal batteries need basic screwdrivers and a plastic prying tool, plus careful handling of the ribbon cable connector. Most people complete the job in under an hour.
How much does a replacement laptop battery cost?
Replacement batteries typically cost between £30 and £150, depending on the laptop model and battery capacity. That cost is significantly lower than buying a new machine.
What happens if I fit the wrong battery?
A battery with the wrong voltage can damage the charging circuit or fail to charge at all. Always match voltage, capacity, and connector type to your specific laptop model before purchasing.
Do I need to calibrate a new laptop battery?
Calibrating after installation improves the accuracy of the battery meter. Charge fully, run down to shutdown, then recharge to 100% without interruption to complete the process.
Recommended
Let customers speak for us
The acid test of any company is how they respond when things go wrong. The Buy2Fix team were efficient in dealing with my emails and resolved the issue to my complete satisfaction

For Samsung Galaxy A26 SM-A266B Original Earpiece Speaker with Cable

Very good communication throught. Good product

Well made part very strong easy to fit great value for the money

Well packed, with fast shipping :)

Exactly what the doctor ordered…great color, comfort, and durability. Trust this watch band!

Brilliant strap, second purchase, bought bracelet before. Excellent value. Thank you

Great item for splitting your Audio signal

Outstanding product!
Next level customer service.

Very satisfied but the delivery needs to get more faster...

Good price,quick delivery

Best phone case ever! This is my second one as I broke my first. Would defo recommend

Great fitting Apple Watch bands

For Apple Watch Ultra 3 / 2 / 1 49mm RedPepper Armor Metal Case Integrated Silicone Watch Band(Steel Black White)

Good price and quick postage
