

Replacing phone camera lens: your complete repair guide
TL;DR:
- A cracked camera lens can cause internal damage that requires either a simple lens replacement or a full module replacement. Proper diagnosis, model-specific parts, and careful handling are essential to ensure a successful DIY repair without compromising water resistance. Accurate identification of damage and precise installation can save significant costs and restore optimal camera performance.
A cracked camera lens does more damage than you might expect. Beyond the obvious scratches across your photos, the exposed camera module underneath is now vulnerable to dust, moisture, and further impact. Replacing your phone camera lens yourself is genuinely achievable, even if you have never opened a phone before. This guide walks you through how to diagnose the damage correctly, prepare the right tools and parts, execute the replacement safely, and test your results. Get this right, and you will save a significant amount compared to official repair costs.
Table of Contents
- Key takeaways
- Replacing phone camera lens: lens vs module damage
- Preparing for the repair: tools, parts, and safety
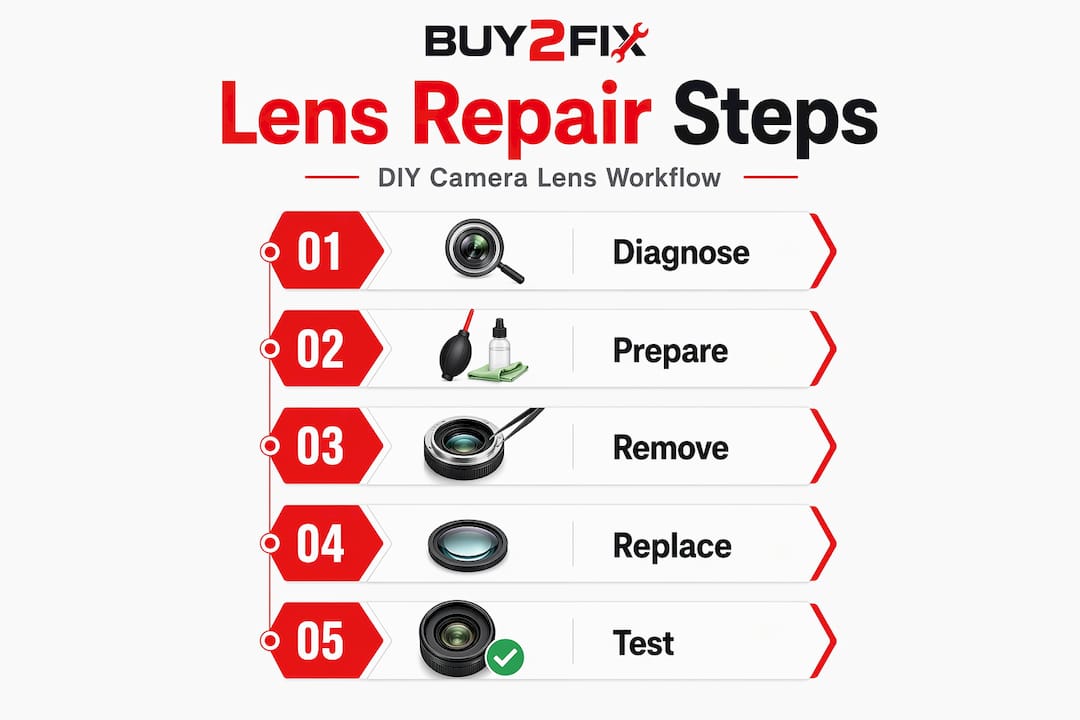
- Step-by-step lens replacement
- Testing and post-repair care
- My honest take on this repair
- Get the right parts from Buy2fix
- FAQ
Key takeaways
| Point | Details |
|---|---|
| Diagnose before you buy parts | Black spots, buzzing, or focus failures indicate module damage, not a simple lens replacement job. |
| Match parts to your exact model | Lens size and orientation vary even within the same phone range, so model-specific sourcing is non-negotiable. |
| Heat softens adhesive safely | Applying moderate heat for 30 to 60 seconds at around 80°C loosens factory epoxy without risking sensor damage. |
| Post-repair water resistance changes | DIY lens repair voids the original waterproof certification, so treat your phone as splash-proof only afterwards. |
| DIY saves money when done correctly | Third-party lens repair typically costs £40 to £150; a DIY kit costs £10 to £50 if the damage is external only. |
Replacing phone camera lens: lens vs module damage
Before you order a single part, you need to understand exactly what you are dealing with. Your phone has two distinct components at play here. The camera lens is the thin protective glass cover sitting flush with the rear panel. The camera module is the internal assembly underneath, containing the actual sensor, autofocus mechanism, and optical elements.
Lens-only damage is worth repairing yourself. Internal module damage is not a DIY job and attempting a lens swap when the module is broken will waste your time and money.
How do you tell the difference? Look and listen carefully:
- External lens symptoms: Visible cracks, scratches, or chips on the glass cover. Photos look sharp but may show a scratch line or slight haze across the frame.
- Internal module symptoms: Black or dark spots that do not move when you clean the lens. Consistent blurring or failure to focus. Buzzing or grinding sounds when the camera app opens. A camera that refuses to launch at all.
If you see black spots or focus failures, stop. That is module damage requiring a full camera replacement, not just a glass swap. Attempting to prise off the outer lens when the module beneath is already compromised adds risk without solving anything.
Pro Tip: Take five test photos in good light before ordering parts. If all images show identical artefacts in the same location regardless of what you point the camera at, the problem is almost certainly internal.
Diagnosing correctly at this stage determines whether you spend £15 on a replacement lens glass or £200 on a module replacement further down the line. Patience here pays off.
Preparing for the repair: tools, parts, and safety
Good preparation is the difference between a clean, confident repair and a frustrating one. Gather everything before you begin so you are not scrambling mid-repair with glass shards exposed.
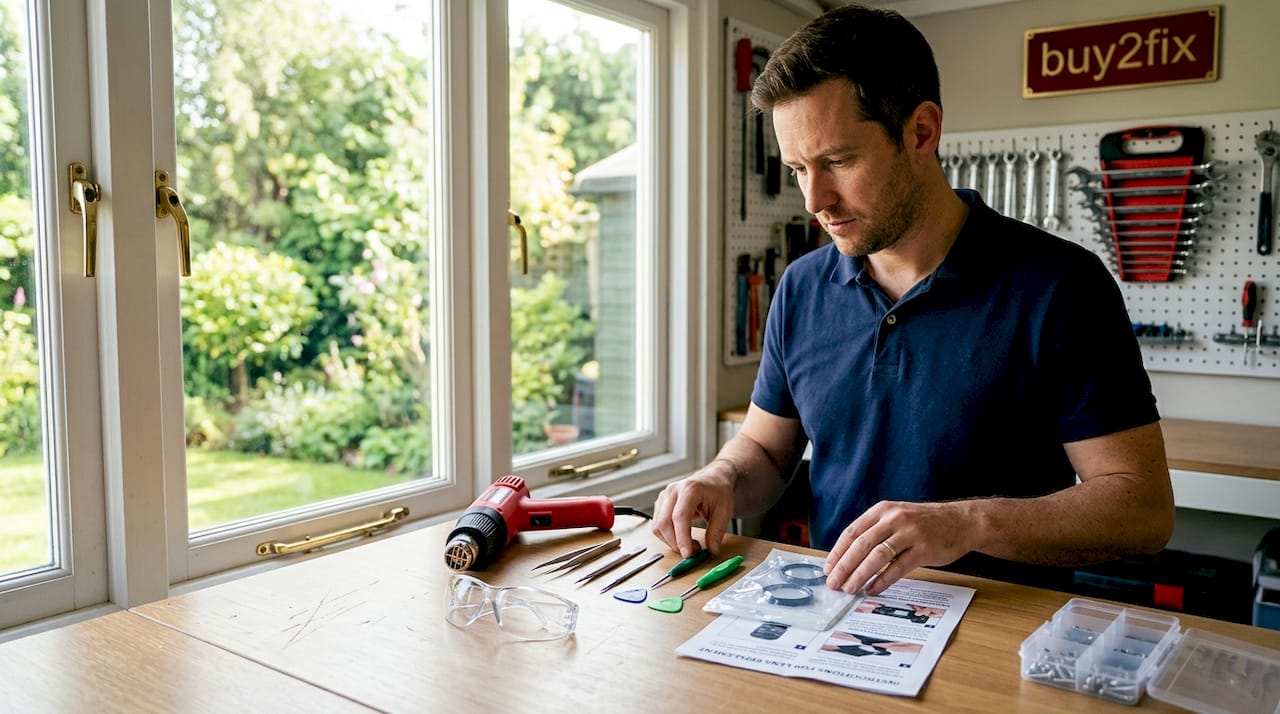
Safety first
Broken camera glass, particularly on phones using sapphire-coated lenses, produces extremely fine, sharp fragments. Glass shards can fall inward during removal and scratch the internal lens elements underneath, turning a simple cosmetic fix into a costly sensor replacement. Wear safety glasses throughout, work over a lint-free mat, and keep a soft brush nearby to clear debris.
Tools you will need
| Tool | Purpose |
|---|---|
| Heat gun or hair dryer | Softens adhesive bonding the lens to the frame |
| Plastic spudger or suction cup | Lifts lens without scratching surrounding metal |
| Tweezers (fine-tip) | Removes glass fragments precisely |
| 99% isopropyl alcohol and cotton buds | Cleans adhesive residue from the bezel |
| UV or B-7000 adhesive | Bonds the replacement lens securely |
| Lint-free cloth | Prevents dust contamination during installation |
| Magnifying glass or lamp | Improves visibility during close work |
Avoid using metal tools directly on the lens aperture. A metal pick can slip and score the sensor cover or chip the surrounding frame.
Sourcing the right replacement lens
This step trips up more people than any other. Lens orientation and model-specific sizing vary significantly, even across variants of the same handset. An iPhone 15 Pro has three lenses at different positions on the camera island, and each has a different diameter and orientation marker. Ordering the wrong one means misaligned optics and persistent focus problems even after a technically clean repair.
Cross-reference your phone’s exact model number (found in Settings) with the part listing before purchasing. A reputable phone camera repair kit will include the correct lens pre-matched to your model along with the necessary adhesive.
Pro Tip: Before removing the broken lens, photograph its exact position and orientation with another device. Use that photo as a reference when installing the replacement to get the alignment right first time.
Step-by-step lens replacement
Work in a warm, dust-free room. Turn off your phone completely before starting.
-
Apply heat to the lens area. Use a heat gun on its lowest setting or a hair dryer held about 5 cm from the lens. Apply heat for 30 to 60 seconds. Heating to around 80°C softens the factory adhesive without overheating the sensor below. The glass should feel warm to the touch but not burning.
-
Remove the broken lens. Place a suction cup or plastic spudger at the edge of the lens and apply gentle, even upward pressure. Work slowly around the perimeter. Do not prise aggressively from one side or the glass will shatter further. If resistance remains, apply heat again for another 20 seconds.
-
Remove glass fragments carefully. Use fine-tip tweezers to lift any remaining shards. Shards from sapphire or glass lenses can score internal optical elements if they drop inward, so work methodically and use your soft brush to clear the aperture.
-
Clean the bezel thoroughly. A chemically clean mounting surface is critical for adhesive bonding and moisture resistance. Dampen a cotton bud with 99% isopropyl alcohol and gently clean away all old adhesive residue. Do not let liquid drip into the camera module opening. Allow to dry completely for two minutes.
-
Prepare your replacement lens. Check orientation against your reference photo. Most lenses have a subtle flat edge or notch indicating correct placement. Apply a thin, even bead of UV or B-7000 adhesive around the lens rim rather than the bezel, which gives you more control over placement.
-
Install the new lens. Lower it carefully into position, aligning the orientation marker first. Press gently from the centre outward to avoid trapping air bubbles under the glass. Confirm the lens sits flush with the surrounding camera housing.
-
Apply pressure and allow to cure. Place a folded cloth over the lens and apply firm, even thumb pressure for 60 seconds. If using UV adhesive, cure under a UV lamp for two minutes. If using B-7000, leave the phone undisturbed for a minimum of four hours before switching it on.
Pro Tip: Work under a bright, angled light source. Any dust particle that lands on the exposed sensor or inner lens elements before you install the cover glass will show up as a permanent spot in every future photo.
Common mistakes to avoid
- Rushing the heat application stage. Insufficient heat means excessive force, which causes shattering.
- Using too much adhesive. Overflow into the module aperture is very difficult to clean and can obscure image quality.
- Skipping the cleaning step. Old adhesive under the new lens creates an uneven bond that lifts at the edges within weeks.
- Not confirming lens orientation before pressing down. Repositioning an already-glued lens almost always damages it.
Testing and post-repair care
Once the adhesive has fully cured, power on the phone and open the camera app immediately.
Run through the following checks:
- Focus test: Point the camera at printed text from 30 cm away. The image should lock focus cleanly and quickly.
- Clarity check: Take photos in bright and low light. Look for haze, streaking, or any new artefacts that were not present before.
- All lenses: On multi-lens phones, test each lens including the ultrawide and telephoto.
- Video mode: Record 30 seconds of footage and check for optical image stabilisation function.
If you notice dust spots inside the image, you have a contamination issue from the repair. In many cases this resolves if a single particle shifts, but if it is persistent, the repair will need to be redone carefully.
Regarding water resistance: DIY lens repair voids your waterproof certification. Even if your adhesive seal looks perfect, it does not replicate the precision sealing of the original factory build. Keep the phone away from rain, sinks, and humid environments for at least 48 hours after the repair and treat it as splash-resistant rather than waterproof from that point on.
Pro Tip: Fit a camera lens protector film immediately after the repair. These cost under £5 and prevent the new glass from suffering the same fate. Clean the lens with a microfibre cloth regularly rather than rough fabrics that can introduce micro-scratches over time.
If focus problems or image artefacts persist after a successful-looking repair, the underlying module may have been damaged before or during the process. At that point, professional repair is the correct path. Apple recommends trained technicians using genuine parts for camera repairs, particularly where image quality or safety is a concern.
My honest take on this repair
In my experience, the biggest mistake people make is not the repair itself. It is the diagnosis step that gets skipped. I have seen people order lens kits, spend an afternoon on the repair, and then discover the actual problem was a failing autofocus motor that no amount of new glass was going to fix.
Spend ten minutes genuinely testing your camera before buying anything. The cost difference between external glass repair and a full module replacement is significant. Apple out-of-warranty camera repair runs from £130 to nearly £200 in the UK; a quality replacement lens glass costs a fraction of that if the damage is truly external only.
I also think people underestimate how much lens orientation matters. Two lenses from the same phone model can look virtually identical but produce completely different optical results if installed in the wrong position. That reference photo step I mentioned is not optional in my view. It takes 30 seconds and prevents a very avoidable mistake.
My genuine recommendation: if your camera shows any symptoms of internal damage alongside the cracked glass, go straight to a professional repair service. The DIY saving is only real when the diagnosis is right. When it is right, though, this is a satisfying, money-saving repair that most careful people can complete successfully on the first attempt.
— Adewale
Get the right parts from Buy2fix
Buy2fix stocks model-specific replacement camera lenses for iPhone, Samsung Galaxy, Huawei, Xiaomi, OPPO, and many other brands, alongside repair adhesives, precision tools, and phone camera repair kits. Every part goes through quality checks before dispatch, and free UK mainland shipping means you are not paying extra to get started. Whether you are a first-time DIY repairer or a professional technician needing reliable stock, you will find clearly matched parts and honest product descriptions. The lens replacement guidance available on the Buy2fix blog also helps you confirm the correct part before you order, reducing the chance of a mismatch.
FAQ
How do I know if I need a lens or full camera module?
If the glass is cracked but your photos are otherwise sharp and clear, you likely need only a lens replacement. Black spots in images, buzzing sounds, or complete focus failure point to internal module damage.
Can replacing phone camera lens affect image quality?
Yes, if the replacement lens is not correctly matched to your model or is misaligned during installation. Using a quality, model-specific lens and following correct orientation guidance gives results that match the original.
Is DIY phone camera lens repair safe?
It is safe with the right preparation. Wear eye protection when handling broken glass, heat the adhesive properly before removal, and work in a dust-free environment to avoid contaminating the sensor.
Will my phone still be waterproof after a DIY lens repair?
No. DIY repair voids waterproof certification regardless of how well the adhesive seal looks. Treat the phone as splash-resistant only and avoid submerging it after any DIY lens work.
How much does smartphone lens replacement cost?
A DIY lens kit typically costs £10 to £50. Professional third-party phone lens repair runs £40 to £150, while Apple out-of-warranty camera repair covers the full module and costs considerably more.
Recommended
Let customers speak for us
The acid test of any company is how they respond when things go wrong. The Buy2Fix team were efficient in dealing with my emails and resolved the issue to my complete satisfaction

For Samsung Galaxy A26 SM-A266B Original Earpiece Speaker with Cable

Very good communication throught. Good product

Well made part very strong easy to fit great value for the money

Well packed, with fast shipping :)

Exactly what the doctor ordered…great color, comfort, and durability. Trust this watch band!

Brilliant strap, second purchase, bought bracelet before. Excellent value. Thank you

Great item for splitting your Audio signal

Outstanding product!
Next level customer service.

Very satisfied but the delivery needs to get more faster...

Good price,quick delivery

Best phone case ever! This is my second one as I broke my first. Would defo recommend

Great fitting Apple Watch bands

For Apple Watch Ultra 3 / 2 / 1 49mm RedPepper Armor Metal Case Integrated Silicone Watch Band(Steel Black White)

Good price and quick postage
