

Fix Phone Screen Cheap UK: Save 40% DIY With Quality Parts
Professional phone screen repairs can drain your wallet, often costing £90 to £130 plus waiting days for service. DIY repair offers a smarter path, cutting costs by up to 40% using quality aftermarket parts from trusted UK suppliers. This guide walks you through sourcing reliable components, mastering repair techniques, avoiding common pitfalls, and understanding your consumer protections. You’ll gain the confidence to fix your screen affordably while keeping your device running smoothly.
Table of Contents
- Prerequisites: Tools And Knowledge You Need Before Starting
- Where To Source Quality But Affordable Phone Screen Replacement Parts In The UK
- Step-By-Step Phone Screen Replacement Procedure
- Common Mistakes And Troubleshooting Tips
- Cost, Time, And Expected Outcomes Of A Successful DIY Screen Repair
- Safety Precautions And Best Practices During Phone Screen Repairs
- Returns, Warranties, And Consumer Rights For DIY Replacement Parts In The UK
- Explore Trusted UK Phone Screen Parts And Repair Guides At Buy2fix
Key Takeaways
| Point | Details |
|---|---|
| Essential tools | Precision screwdrivers, plastic pry tools, anti-static gear, and heat sources prevent component damage during repairs. |
| Quality UK parts | Aftermarket screens with warranties cost 40% less than OEM while delivering comparable performance. |
| Repair process | Disconnect battery first, apply heat carefully, remove old screen gently, install new display, and test thoroughly. |
| Common mistakes | Forgetting battery disconnect, poor adhesive application, and rough cable handling reduce success rates. |
| Consumer rights | UK law grants 30-day returns and 1-year warranties on parts, protecting your investment. |
Prerequisites: Tools and Knowledge You Need Before Starting
Successful screen repairs start with proper preparation. Gathering the right tools and setting up your workspace correctly prevents costly mistakes and protects delicate phone components from damage.
You’ll need precision screwdrivers matching your phone’s screw types, typically Phillips #000 or Pentalobe for iPhones. Plastic pry tools and suction cups help separate screens without scratching or cracking glass. An anti-static wristband grounds you, preventing electrostatic discharge that can fry circuits.
A heat gun or hairdryer softens adhesive holding screens in place, making removal safer. Understanding your phone’s internal layout helps you identify connectors and avoid breaking fragile flex cables. Proper tools and anti-static safety are critical to avoid damaging delicate components during DIY repair.
Essential Tool Checklist:
| Tool Category | Specific Items | Purpose |
|---|---|---|
| Screwdrivers | Precision Phillips #000, Pentalobe, Torx | Remove housing screws |
| Opening Tools | Plastic pry tools, suction cups, guitar picks | Separate screen safely |
| Safety Gear | Anti-static wristband, ESD mat | Prevent component damage |
| Heat Source | Heat gun or hairdryer | Soften adhesive |
| Workspace | Clean surface, good lighting, organizer tray | Keep parts secure |
Create a static-free environment by working on a rubber mat or wooden table. Avoid carpeted areas that generate static electricity. Organize screws and small parts in labeled compartments to prevent loss during reassembly.
Pro Tip: Take photos at each disassembly step with your second device or camera. These reference images guide you during reassembly, ensuring cables and components return to correct positions.
Invest in quality precision repair tools rather than cheap sets. Well-made screwdrivers prevent stripped screws, while sturdy pry tools reduce screen cracking risks. Your initial tool investment pays off across multiple repairs.
Where to Source Quality but Affordable Phone Screen Replacement Parts in the UK
Balancing cost and quality when buying replacement screens determines repair success. Understanding the differences between aftermarket and OEM parts helps you make smart purchasing decisions.

Aftermarket screens from reputable UK suppliers cost significantly less than manufacturer parts while delivering similar performance. These parts undergo quality testing and come with warranties, providing peace of mind. Buying locally ensures faster delivery and simpler returns compared to international sellers.
UK sellers offering 30-day return policies and 1-year warranties ensure DIY repairers can buy with confidence, reducing financial risks. This protection matters when attempting your first repair or testing unfamiliar brands.
Aftermarket vs OEM Comparison:
| Factor | Aftermarket Parts | OEM Parts |
|---|---|---|
| Cost | £25-£70 | £90-£130 |
| Warranty | 1 year typical | Varies |
| Availability | Widely available UK | Limited sources |
| Quality | High-quality options available | Original manufacturer spec |
| Savings | Up to 40% | No savings |
Buy2fix exemplifies trusted UK suppliers providing quality aftermarket components with comprehensive protections. Their parts balance affordability with reliability, backed by customer service and clear return terms.
Research supplier reputation before purchasing. Read customer reviews focusing on screen quality, colour accuracy, and touch responsiveness. Check whether sellers test parts before shipping and offer technical support.
Pro Tip: Verify that replacement screens include necessary components like earpiece grilles, proximity sensors, and camera brackets. Incomplete kits force you to transfer tiny parts from your broken screen, increasing difficulty.
Understanding choosing phone parts criteria helps you identify quality screens. Look for sellers specifying screen grade, such as original refurbished, high-copy, or aftermarket premium. Clear product descriptions indicate reliable suppliers.
Check UK consumer protection rights to understand your legal protections. These safeguards ensure you receive quality products and can return defective parts without losing money.
Step-by-Step Phone Screen Replacement Procedure
Following the correct repair sequence prevents damage and ensures your new screen functions properly. Each step builds on the previous one, creating a safe pathway from disassembly to testing.
Repair Process:
- Power down completely and remove SIM tray to prevent moisture ingress during repair.
- Disconnect the battery immediately after opening the device to eliminate short circuit risks. Proper disconnect at start reduces risk of short circuits by 90%.
- Apply controlled heat around screen edges for 60-90 seconds to soften adhesive without overheating internal components.
- Insert suction cup near the bottom edge and pull gently while sliding a plastic pick around perimeter to separate screen.
- Lift screen slowly at a shallow angle to avoid tearing flex cables still attached underneath.
- Disconnect display cables carefully by lifting connector tabs with a spudger, never pulling on cables directly.
- Remove broken screen and clean adhesive residue from phone frame using isopropyl alcohol.
- Apply new adhesive evenly around the frame perimeter, following manufacturer patterns.
- Connect new screen cables by aligning connectors precisely and pressing down gently until they click.
- Test display and touch before final closure by powering on briefly to verify functionality.
- Press screen into place firmly and evenly, ensuring adhesive bonds completely.
- Reassemble housing and screws in reverse order of removal.
Work methodically without rushing. Each cable connector has a specific orientation and locking mechanism. Forcing connections causes permanent damage.
Apply heat gradually to avoid melting internal components. Keep the heat source moving rather than concentrating on one spot. Most adhesives soften at temperatures below 80°C, well within safe ranges.
The step-by-step DIY screen replacement guide provides model-specific instructions for popular phones. Consult these resources when working on unfamiliar devices.
Common Mistakes and Troubleshooting Tips
Avoiding frequent errors dramatically improves repair outcomes. Understanding what goes wrong and how to fix problems saves time and prevents permanent device damage.
Many DIYers skip battery disconnection, thinking they’ll work carefully. This gamble fails when metal tools accidentally bridge contacts, creating shorts that destroy logic boards. Always disconnect power first.
Poor adhesive application causes screens to lift at corners or edges. Apply adhesive in continuous thin lines matching the original pattern. Press firmly across the entire screen surface for at least 30 seconds after installation.
Rough handling breaks fragile flex cables instantly. These thin ribbons tear easily when bent sharply or pulled at angles. Support cables with one hand while disconnecting with the other.
Mistake Prevention Checklist:
- Disconnect battery before any other component to prevent electrical damage
- Apply manufacturer-approved adhesive in even, continuous patterns
- Handle flex cables gently, never pulling or bending sharply
- Wear anti-static protection throughout the entire repair
- Test new screen before complete reassembly to catch defects early
- Calibrate touchscreen if responsiveness seems off after installation
Touchscreen calibration fixes minor responsiveness issues. Access calibration through phone settings or by dialing specific codes for your model. This recalibration syncs the new digitizer with your device’s software.
Not disconnecting battery first increases risk of short circuits; disconnecting battery at start reduces damage risk by 90%. This single step prevents most catastrophic failures.
Pro Tip: If your screen works but displays odd colours or lines, reseat the display cable. Power off, disconnect battery, unplug and replug the screen connector firmly, then test again.
Learn from costly DIY phone repair errors made by others. Reading about common problems prepares you to recognize and avoid them during your repair.
Cost, Time, and Expected Outcomes of a Successful DIY Screen Repair
Understanding realistic expectations helps you decide whether DIY repair suits your situation. Comparing costs, time investment, and quality outcomes against professional services reveals the true value.
First-time repairs typically take 60 to 90 minutes as you work carefully through unfamiliar steps. Experienced DIYers complete the same job in 30 to 45 minutes. Allow extra time for your initial attempt rather than rushing.
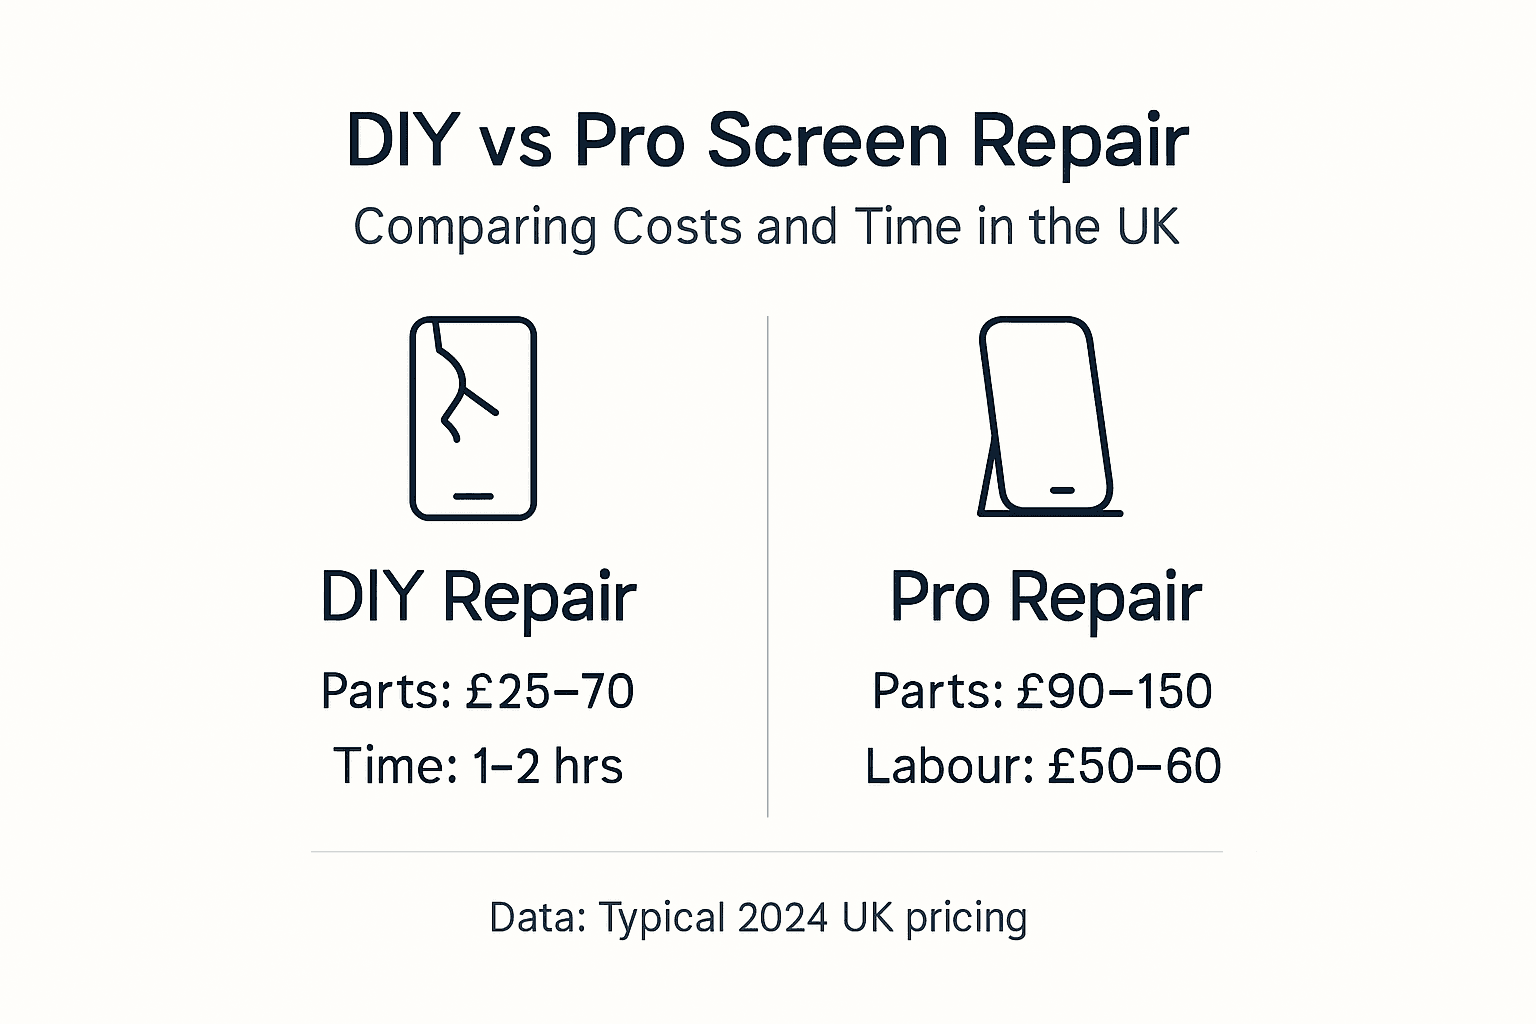
Financial savings make DIY attractive. Quality aftermarket screens cost £25 to £70 depending on your phone model. Professional repairs charge £90 to £130 for the same work, representing roughly 40% savings through self-repair.
Cost and Time Comparison:
| Repair Method | Parts Cost | Labour Cost | Total Cost | Time Required |
|---|---|---|---|---|
| DIY Repair | £25-£70 | £0 | £25-£70 | 30-90 minutes |
| Professional Service | Included | £60-£90 | £90-£130 | 2-5 days |
| Savings | N/A | Save 100% | Save ~40% | Immediate |
Successful repairs deliver clear, vibrant displays with fully responsive touchscreens. The new screen should sit flush against the frame without gaps or lifting. No error messages should appear related to display hardware.
Expect a learning curve on your first repair. You might need to reseat a cable or adjust adhesive placement. These minor adjustments are normal and don’t indicate failure.
Success Criteria:
- Display shows clear, accurate colours without lines or dead pixels
- Touchscreen responds precisely across entire surface
- Screen sits flush without lifting or gaps
- No hardware error messages appear after reassembly
- All sensors function correctly, including proximity and ambient light
Your time investment pays dividends beyond immediate savings. Learning repair skills enables you to fix future screen damage quickly without waiting for appointments or shipping delays.
Quality parts from trusted suppliers ensure results matching professional repairs. The DIY phone screen kits save money UK approach empowers you to maintain your device affordably throughout its lifespan.
Safety Precautions and Best Practices During Phone Screen Repairs
Protecting yourself and your device requires attention to specific hazards unique to electronics repair. Following safety protocols prevents injuries and component damage.
Electrostatic discharge destroys sensitive chips instantly, often without visible signs. Wearing an anti-static wristband connected to a grounded surface neutralizes charge differences between your body and components. ESD mats provide additional protection.
Heat application requires careful control. Excessive temperatures warp plastic frames, melt internal components, or damage battery cells. Keep heat guns moving and maintain distance. Test temperature on your hand before applying to your phone.
Critical Safety Warning: Never apply excessive force when prying screens or disconnecting cables. Electronic components break easily under pressure. If something resists, stop and identify what’s blocking progress rather than forcing it. Overheating batteries can swell, leak, or ignite, so always monitor temperature during heat application.
Safety Best Practices:
- Wear anti-static wristband and work on ESD mat throughout repair
- Apply heat moderately, testing temperature frequently to prevent overheating
- Use gentle, controlled force when prying or separating components
- Work in clean, dust-free environment to prevent particle contamination
- Follow manufacturer guidelines for your specific phone model
- Keep flammable materials away from heat sources and batteries
Dust particles trapped under new screens create visible spots and affect touch sensitivity. Clean your workspace thoroughly before starting. Wipe the phone frame with a lint-free cloth and isopropyl alcohol.
Manufacturer repair guides provide model-specific warnings about hidden clips, cable routing, and component locations. Review these guides before starting to identify potential trouble spots.
The common mobile phone repairs tips resource highlights safety considerations across various repair types. Understanding these principles protects you and your device.
Returns, Warranties, and Consumer Rights for DIY Replacement Parts in the UK
Knowing your legal protections when buying repair parts reduces financial risk and ensures you receive quality products. UK consumer law provides strong safeguards for DIY repairers.
The Consumer Rights Act 2015 requires products to be as described, fit for purpose, and of satisfactory quality. If parts fail these standards, you’re entitled to refunds, replacements, or repairs. These rights apply whether you buy from large retailers or small specialist suppliers.
Most UK sellers offer 30-day return periods allowing you to change your mind or return faulty parts. One-year warranties typically cover manufacturing defects, though installation damage usually isn’t covered. Read warranty terms carefully to understand exclusions.
Your Consumer Protections:
- Right to receive products matching seller descriptions and advertised quality
- 30-day return window for change of mind or discovered defects
- One-year warranty coverage for manufacturing faults on most aftermarket parts
- Refund or replacement options when parts fail quality standards
- Protection against misleading claims or false product descriptions
30-day return policies and 1-year warranties offered by UK sellers like Buy2fix ensure DIY repairers can buy with confidence. These protections mean you’re not gambling when purchasing repair parts.
Return conditions usually require parts to be unused or returned with proof of defect. Keep original packaging until you’ve successfully installed and tested components. Document any defects with photos before requesting returns.
Check seller policies before purchasing. Reputable suppliers clearly state return procedures, warranty coverage, and claim processes. Avoid sellers with vague or absent protection policies.
Understanding UK Consumer Rights Act 2015 provisions empowers you to assert your rights confidently. You’re protected by law when buying parts for DIY repairs, reducing the financial risks of attempting self-service.
Explore Trusted UK Phone Screen Parts and Repair Guides at Buy2fix
Taking the next step from learning to doing becomes easier with reliable parts and ongoing support. Buy2fix provides quality UK-sourced components backed by warranties and educational resources that guide you through successful repairs. Their extensive selection covers popular models from iPhone to Samsung Galaxy, all tested before shipping to ensure you receive working parts.
Comprehensive blog guides cover everything from mobile phone repair basics to advanced techniques. Learn about essential mobile repair tools and master choosing phone parts wisely through detailed articles. Fast UK shipping and responsive customer support ensure smooth purchasing experiences, helping you complete repairs confidently while saving money.
Frequently Asked Questions
What tools do I absolutely need to fix my phone screen cheaply?
Precision screwdrivers, plastic pry tools, suction cups, an anti-static wristband, and a heat source form the essential toolkit. Using quality tools protects delicate components from damage during disassembly and reassembly. Refer to the Buy2fix guide on essential repair tools for detailed recommendations matching your phone model.
Are aftermarket phone screens reliable compared to OEM parts?
High-quality UK aftermarket parts deliver performance comparable to OEM screens when installed correctly. They typically cost up to 40% less than manufacturer parts, making them excellent value for DIY repairs. Choose reputable suppliers offering warranties and quality testing to ensure reliability.
What are the main safety precautions during a DIY screen repair?
Always disconnect the battery first, wear an anti-static wristband, and apply heat carefully to avoid component damage. Work in a clean, organized workspace using proper tools designed for electronics repair. These precautions prevent short circuits, static damage, and physical harm to delicate phone components.
Can I return defective parts if my DIY repair fails?
UK law provides 30-day return rights and 1-year warranties on quality parts from UK sellers, protecting your investment. Check your seller’s specific return policy for detailed conditions on unused or defective parts. These legal protections significantly reduce financial risks when buying components for DIY screen repairs, giving you confidence to attempt self-service solutions.
Recommended
- Can I Get My Phone Screen Fixed? DIY Kits Save 73% in UK – buy2fix
- How to Fix Phone Screen Near Me Cheap: A Practical Guide – buy2fix
- DIY Phone Screen Replacement: Step-by-Step Guide to Success – buy2fix
- How to Fix Phone Screen: Repair Guide for DIY Success – buy2fix
- Ersätt trasigt mobilbatteri: 30-50% färre misstag med guide
Let customers speak for us
For Samsung Galaxy A26 SM-A266B Original Earpiece Speaker with Cable

Very good communication throught. Good product

Well made part very strong easy to fit great value for the money

Well packed, with fast shipping :)

Exactly what the doctor ordered…great color, comfort, and durability. Trust this watch band!

Brilliant strap, second purchase, bought bracelet before. Excellent value. Thank you

Great item for splitting your Audio signal

Outstanding product!
Next level customer service.

Very satisfied but the delivery needs to get more faster...

Good price,quick delivery

Best phone case ever! This is my second one as I broke my first. Would defo recommend

Great fitting Apple Watch bands

For Apple Watch Ultra 3 / 2 / 1 49mm RedPepper Armor Metal Case Integrated Silicone Watch Band(Steel Black White)

Good price and quick postage

