

Replace a phone screen safely: complete DIY guide 2026
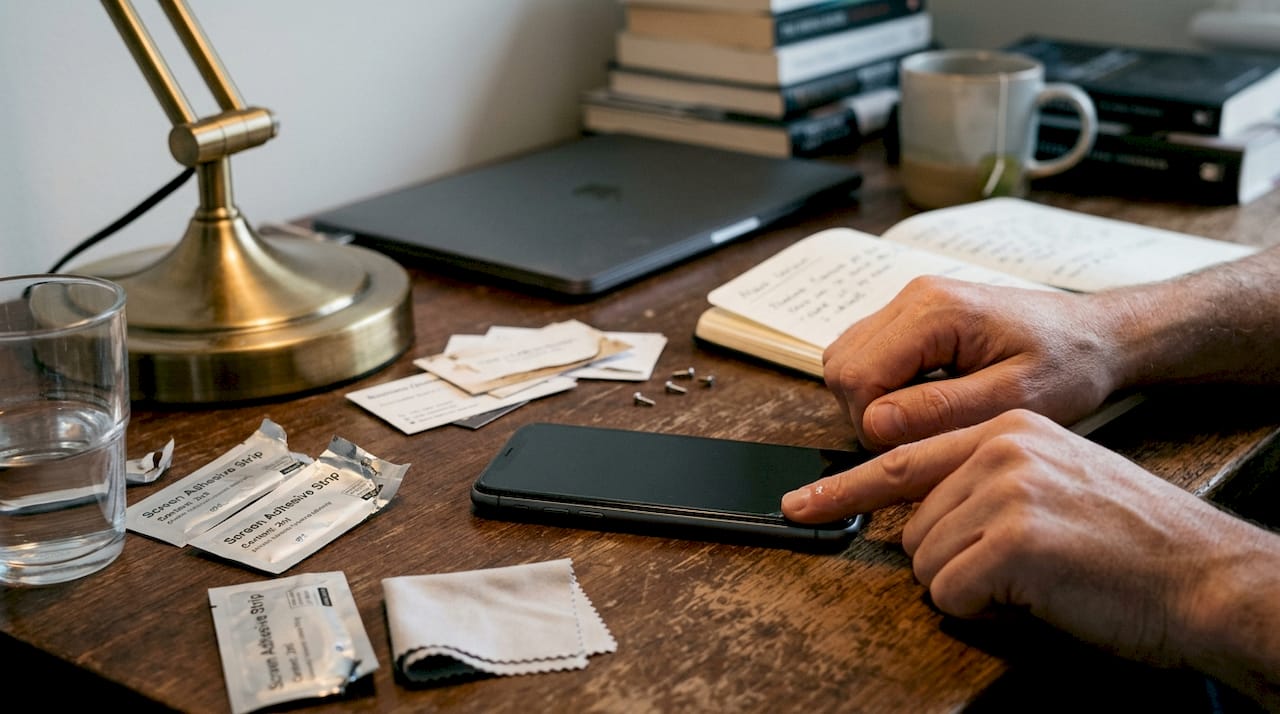
Cracked phone screens are frustrating, but replacing them yourself doesn’t have to be daunting. Whether you’re a DIY enthusiast or running a small repair business, understanding safe replacement methods saves money and builds valuable skills. This guide walks you through the essential tools, step by step techniques, and troubleshooting strategies to replace phone screens confidently whilst avoiding common pitfalls that damage internal components. You’ll learn how to source quality parts, execute repairs professionally, and verify your work for lasting results.
Table of Contents
- Key takeaways
- Gathering tools and materials for safe phone screen replacement
- Step by step guide to safely remove and replace a phone screen
- Common issues and troubleshooting during phone screen replacement
- Verifying repair success and tips for ongoing phone care
- Get quality tools and parts for your phone repair needs
- How can I ensure my phone screen replacement is safe?
Key Takeaways
| Point | Details |
|---|---|
| Preparation is vital | Proper preparation helps prevent damage and increases chances of a successful screen replacement. |
| Quality tools and parts | Using quality tools and matching the replacement screen to the exact phone model reduces the risk of damage and compatibility issues. |
| Follow step by step | Carefully follow the step by step guide to minimise mistakes and protect delicate cables. |
| Verify and clean | Test the screen functionality thoroughly and remove residue before resealing the device. |
Gathering tools and materials for safe phone screen replacement
Proper preparation separates successful repairs from damaged phones. Having the right tools significantly reduces damage risk during disassembly and reassembly.
Essential tools form the foundation of any screen replacement:
- Precision screwdriver set with multiple bits for various phone models
- Suction cup for lifting screens without cracking glass
- Plastic prying tools and spudgers to separate components safely
- Tweezers for handling small screws and delicate flex cables
- Heat gun or hairdryer to soften adhesive bonds
- Opening picks to maintain separation whilst working around edges
Replacement screen quality directly impacts repair longevity. Using quality replacement screens ensures reliable mobile repairs and prevents premature failures. Match your exact phone model when purchasing screens, as even slight variations cause compatibility issues. Original equipment manufacturer screens offer the best quality but cost more, whilst aftermarket options provide budget-friendly alternatives with varying quality grades.
Additional materials complete your repair setup:
- Pre-cut adhesive strips or liquid adhesive for securing the new screen
- Microfibre cloths for cleaning surfaces without leaving lint
- Isopropyl alcohol for removing old adhesive residue
- Anti-static wrist strap or ESD mat to prevent electrostatic discharge
- Small containers for organising screws by removal order
| Tool Kit Type | Contents | Quality Level | Price Range |
|---|---|---|---|
| Basic Kit | Screwdrivers, prying tools, suction cup | Entry level | £10-£20 |
| Standard Kit | Basic tools plus tweezers, picks, adhesive | Mid range | £20-£35 |
| Professional Kit | All tools, ESD protection, heat gun, organiser | Premium | £35-£60 |
| Screen Type | Quality | Compatibility | Cost |
| OEM Original | Highest | Perfect match | £60-£150 |
| Premium Aftermarket | High | Excellent | £30-£70 |
| Standard Aftermarket | Good | Very good | £15-£35 |
| Budget Aftermarket | Variable | Good | £8-£20 |
Pro Tip: Purchase parts from reputable UK suppliers like Buy2Fix that offer quality guarantees and model-specific compatibility checks. This eliminates guesswork and ensures you receive components that fit properly and function reliably from the start.
Step by step guide to safely remove and replace a phone screen
With your workspace prepared and tools assembled, executing the repair methodically prevents damage and ensures success. Step by step guides reduce error rates and improve repair outcomes for DIY replacements.
- Power off your phone completely and remove the SIM card tray to prevent electrical shorts during disassembly.
- Apply gentle heat around the screen edges for 30-60 seconds to soften adhesive bonds without overheating internal components.
- Place the suction cup near the bottom edge and pull steadily whilst inserting a plastic pick into the gap that forms.
- Slide the pick carefully around all edges, maintaining separation and reheating stubborn sections as needed.
- Lift the screen slowly at a shallow angle, watching for flex cables that connect the display to the motherboard.
- Remove screws securing the metal plate covering the screen connector, keeping them organised by location.
- Use a spudger to gently lift the screen flex cable connectors straight up from their sockets without bending pins.
- Disconnect the digitiser cable, LCD cable, and any additional sensor cables attached to the old screen assembly.
- Clean the phone frame thoroughly with isopropyl alcohol, removing all old adhesive residue for proper new screen bonding.
- Apply new adhesive strips or liquid adhesive to the frame, following the manufacturer’s pattern precisely.
- Connect the new screen’s flex cables to their motherboard sockets, ensuring they click securely into place.
- Test the screen function before final assembly by powering on briefly to verify display and touch response.
- If testing succeeds, power off again and carefully press the screen into the frame, applying even pressure around all edges.
- Replace the connector cover plate and screws, then reinsert the SIM tray to complete reassembly.
Pro Tip: Work on an ESD-safe mat and keep screws organised in a magnetic tray or egg carton with sections labelled by removal order. This prevents mixing different length screws that could damage internal threading or pierce through to sensitive components.
Patience and care during disassembly prevent cracked internal components, bent flex cables, and stripped screw threads that turn a simple screen replacement into a costly motherboard repair.
Heating techniques require attention to avoid damage. Hold the heat gun 10-15 centimetres from the surface and move continuously rather than focusing on one spot. Excessive heat warps plastic components and damages battery cells, whilst insufficient heat leaves adhesive too strong, causing glass to crack during prying.
Common issues and troubleshooting during phone screen replacement
Even careful repairs encounter problems. Awareness of common mistakes during phone screen replacement helps DIYers prevent costly secondary repairs.
Typical issues include:
- No display after reassembly despite power indicators working
- Touch screen unresponsive or registering phantom touches
- Screen flickering or showing lines across the display
- Backlight functioning but no image visible
- Proximity sensor failing during calls
- Home button or fingerprint scanner not responding
Most problems stem from connection issues rather than defective parts. Loose flex cable connections cause 60% of post-repair display problems. Disconnect and reconnect each cable firmly, ensuring they seat completely in their sockets with an audible click. Inspect connector pins for bending or debris that prevents proper contact.
| Symptom | Likely Cause | Quick Fix |
|---|---|---|
| Black screen, phone powers on | Disconnected LCD cable | Reseat display connector firmly |
| Touch not working | Loose digitiser connection | Reconnect touch flex cable |
| Flickering display | Partially seated cable | Press connector fully into socket |
| Backlight only | Damaged LCD component | Replace screen assembly |
| Lines on screen | Cracked internal display | Install new screen unit |
| Sensors not working | Forgotten sensor cable | Connect proximity sensor cable |
Pro Tip: Test screen function before full reassembly by temporarily connecting cables and powering on whilst the screen rests loosely on the frame. This isolates problems before adhesive application, making corrections simple rather than requiring complete disassembly.
Adhesive issues create gaps that allow dust ingress and reduce screen durability. If the screen doesn’t sit flush after installation, remove it whilst adhesive remains workable and check for debris or uneven adhesive application. Clean surfaces again and apply fresh adhesive for proper bonding.
Compatibility problems occasionally arise with aftermarket screens. Some budget replacements lack proper calibration, causing touch accuracy issues or colour reproduction problems. Verify your supplier offers returns if the screen doesn’t match original specifications.
Verifying repair success and tips for ongoing phone care
Confirming your repair meets quality standards prevents future frustration and ensures your investment in time and parts delivers lasting value. Verification of screen function post-repair is essential to ensure successful replacement.
Test these functions systematically:
- Display quality: check for dead pixels, colour accuracy, and uniform brightness across the entire screen
- Touch responsiveness: test all screen areas including corners and edges for accurate input registration
- Multi-touch capability: use pinch-to-zoom gestures to verify simultaneous touch point detection
- Brightness adjustment: confirm auto-brightness sensor responds and manual controls work properly
- Proximity sensor: make a test call to ensure the screen turns off when held to your ear
- Home button or gesture navigation: verify all navigation methods function correctly
- Face recognition or fingerprint scanner: re-register biometrics if sensors were disconnected
Inspect the installation carefully under good lighting. Look for dust particles, fingerprints, or adhesive residue trapped under the glass. Small imperfections near edges are common but shouldn’t affect the visible display area. Check that the screen sits completely flush with the frame around all edges without gaps or raised sections.
Protective measures extend your new screen’s lifespan:
- Apply a tempered glass screen protector within 24 hours of installation
- Use a protective case with raised edges that prevent direct screen contact when placed face down
- Avoid exposing your phone to extreme temperatures that stress adhesive bonds
- Clean the screen regularly with microfibre cloths rather than abrasive materials
- Handle your phone gently, avoiding drops and impacts that crack even new screens
Adhesive cures fully over 24-48 hours after installation. Avoid pressing hard on the screen or exposing the phone to water during this period. The bond strengthens as adhesive sets, providing maximum durability once cured completely.
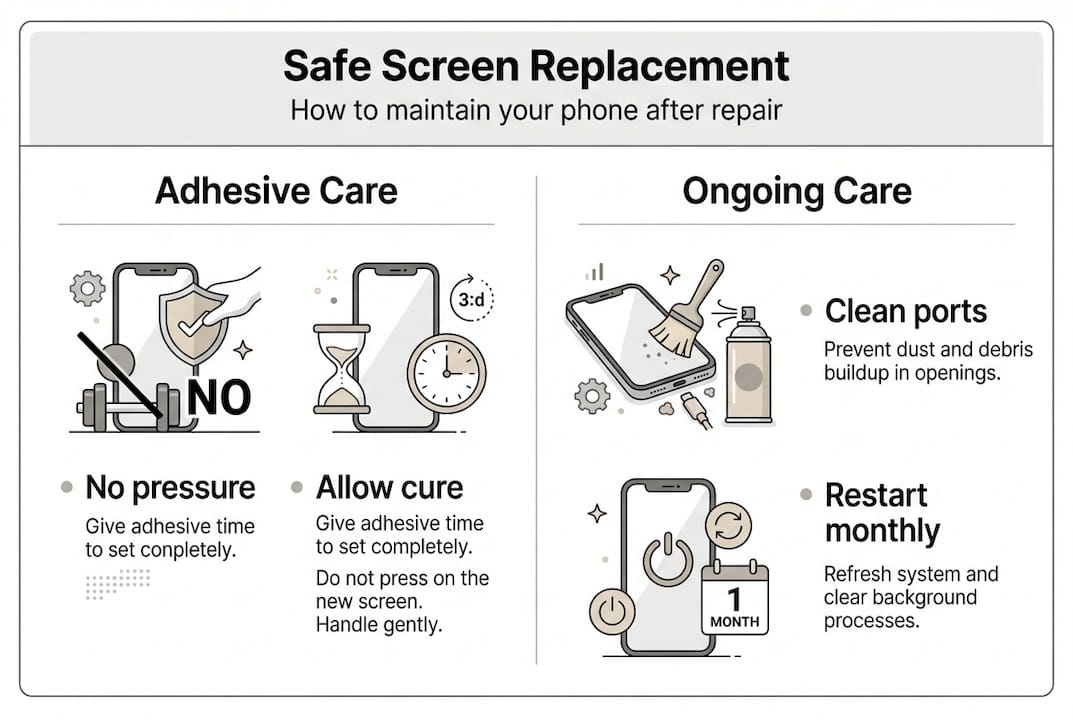
Periodic maintenance keeps your repaired phone functioning optimally. Clear the charging port of lint monthly, restart your device weekly to clear memory, and update software promptly for security and performance improvements. These simple habits prevent minor issues from becoming major problems.
Get quality tools and parts for your phone repair needs
Successful screen replacement depends on sourcing reliable components and proper tools. Buy2Fix serves as your trusted UK supplier for everything needed to complete professional-quality repairs at home or in your small business.
Our extensive inventory includes model-specific replacement screens for iPhone, Samsung Galaxy, Huawei, Xiaomi, and other major brands, ensuring perfect compatibility. Each screen undergoes rigorous quality testing before shipping, backed by our one-year warranty and 30-day return policy. We stock complete tool kits from basic to professional grades, along with adhesives, cleaning supplies, and ESD protection equipment.
Free UK mainland shipping eliminates unexpected costs, whilst our competitive pricing reflects direct sourcing from partner warehouses. Whether you’re attempting your first DIY phone screen replacement or stocking your repair business, Buy2Fix provides the quality replacement screens and guidance you need for reliable results.
How can I ensure my phone screen replacement is safe?
How can I ensure my phone screen replacement is safe?
Use proper tools designed specifically for phone repair rather than improvised household items that damage components. Follow step by step instructions carefully without skipping stages, as each step builds on previous work. Work in a static-free environment using an ESD mat or wrist strap to prevent electrostatic discharge that destroys sensitive circuits. Handle all components gently, particularly flex cables that tear easily when bent sharply or pulled at angles.
What are the best tools to use for replacing a phone screen?
Precision screwdrivers with magnetic tips prevent lost screws and stripped heads. Plastic prying tools and spudgers separate components without scratching or cracking surfaces. Suction cups lift screens evenly, whilst tweezers handle small parts safely. A heat source softens adhesive bonds, and fresh adhesive ensures proper screen bonding. An ESD-safe mat protects against static electricity damage. Quality safe screen repair tools from reputable suppliers include all these essentials in organised kits.
Can I reuse the old screen frame or adhesive when replacing the screen?
Reusing the frame is standard practice as it remains part of the phone body. However, replacing adhesive rather than reusing old improves screen adhesion and durability significantly. Old adhesive loses bonding strength and creates uneven surfaces that allow dust ingress. Clean the frame thoroughly with isopropyl alcohol to remove all residue before applying new adhesive strips or liquid adhesive. This ensures strong, lasting bonds that keep your screen secure.
How do I test my phone screen after replacing it?
Power on the device before full assembly to test touch responsiveness, display clarity, brightness levels, and sensor accuracy. Check for dead pixels by displaying solid colours across the entire screen. Test multi-touch with pinch-to-zoom gestures in photos or maps. Verify the proximity sensor by making a test call and ensuring the screen turns off near your face. Verifying screen functions immediately after installation helps detect issues early when corrections remain simple rather than requiring complete disassembly.
Recommended
Let customers speak for us
For Samsung Galaxy A26 SM-A266B Original Earpiece Speaker with Cable

Very good communication throught. Good product

Well made part very strong easy to fit great value for the money

Well packed, with fast shipping :)

Exactly what the doctor ordered…great color, comfort, and durability. Trust this watch band!

Brilliant strap, second purchase, bought bracelet before. Excellent value. Thank you

Great item for splitting your Audio signal

Outstanding product!
Next level customer service.

Very satisfied but the delivery needs to get more faster...

Good price,quick delivery

Best phone case ever! This is my second one as I broke my first. Would defo recommend

Great fitting Apple Watch bands

For Apple Watch Ultra 3 / 2 / 1 49mm RedPepper Armor Metal Case Integrated Silicone Watch Band(Steel Black White)

Good price and quick postage

