

iPhone Back Glass Replacement Guide for DIY Repair Success
Cracked iPhone back glass is a common frustration for many British DIY repair fans, but tackling the repair yourself can transform a costly fix into a rewarding project. The right tools and replacement parts are key to achieving professional results and keeping expenses down. This guide shows how to select precise components, follow best safety practices, and apply precision techniques for a flawless back glass replacement.
Table of Contents
- Step 1: Gather Essential Tools And Replacement Parts
- Step 2: Power Off And Secure Your Iphone
- Step 3: Remove Damaged Back Glass Safely
- Step 4: Install New Back Glass With Care
- Step 5: Test And Inspect Finished Repair
Quick Summary
| Essential Insight | Detailed Explanation |
|---|---|
| 1. Gather the right tools first | Ensure you have all the necessary tools and replacement parts specific to your iPhone model before starting the repair. |
| 2. Power off your device completely | Always turn off your iPhone and disconnect accessories to prevent electrical damage during repair. |
| 3. Remove old glass with caution | Take your time removing the damaged back glass to avoid damaging internal components; use heat and proper tools. |
| 4. Clean and align new glass carefully | Thoroughly clean the frame, remove old adhesive, and align the new glass accurately for a secure fit. |
| 5. Test your repair thoroughly | After installation, systematically test all iPhone functions to ensure proper operation and seal integrity. |
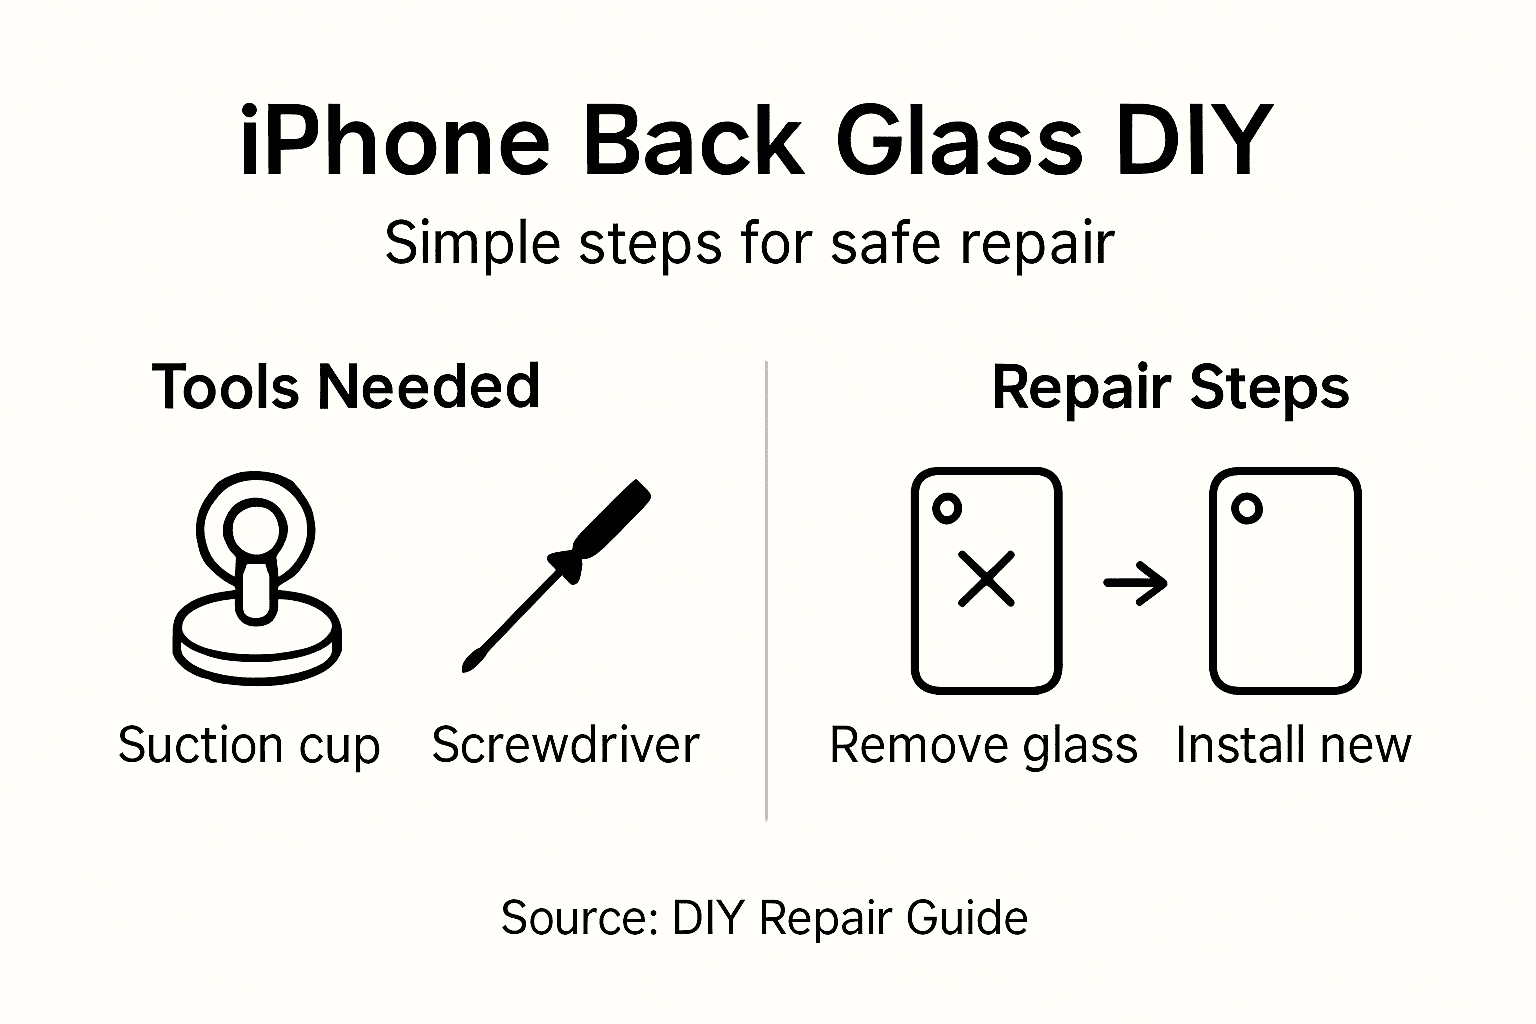
Step 1: Gather essential tools and replacement parts
Successfully replacing an iPhone’s back glass requires carefully selecting the right tools and components. Your repair process depends on having a complete toolkit that matches your specific iPhone model and ensures a professional outcome.
To begin, you’ll need several specialised tools and replacement parts. Here are the key items every DIY repair enthusiast should have ready:
- Precision screwdriver set with multiple bit sizes
- Suction cup for lifting the back glass
- Replacement back glass panel compatible with your exact iPhone model
- Protective work gloves
- Heat gun or hairdryer
- Cleaning microfibre cloth
- Tweezers with fine, non-conductive tips
- Phone repair tools that are professionally designed for delicate electronics
Before starting, verify that your replacement back glass perfectly matches your iPhone’s specific model and generation. Mismatched parts can lead to poor fitment and potential damage.
Precision matters. Even slight variations in component sizing can compromise your repair success.
Pro tip: Always work in a clean, well-lit area with ample space to organise your tools and prevent losing small components.
Step 2: Power off and secure your iPhone
Before diving into back glass replacement, preparing your iPhone correctly is crucial for a safe and successful repair. You’ll need to completely power down your device and create a stable workspace to prevent potential damage.
Preventing electrical damage starts with a systematic approach to powering off and securing your device. Follow these key steps:
- Press and hold the power button and either volume button
- Slide the power off slider when it appears on screen
- Verify the screen is completely black and unresponsive
- Unplug any charging cables or accessories
Choose a clean, flat surface with good lighting and minimal vibration. A soft, lint-free mat or workspace can help protect your iPhone during the repair process. Ensure you have ample room to organise your tools and move around comfortably.
Electrical safety is paramount. Always disconnect your device completely before beginning any repair work.
Pro tip: Place a small container nearby to store screws and tiny components, preventing them from getting lost during the repair process.
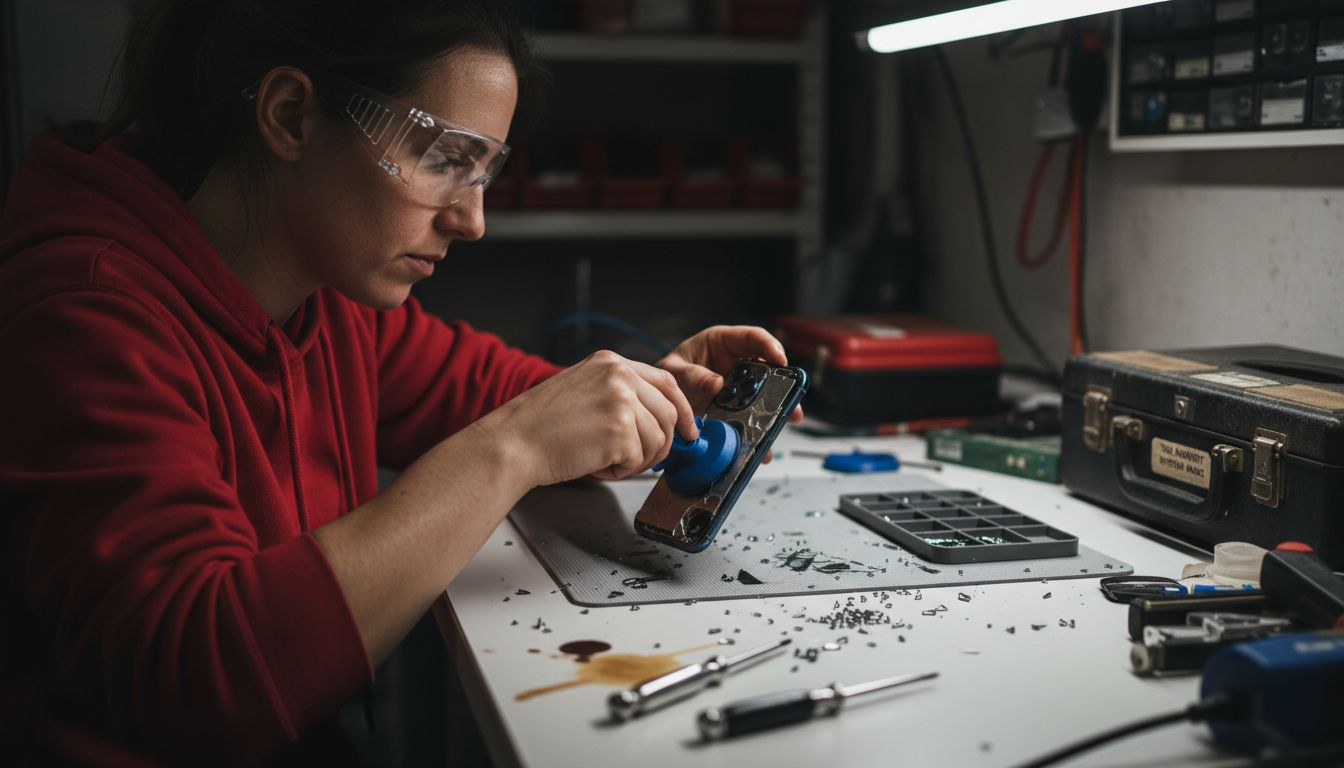
Step 3: Remove damaged back glass safely
Removing a damaged iPhone back glass requires precision, patience, and the right technique to prevent further damage to your device. This critical step demands careful handling and methodical approach to ensure successful glass removal.
Prepare your workspace with repair safety equipment including protective gloves and safety glasses. Follow these detailed steps for safe back glass removal:
- Apply heat around the edges of the back glass using a heat gun or hairdryer
- Start at a corner with a suction cup, gently lifting the damaged glass
- Use precision tweezers to support and stabilise the lifting process
- Work slowly and consistently, applying even pressure
- Avoid sudden movements that could cause additional fracturing
Watch for any adhesive residue or fragile internal components as you remove the glass. Some iPhone models have delicate connectors that can be easily damaged during this process.
Precision matters. Rushing this step can transform a simple repair into a costly mistake.
Pro tip: Keep your workspace organised and use magnetic project mat to prevent tiny screws and glass fragments from getting lost.
Step 4: Install new back glass with care
Installing a replacement back glass demands precision and patience to ensure a perfect, secure fit for your iPhone. Your goal is to create a seamless, professional-looking repair that protects your device’s internal components.
Proper glass installation techniques require meticulous preparation and careful execution. Follow these critical steps:
- Clean the iPhone frame thoroughly with isopropyl alcohol
- Remove any old adhesive completely
- Align replacement glass precisely with device edges
- Apply even pressure when positioning the new glass
- Check for complete adhesion around all edges
Ensure your workspace remains clean and dust-free during installation. Even microscopic particles can compromise the seal and appearance of your new back glass.
Here’s a quick reference outlining common iPhone back glass repair challenges and how to avoid them:
| Challenge | Cause | Prevention Technique |
|---|---|---|
| Mismatched glass panels | Incorrect model selection | Double-check device compatibility |
| Internal component damage | Excess force or tool misuse | Apply gentle, even pressure |
| Adhesive residue left behind | Inadequate cleaning before installation | Thoroughly clean frame with alcohol |
| Lost screws or fragments | Poor workspace organisation | Use a magnetic mat & containers |
| Fingerprint marks on new glass | Working without protective gloves | Always wear lint-free gloves |
Precision is paramount. A millimetre of misalignment can lead to future damage or water vulnerability.
Pro tip: Use clean, lint-free gloves throughout the installation to prevent fingerprints and maintain a pristine repair surface.
Step 5: Test and inspect finished repair
After carefully replacing your iPhone’s back glass, comprehensive testing is crucial to ensure a successful repair. Your final inspection will validate the quality of your work and confirm that all device functions remain intact.
Comprehensive repair verification involves a systematic approach to checking device functionality. Perform these critical tests:
- Power on the iPhone and check display responsiveness
- Test wireless charging functionality
- Verify camera operations for all lens modes
- Check sensor performance including proximity and ambient light sensors
- Inspect physical glass installation for complete adhesion
Pay close attention to any unusual behaviour or performance changes. Minor issues might indicate improper installation that requires immediate adjustment.
This table summarises essential post-repair checks to ensure long-term iPhone functionality:
| Test Type | Why It Matters | What To Look For |
|---|---|---|
| Display responsiveness | Confirms touch functionality | Fast, accurate screen response |
| Wireless charging | Checks induction coil intact | Consistent charging performance |
| Camera operation | Ensures lens and sensors align | Clear images, working features |
| Sensor performance | Validates internal connectivity | Accurate proximity/light readings |
| Physical inspection | Confirms secure attachment | No gaps, full edge adhesion |
Thorough testing prevents future complications. A few minutes of careful inspection can save costly repairs later.
Pro tip: Take photographs of the repaired device from multiple angles to document your successful repair and track any potential future issues.
Equip Yourself for Perfect iPhone Back Glass Repairs
Replacing your iPhone’s back glass is a precise challenge that demands the right tools and genuine replacement parts. This guide highlights the need for compatible components, careful preparation, and professional techniques to avoid mishaps such as mismatched glass panels or internal damage. At Buy2fix, we understand these pain points and offer a comprehensive range of mobile phone repair parts including high-quality replacement back covers, precision tools, and adhesives tailored exactly to your iPhone model.
Avoid the frustration of delays or costly errors by securing your repair essentials from a trusted UK specialist. Benefit from free UK mainland shipping, top-tier quality control, and a 30-day return policy that guarantees confidence with every purchase. Whether you are a DIY enthusiast or a professional technician, our extensive inventory ensures you have everything needed for a seamless back glass installation and thorough repair testing.
Start your successful iPhone back glass repair journey now by exploring our full selection of Mobile Phone Repair Parts. Make your replacement precise and professional with Buy2fix—your reliable partner in device repair solutions. Visit https://buy2fix.co.uk today and experience hassle-free shopping with expert support ready when you need it.
Frequently Asked Questions
What tools do I need for iPhone back glass replacement?
To replace an iPhone back glass, you’ll need a precision screwdriver set, suction cup, replacement back glass panel, protective gloves, heat gun or hairdryer, cleaning microfibre cloth, and fine-tipped tweezers. Gather these tools before starting to ensure a smooth repair process.
How do I safely remove the damaged back glass of my iPhone?
Begin by applying heat around the edges of the back glass using a heat source. Then, gently lift from a corner with a suction cup, using tweezers for support, while applying even pressure to avoid further damage.
What steps should I follow to install the new back glass correctly?
Clean the iPhone frame thoroughly with isopropyl alcohol, removing any old adhesive. Align the replacement glass with the device edges, apply even pressure, and check that it adheres completely to prevent future issues.
How can I test my iPhone after replacing the back glass?
Power on your iPhone and test the display responsiveness, wireless charging, camera functions, and sensor performance. Conduct these checks carefully to ensure that everything is working correctly post-repair.
What common challenges should I be aware of during back glass replacement?
Issues like mismatched glass panels, internal component damage, or adhesive residue can arise. Mitigate these by double-checking compatibility, applying gentle pressure, and cleaning thoroughly before installation.
Why is it important to work in a clean space while replacing back glass?
Working in a clean environment helps prevent dust and debris from entering the device, which can compromise the repair. Organise your tools and components to keep your workspace tidy and reduce the risk of losing small parts.
Recommended
Let customers speak for us
Well made part very strong easy to fit great value for the money

Well packed, with fast shipping :)

Exactly what the doctor ordered…great color, comfort, and durability. Trust this watch band!

Brilliant strap, second purchase, bought bracelet before. Excellent value. Thank you

Great item for splitting your Audio signal

Outstanding product!
Next level customer service.

Very satisfied but the delivery needs to get more faster...

Good price,quick delivery

Best phone case ever! This is my second one as I broke my first. Would defo recommend

Great fitting Apple Watch bands

For Apple Watch Ultra 3 / 2 / 1 49mm RedPepper Armor Metal Case Integrated Silicone Watch Band(Steel Black White)

Good price and quick postage

Perfect fit.

Absolutely necessary

Second Purchase and still a very happy customer. Keep up the good work.
