

Mobile device repair for beginners: A practical DIY guide
Most people assume that a cracked screen or a dying battery means an expensive trip to a repair shop. That assumption costs UK smartphone owners millions of pounds every year. The truth is that many common faults, from worn-out batteries to broken charging ports, are well within reach of a careful beginner with the right tools and a bit of patience. This guide walks you through the fundamentals of mobile device repair: what to expect, which tools you need, how to attempt your first fix safely, and crucially, when to step back and call a professional.
Table of Contents
- Understanding the basics of mobile device repair
- Essential tools and setup for beginners
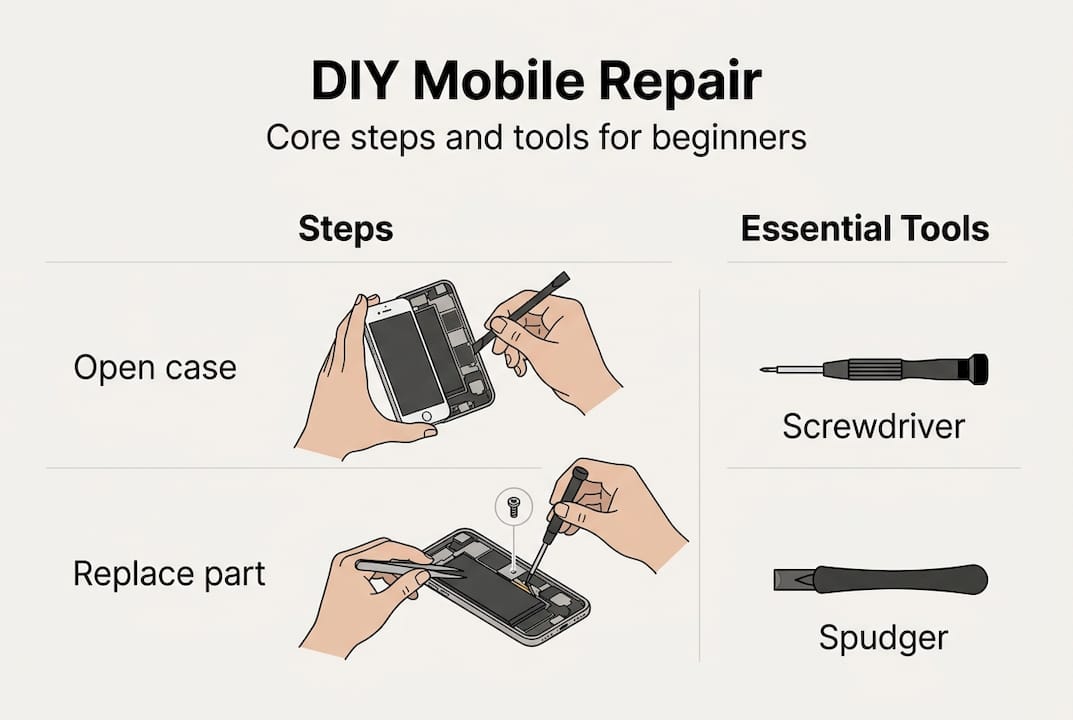
- Step-by-step guide: Your first mobile repair
- Preventative care: Protecting your device to minimise repairs
- When to repair, when to seek professional help
- Start your DIY repair journey with expert support
- Frequently asked questions
Key Takeaways
| Point | Details |
|---|---|
| Start with basics | A solid understanding of your device and key repair skills helps you avoid costly mistakes. |
| Invest in quality tools | Reliable, anti-static repair tools are critical for safe and successful DIY repairs. |
| Follow clear instructions | Step-by-step guides and knowing your limits reduce risk and improve repair outcomes. |
| Prioritise device care | Simple habits and the right accessories can dramatically extend your device’s life. |
| Know when to seek help | Some repairs, especially involving batteries or water damage, are safer and more reliable when handled by professionals. |
Understanding the basics of mobile device repair
Before you pick up a screwdriver, it helps to understand what you are actually working with. A modern smartphone is a layered assembly of components, each serving a specific function. Knowing what lives inside the device helps you approach repairs with confidence rather than guesswork.
The main components you will encounter include:
- Screen and display assembly: The glass digitiser (touch layer) and the LCD or OLED panel beneath it
- Battery: A lithium-ion cell that powers everything, typically glued or clipped into place
- Charging port and flex cables: Connectors that link the board to external power and data
- Camera modules: Front and rear units, often connected via ribbon cables
- SIM tray and small parts: Tiny components that are easy to lose and easy to damage
The skills that matter most for beginners are not technical genius. Patience, a steady hand, and careful screw handling will take you further than any advanced knowledge. You also need to understand mobile repair basics before you start, including how to read common repair terms like “digitiser,” “flex cable,” and “adhesive strip.”
There are real risks involved, and it is important to be honest about them from the start. DIY risks include further damage to the device, voided warranties, and genuine safety hazards from lithium-ion batteries if punctured or mishandled.
Know your limits early. If you open a device and find something unexpected, such as a swollen battery, corrosion, or components you do not recognise, close it back up and seek professional advice. There is no shame in stopping.
A beginner should stop and consult a professional whenever a repair involves the motherboard, liquid damage, or any component that requires soldering. These jobs require specialist equipment and training that go beyond the scope of DIY.
Essential tools and setup for beginners
Having the right kit is not optional. Attempting a repair with the wrong tools is one of the most common reasons beginners cause more damage than they fix. Fortunately, a solid starter set does not cost a fortune.
Here are the tools every beginner needs:
- Precision screwdriver set: Phillips, Pentalobe, and Torx heads cover most smartphone brands
- Spudger: A plastic or nylon prying tool used to separate components without scratching
- Opening picks: Thin, flexible picks that slide between panels to release adhesive
- Tweezers: Fine-tipped tweezers for handling tiny screws and ribbon cables
- Suction cup: Used to lift screens away from the chassis without cracking them
- Anti-static mat and wrist strap: Protect sensitive components from ESD (electrostatic discharge), which is invisible static electricity that can permanently damage chips and circuits
ESD is worth taking seriously. A single static discharge from your fingertip can destroy a component that looks perfectly fine. An anti-static mat grounds your workspace, and a wrist strap grounds you. Together, they cost very little and prevent expensive mistakes. You can find a full breakdown of essential repair tools and a more detailed list of phone technician tools to help you build your kit.
Your workspace matters just as much as your tools. Work on a clean, flat, well-lit surface. Use a magnetic parts tray or a sheet of white paper to keep screws organised. Small screws have a talent for disappearing into carpet.
Pro Tip: Do not buy the cheapest tool kit you can find. Budget kits often use soft metal screwdrivers that strip screw heads on the first use, turning a simple repair into a nightmare. Spend a little more upfront and you will avoid a lot of frustration.
Good preventative care habits, such as using quality cases, avoiding cheap chargers, cleaning ports regularly, and keeping software updated, also reduce how often you need to repair in the first place. Think of your toolkit as an investment in both repairs and prevention.

Step-by-step guide: Your first mobile repair
For your first repair, a battery replacement is the ideal starting point. It is one of the most common faults, the parts are affordable, and the process is straightforward on most mid-range Android devices. A screen replacement is slightly more involved but still very achievable with care.
Before you begin, check you have:
- The correct replacement part for your specific model
- Your full tool kit laid out and accessible
- A clean, well-lit workspace
- A charged backup device in case something goes wrong
- A repair guide specific to your model (iFixit is an excellent free resource)
Steps for a basic battery replacement:
- Power off the device completely and remove the SIM tray
- Apply gentle heat to the back cover using a heat mat or heat gun on a low setting to soften the adhesive
- Use a suction cup and opening picks to carefully separate the back cover
- Locate and remove the screws securing the battery connector bracket
- Disconnect the battery flex cable using a spudger, not your fingers
- Slide opening picks under the battery to release the adhesive strips, working slowly
- Lift the old battery out without bending or puncturing it
- Place the new battery, reconnect the flex cable, and reassemble in reverse order
- Power on and test before sealing the back cover with fresh adhesive
For screen repairs, the process is similar but requires more care around the display connectors. Our screen replacement guide covers this in detail, and our small part replacements guide is useful for ports and buttons.
Pro Tip: Take photos at every stage before you disconnect anything. When reassembling, those photos are worth more than any written guide.
Here is a quick comparison of common beginner repairs to help you choose where to start:
| Repair type | Difficulty | Typical time | Key tools needed |
|---|---|---|---|
| Battery replacement | Easy | 30 to 60 minutes | Screwdrivers, spudger, picks |
| Charging port replacement | Moderate | 45 to 90 minutes | Screwdrivers, tweezers, spudger |
| Screen replacement | Moderate | 60 to 120 minutes | Suction cup, picks, screwdrivers |
| Camera lens replacement | Easy | 20 to 40 minutes | Heat gun, tweezers |
| Back cover replacement | Easy | 15 to 30 minutes | Heat mat, picks |
While iFixit empowers DIY repairs, professional services highlight that mistakes during screen or battery jobs can cause further damage, so weigh your confidence honestly before starting.
Preventative care: Protecting your device to minimise repairs
The most cost-effective repair is the one you never need. A few simple habits and affordable accessories can add years to your device’s life and save you significant money over time.
Key preventative measures include:
- A quality protective case: Absorbs impact from drops and protects the chassis
- A tempered glass screen protector: Takes the hit so your display does not
- Regular port cleaning: Dust and lint in charging ports cause connection faults over time
- Software updates: Manufacturers patch bugs that can cause battery drain and performance issues
- Battery health monitoring: Most modern phones show battery capacity in settings; replace when it drops below 80%
Preventative care techniques genuinely help avoid costly repairs, and the investment is minimal compared to replacement parts or professional labour.
Here is a practical overview of preventative items, their typical cost, and how effective they are:
| Preventative item | Approximate cost | Effectiveness |
|---|---|---|
| Tempered glass screen protector | £5 to £15 | Very high for screen damage |
| Protective phone case | £8 to £25 | High for drop and impact damage |
| Port cleaning kit | £3 to £8 | Moderate for connection faults |
| Quality charging cable | £10 to £20 | High for battery and port health |
| Battery health app | Free | High for monitoring degradation |
Stay up to date with phone accessory trends to find the best value protective gear, and explore affordable repair solutions if a fault does develop.
Pro Tip: Cheap charging cables and plug adapters are one of the leading causes of battery degradation and port damage. Replacing a £3 cable with a verified, quality alternative is one of the best investments you can make for your device’s long-term health.
When to repair, when to seek professional help
Confidence is a good thing in DIY repair. Overconfidence is not. Part of becoming a skilled repairer is knowing exactly where your abilities end and where a professional’s begin.
There are clear situations where you should not attempt a repair yourself:
- Swollen or puffed battery: A swollen lithium-ion battery is a fire risk. Do not puncture, bend, or attempt to remove it without professional guidance
- Liquid damage: Water damage is unpredictable. Corrosion spreads across the board and can affect components you cannot see
- Micro-soldering: Replacing individual chips or components on the motherboard requires specialist equipment and years of practice
- Face ID or biometric components: On iPhones especially, replacing certain parts without Apple’s proprietary tools breaks security features permanently
- Any repair you are not sure about: Uncertainty is a valid reason to stop
Professionals are recommended for complex repairs where the cost of getting it wrong outweighs the savings of doing it yourself.
The most common beginner mistake is not knowing when to stop. Opening a device out of curiosity, without a clear plan or the right parts, is how minor faults become major ones.
For a balanced view of the trade-offs involved, our guide on DIY repair pros and cons is worth reading before you commit to any repair. It covers real user experiences and helps you set realistic expectations.
The goal is not to fix everything yourself. The goal is to fix what you can fix safely, save money where it makes sense, and build skills gradually over time.
Start your DIY repair journey with expert support
Ready to put these skills into practice? At Buy2fix, we stock everything a beginner needs to get started, from quality repair tool kits and precision screwdriver sets to replacement screens, batteries, and charging ports for all major brands. Every part is quality-checked before it leaves our warehouse, and we offer free UK mainland shipping on all orders. Whether you are replacing your first battery or building a full repair toolkit, our range is designed to support you at every stage. We also publish practical guides and tutorials written specifically for DIY repairers, so you are never working without support.
Frequently asked questions
What are the main risks of DIY mobile device repair?
DIY repairs can cause further damage, void your warranty, or create safety hazards, particularly with lithium-ion batteries that can swell or rupture if mishandled. Starting with simpler repairs and building your skills gradually reduces these risks significantly.
What tools should every beginner have for mobile repairs?
A precision screwdriver set, a spudger, tweezers, suction tools, opening picks, and an anti-static mat are the essentials for most beginner repairs. A magnetic parts tray is also highly recommended to keep tiny screws organised.
How can I tell if a repair is too challenging to do myself?
If the repair involves a swollen battery, water damage, or intricate soldering, it is best handled by a professional repair technician rather than attempted at home. When in doubt, the cost of professional help is almost always less than the cost of making a fault worse.
What are simple ways to prevent device damage?
Using a quality case, applying a tempered glass screen protector, keeping software updated, and avoiding cheap charging accessories are the most effective preventative care steps you can take. These habits cost very little but can extend your device’s life by several years.
Recommended
Let customers speak for us
Well made part very strong easy to fit great value for the money

Well packed, with fast shipping :)

Exactly what the doctor ordered…great color, comfort, and durability. Trust this watch band!

Brilliant strap, second purchase, bought bracelet before. Excellent value. Thank you

Great item for splitting your Audio signal

Outstanding product!
Next level customer service.

Very satisfied but the delivery needs to get more faster...

Good price,quick delivery

Best phone case ever! This is my second one as I broke my first. Would defo recommend

Great fitting Apple Watch bands

For Apple Watch Ultra 3 / 2 / 1 49mm RedPepper Armor Metal Case Integrated Silicone Watch Band(Steel Black White)

Good price and quick postage

Perfect fit.

Absolutely necessary

Second Purchase and still a very happy customer. Keep up the good work.
