

Beginner DIY phone repair tips that actually work
TL;DR:
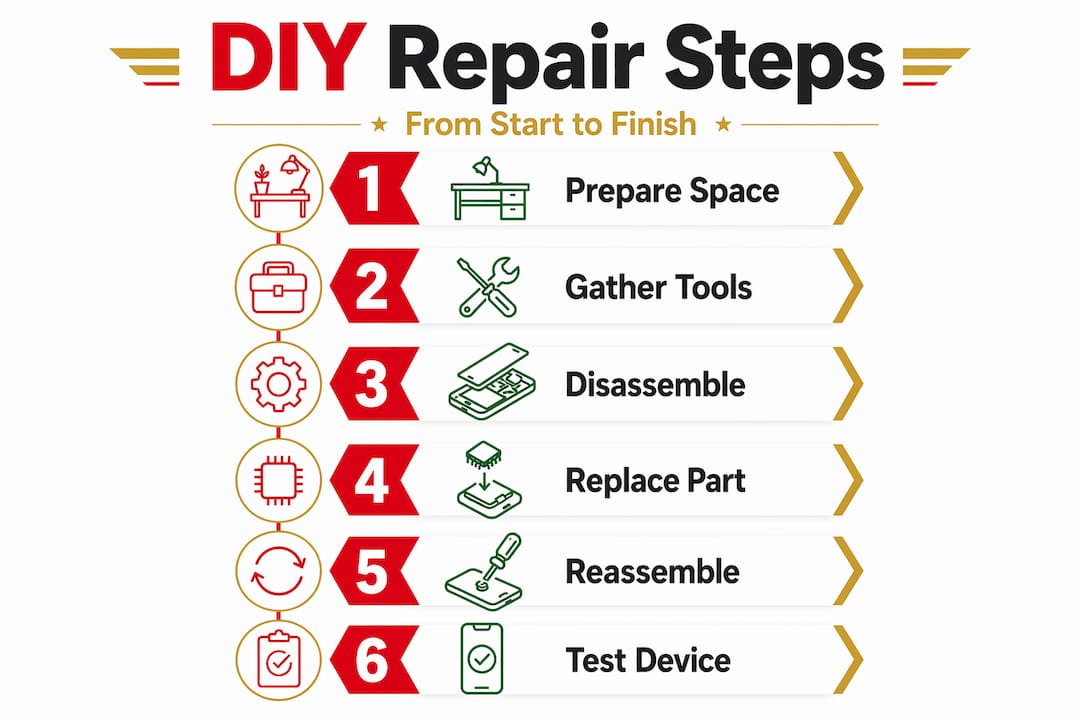
- Proper workspace preparation, the right tools, and patience are essential for safe and effective DIY smartphone repairs. Beginners should start with simple tasks like replacing batteries or screens, avoiding complex motherboard work, and always testing before reassembling. Utilizing quality parts and community resources helps prevent costly mistakes and builds confidence in phone repair skills.
Most people’s first reaction to a cracked screen or dead battery is a trip to the repair shop, followed by a bill that stings. But with the right beginner diy phone repair tips, you can handle the most common smartphone faults at home for a fraction of the cost. Average mid-range repairs run between £80 and £200, while a refurbished replacement can set you back £300 or more. This guide walks you through everything you need to start confidently: tools, screen and battery replacement, troubleshooting, and the mistakes that turn a small fix into an expensive disaster.
Table of Contents
- Key takeaways
- Essential tools and workspace setup
- Step-by-step screen replacement for beginners
- How to replace a phone battery safely
- Cleaning ports and fixing slow performance
- Common beginner mistakes to avoid
- My take on starting out with phone repair
- Start your repairs with Buy2fix
- FAQ
Key takeaways
| Point | Details |
|---|---|
| Prepare your workspace first | A clean, static-free, well-lit space prevents lost screws and accidental damage before you even open the phone. |
| Heat is your best friend for screens | Softening adhesive with a heat source makes opening sealed phones far safer and reduces cracked glass risk. |
| Never use metal on batteries | Plastic spudgers and isopropyl alcohol are the only safe tools for prying out lithium-ion batteries. |
| Power off immediately after a drop | Turning on a damaged phone risks a short circuit that can destroy the motherboard entirely. |
| Quality parts make the difference | Cheap, unverified replacement parts are the single biggest cause of repeat failures on DIY repairs. |
Essential tools and workspace setup
Before you touch a single screw, getting your tools and environment right is the most important step any beginner can take. This is where most DIY phone repairs succeed or fail before they even begin.
The basic tool kit
A comprehensive beginner’s tool kit includes magnetic-tip screwdrivers in multiple sizes (particularly Phillips #000 and Pentalobe for iPhones), plastic spudgers, a suction cup handle, fine-tipped tweezers, and a heat source such as a heat gun or even a standard hair dryer. Each tool has a specific job. The suction cup creates the initial gap to open a display assembly. The spudger separates adhesive without scratching or snapping fragile flex cables. Tweezers handle the impossibly small connectors you will absolutely drop otherwise.
You can find a detailed breakdown of what to buy in Buy2fix’s guide to essential repair tools before committing to a purchase.
Keeping parts organised
Disorganised screw placement during reassembly is one of the most common causes of permanent device damage. Screws from different sections of a phone are often different lengths. Put the wrong length screw back in the wrong hole and you can crack a circuit board or puncture a component underneath. Use a magnetic parts mat and label each section as you remove screws. Egg cartons, pill organisers, or printed teardown diagrams also work well.
Your workspace
Work on a wooden or rubber surface, never metal or glass. Bright, directional light helps you spot tiny connectors. An anti-static wrist strap is worth adding to your kit if you are working on any phone with a motherboard exposed, as static discharge can silently kill components even when everything looks fine.
Pro Tip: Lay a white sheet of paper over your work surface. Dropped screws and tiny components become much easier to spot against a plain white background.
| Tool | Purpose |
|---|---|
| Magnetic screwdriver set | Removes and re-seats small screws without dropping them |
| Plastic spudger | Separates adhesive and pries open casings safely |
| Suction cup | Creates the opening gap on screen assemblies |
| Heat gun or hair dryer | Softens adhesive around screen edges |
| Anti-static wrist strap | Prevents static discharge damaging internal components |
Step-by-step screen replacement for beginners
Replacing a cracked screen is the most common beginner diy phone repair, and it is genuinely achievable at home with the right approach. Here is a clear, step-by-step process.
- Power down the device fully. Hold the power button and shut the phone off completely before doing anything else. Never work on a live device.
- Apply heat around the screen edges. Heating the edges slowly with a heat gun or hair dryer on its lowest setting softens the adhesive that holds the display assembly in place. Move the heat source in slow circles for 60 to 90 seconds. Do not hold it in one spot.
- Use the suction cup to create a gap. Press the suction cup firmly to the lower portion of the screen and pull gently upward while inserting a plastic spudger into the gap. Work slowly around the edges. Rushing this step is where most people crack an already damaged screen further.
- Disconnect the battery connector first. Once the screen has enough lift to work inside, locate and disconnect the battery connector before anything else. This prevents any accidental power running through the board while you work.
- Disconnect the old screen. Locate the screen flex cable connectors on the motherboard. Use your spudger or a plastic prying tool to carefully release each connector. Lift the old display assembly out and set it aside.
- Seat the new screen and test before closing. Connect the new screen’s flex cables, reconnect the battery, and power on the phone to test the display before you seal everything shut. This saves enormous frustration if the replacement part is faulty.
- Reassemble carefully. Once confirmed working, apply new adhesive strips if needed, press the screen down evenly, and allow it to set before using the device.
Pro Tip: Watch a teardown video specific to your exact phone model before starting. The internal layout of a Samsung Galaxy A55 is very different from that of an iPhone 15. Generic guides only take you so far.
For a more detailed walkthrough suited to UK buyers, Buy2fix has a dedicated DIY screen repair guide covering popular models and compatible parts.
How to replace a phone battery safely
Battery degradation is the silent killer of otherwise perfectly functioning phones. If your device is draining within a few hours, shutting down unexpectedly, or showing a swollen back, it is time for a new battery. Here is how to do it safely at home.
- Power off the device and remove the back cover. Depending on your phone model, this may involve screws or a glued panel requiring gentle heat, similar to screen removal.
- Locate the battery. Most modern smartphones have the battery adhered to the chassis with pull tabs or strong adhesive. Look for adhesive pull strips first before resorting to any other method.
- Apply isopropyl alcohol if needed. Dissolving the adhesive with a small amount of isopropyl alcohol (90% or above) applied around the battery edges helps loosen it without force. Allow it to sit for 30 to 60 seconds before attempting removal.
- Use only plastic tools to pry. Metal tools risk puncturing a lithium-ion battery, which can cause fire or explosion. This is not an exaggeration. Plastic spudgers only.
- Lift the battery out gently and disconnect the connector.
- Seat the new battery, press the connector home, and reassemble.
Signs you genuinely need a replacement rather than just a software fix:
- Battery health below 80% (check under Settings on iPhone or via a third-party app on Android)
- Phone randomly shutting down above 20% charge
- Visible swelling or a back cover that no longer sits flush
- Device running unusually hot during normal use
Pro Tip: Take your old battery to a local electronics recycling point. Lithium-ion batteries cannot go into household waste and most UK supermarkets and councils have dedicated drop-off bins.
Cleaning ports and fixing slow performance
Not every fix requires opening your phone. Some of the most satisfying beginner phone fixing techniques cost nothing and take under five minutes.
Clearing a blocked charging port
Lint builds up in charging ports over months of use, and it is one of the most common reasons a phone suddenly stops charging or charges intermittently. The fix is simple. Use a can of compressed air to blow into the port in short bursts. If lint remains, use a wooden toothpick or a plastic dental pick to gently dislodge it. Cleaning with compressed air and a non-metallic tool clears lint without damaging the pins inside. Never use a metal pin, SIM card tool, or anything conductive. A single bent pin in a USB-C port can make charging impossible without a full port replacement.
Basic DIY phone troubleshooting for slow performance
Before assuming your phone needs a hardware fix, try these software-level steps:
- Clear cached data by going into Settings, then App Management, and clearing cache for heavy apps
- Boot into safe mode (hold power and volume down on most Android devices) to test whether a third-party app is causing slowdowns
- Check available storage. Phones running below 10% free storage slow down significantly as the operating system struggles to write temporary files
- Perform a soft reset by holding power and volume down simultaneously for 10 to 15 seconds
Pro Tip: If your phone runs noticeably faster in safe mode, a recently installed app is almost certainly the culprit. Uninstall your last three to five downloaded apps and test again.
Common beginner mistakes to avoid
This is the section that saves you the most money. DIY phone troubleshooting tips are only useful if you do not undo them with avoidable errors.
- Turning the phone on after a drop. Powering on a dropped phone risks a short circuit that can destroy the motherboard. Power it off immediately and leave it off until you have assessed the damage.
- Using metal tools to pry or clean. Metal scratches circuit boards, bends connectors, and punctures batteries. Remove metal tools from your repair kit entirely until you are experienced enough to know exactly when they are appropriate.
- Buying the cheapest possible replacement parts. Bargain screens with no quality checks frequently fail within weeks, produce yellow-tinted displays, or do not register touch correctly. Quality parts from reliable suppliers are not optional.
- Ignoring hairline cracks. Small cracks spread. Water enters. What starts as a minor cosmetic issue can become a moisture-damaged motherboard. A screen protector buys time, but replacement is the only real fix.
- Skipping reassembly testing. Always power on and fully test the device before applying adhesive and closing the case. Reopening a sealed phone risks new damage every time.
“Improper handling after dropping a phone can double or triple repair costs due to further internal damage. Motherboard repairs for a Samsung Galaxy S23 alone can cost between $100 and $200.”
Knowing your limits matters too. If you open a device and the fault clearly involves the motherboard or a soldered component, step back. Some repairs genuinely require professional equipment and a microscope. Recognising that boundary early is a skill in itself.
My take on starting out with phone repair
I have spoken to hundreds of first-time repairers, and the hesitation is always the same: fear of making things worse. That fear is not irrational. But what I have found is that the people who make things worse are almost always the ones who skipped preparation, not the ones who lacked skill.
When I started following safe DIY repair practices, the single biggest shift was slowing down. New repairers rush. They heat too fast, pry too hard, and skip the test-before-closing step. Patience is the skill. The technical knowledge comes quickly once you commit to doing the job properly.
My honest advice: start with a battery replacement on an older or spare phone before you attempt your main device. It teaches you how adhesive behaves, how connectors feel, and how to work inside a small space without panicking. By the time you tackle your primary phone, nothing feels unfamiliar.
The repair community is also genuinely helpful. Forums, YouTube teardowns, and subreddits dedicated to specific phone models contain more practical knowledge than most paid courses. Use them. And when something does not look right mid-repair, stop. Photograph the current state, ask a question online, and resume when you have an answer. Rushing a stalled repair is how expensive mistakes happen.
— Adewale
Start your repairs with Buy2fix
If you are ready to move from reading to doing, Buy2fix has everything you need to get started without overspending. The Buy2fix catalogue includes replacement parts for iPhones, Samsung, Huawei, Xiaomi, and OPPO, with quality checks before dispatch and free UK mainland shipping on every order. Whether you need a new screen assembly, a fresh battery, or a complete beginner’s tool kit, the parts are priced to make DIY repairs genuinely worth your time rather than just a frustration. There is also a growing library of beginner-friendly repair guides on the Buy2fix blog covering common models and fault types. The 30-day return policy means you can order with confidence, even when you are still learning which part you actually need.
FAQ
What tools do I need to start DIY phone repairs?
A basic kit should include magnetic-tip screwdrivers, plastic spudgers, a suction cup, fine tweezers, and a heat gun or hair dryer. An anti-static wrist strap is also worth having if you plan to work near the motherboard.
Is it safe to replace a phone battery at home?
Yes, provided you use plastic tools and avoid puncturing the battery. Lithium-ion batteries can catch fire if damaged, so never use metal to pry them out and always apply isopropyl alcohol to loosen stubborn adhesive rather than using force.
Why is my phone not charging after I cleaned the port?
If compressed air and a non-metallic pick did not resolve the issue, the charging port itself may be faulty or a pin may have been bent. At that point, a port replacement is the likely fix rather than further cleaning.
How much can I save by doing phone repairs myself?
DIY repairs save significantly compared to authorised service centres. Mid-range phone repairs typically cost £80 to £200 professionally, while sourcing your own parts and doing the work yourself can reduce that to the cost of the part alone.
When should a beginner avoid DIY phone repair?
If the fault involves the motherboard, soldered components, or water damage affecting internal circuits, professional repair is the safer choice. Attempting these without specialist tools and training risks permanent and irreversible damage.
Recommended
Let customers speak for us
Well made part very strong easy to fit great value for the money

Well packed, with fast shipping :)

Exactly what the doctor ordered…great color, comfort, and durability. Trust this watch band!

Brilliant strap, second purchase, bought bracelet before. Excellent value. Thank you

Great item for splitting your Audio signal

Outstanding product!
Next level customer service.

Very satisfied but the delivery needs to get more faster...

Good price,quick delivery

Best phone case ever! This is my second one as I broke my first. Would defo recommend

Great fitting Apple Watch bands

For Apple Watch Ultra 3 / 2 / 1 49mm RedPepper Armor Metal Case Integrated Silicone Watch Band(Steel Black White)

Good price and quick postage

Perfect fit.

Absolutely necessary

Second Purchase and still a very happy customer. Keep up the good work.
