

iPhone 12 Max Screen Replacement: Full Step-by-Step Guide
More than 40 percent of British smartphone owners will experience a cracked or damaged screen during their device’s life. Whether you are aiming to save money or extend the lifespan of your iPhone 12 Max, knowing the right steps makes all the difference. With straightforward instructions, you can confidently repair your own phone and avoid the high costs of professional repairs, gaining peace of mind and reliable performance in the process.
Table of Contents
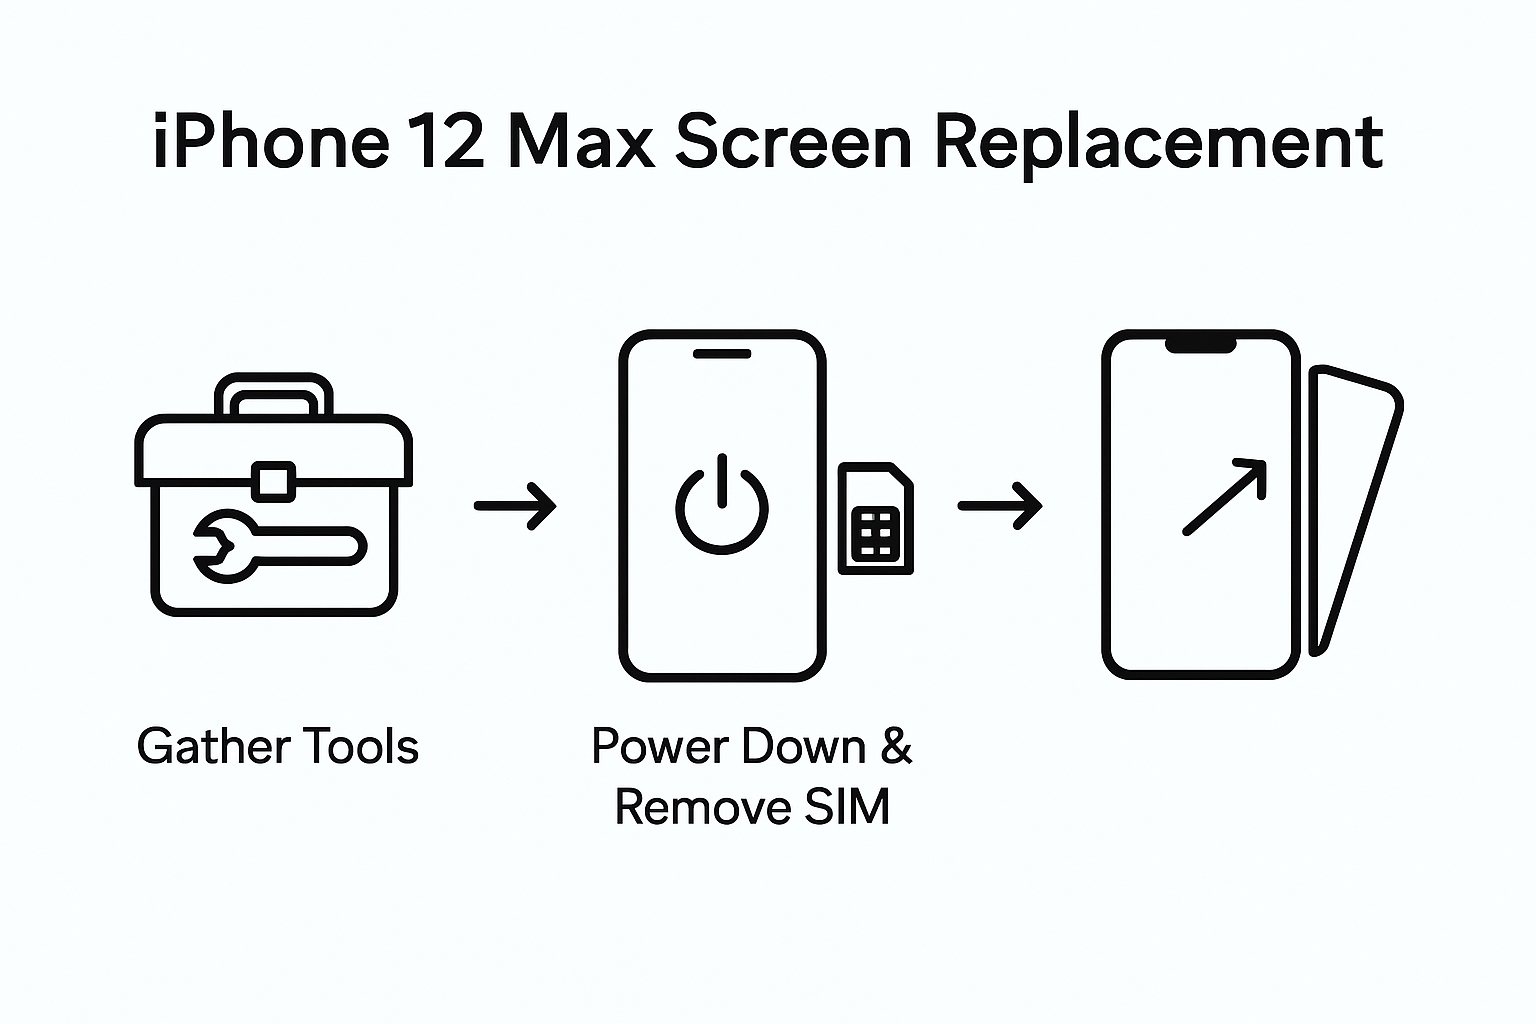
- Step 1: Gather Essential Tools and Compatible Replacement Screen
- Step 2: Power Down Device and Remove SIM Tray
- Step 3: Detach Screen Assembly Safely from Housing
- Step 4: Disconnect and Transfer Components to New Screen
- Step 5: Reassemble iPhone and Secure All Connections
- Step 6: Test Replacement Screen and Ensure Proper Functionality
Quick Summary
| Key Point | Explanation |
|---|---|
| 1. Gather Necessary Tools | Assemble precision tools like screwdrivers and a suction cup for screen replacement. High quality tools prevent damage during the repair. |
| 2. Power Down and Remove SIM Tray | Always turn off your device and safely remove the SIM tray before starting repairs to protect components and data. |
| 3. Detach Screen with Care | Use heat to soften adhesive and carefully lift the screen using suction and plastic tools to avoid damaging internal parts. |
| 4. Transfer Components Safely | Disconnect and handle delicate parts with precision, ensuring proper alignment when transferring to the new screen assembly. |
| 5. Test for Functionality Post-Repair | Power on the device after reassembling and check all display features, ensuring everything functions correctly before concluding the repair. |
Step 1: Gather Essential Tools and Compatible Replacement Screen
Before diving into your iPhone 12 Max screen replacement, you’ll need to collect the right tools and secure a compatible replacement screen. This preparatory stage is crucial for a smooth repair process and preventing potential damage to your device.
To begin, assemble a comprehensive repair kit that includes precision tools specifically designed for smartphone repairs. Your toolkit should contain a set of miniature screwdrivers with magnetic tips, including pentalobe and Phillips head variants, a suction cup for screen removal, plastic prying tools, tweezers, and an anti static wrist strap to protect sensitive electronic components. Professional mobile screen replacement guides recommend using high quality, non conductive plastic spudgers to minimise risk of electrical damage.
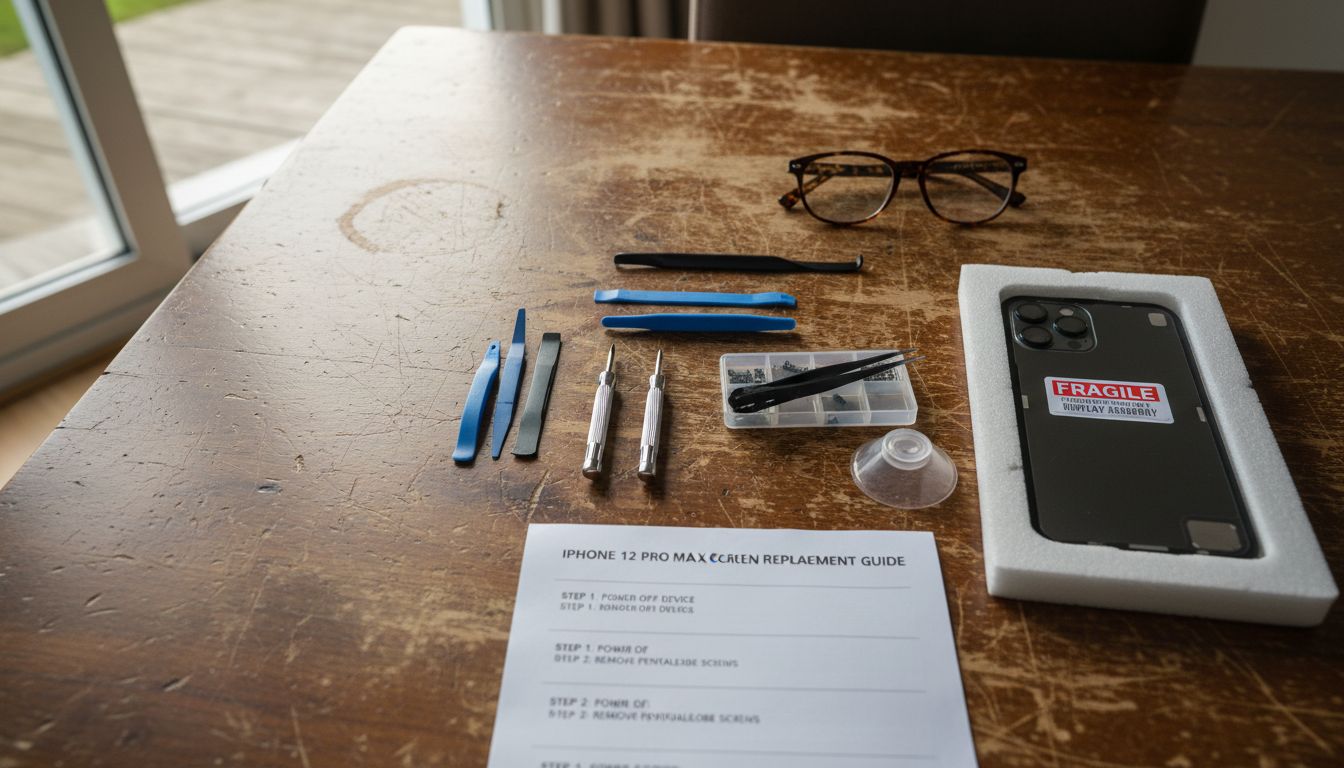
When selecting a replacement screen, ensure you purchase an exact match for the iPhone 12 Max model. Look for screens that come with pre installed flex cables and are sourced from reputable manufacturers. Avoid generic or low quality screens that might compromise touch sensitivity or display performance. The screen should include the digitiser, LCD panel, and front glass as an integrated assembly to guarantee proper functionality and seamless installation.
Warning: Always work in a clean, well lit environment with plenty of space to organise your tools and components. Static electricity can quickly damage sensitive electronic parts, so ground yourself using an anti static mat or wrist strap before beginning the repair process.
Step 2: Power Down Device and Remove SIM Tray
Before beginning any smartphone repair, powering down the device and removing the SIM tray are critical first steps that protect both your hardware and personal data. These initial actions help prevent electrical shorts and prepare the iPhone 12 Max for screen replacement.
To power down your device, press and hold the side button and volume down button simultaneously until the power off slider appears. Slide the power off indicator from left to right, allowing the iPhone to completely shut down. Once powered off, locate the SIM tray on the right side of the device. You will need a SIM ejection tool or a straightened paperclip to remove it. Gently insert the tool into the small pinhole next to the SIM tray, applying light and steady pressure until the tray pops out. If you are unsure about this process, mobile device screen replacement guides recommend consulting your device manual or watching manufacturer tutorials for precise instructions.
Warning: Handle the SIM tray and ejection tool with care to avoid scratching your device. Place the removed SIM card in a safe location where it will not be lost during the repair process. Ensuring your device is completely powered down eliminates risks of electrical damage and helps protect sensitive internal components during the screen replacement procedure.
Step 3: Detach Screen Assembly Safely from Housing
Removing the screen assembly from your iPhone 12 Max requires precision and careful technique to prevent damaging sensitive internal components. This critical step demands patience and a methodical approach to successfully separate the display from the device housing.
Begin by using a heat gun or specialised phone heating pad to gently warm the edges of the screen, which helps soften the adhesive securing the display. Apply consistent low heat for approximately 30 to 45 seconds, being careful not to overheat the device. Once warmed, use a suction cup to lift the bottom edge of the screen slightly, creating a small gap. Insert a thin plastic prying tool into this opening, working carefully to release the adhesive. DIY phone screen replacement guides recommend using a thin metal spudger to gradually separate the screen assembly, moving slowly around the device perimeter to avoid sudden force that might crack the existing display.
Warning: Work slowly and deliberately during this process. Rushing can lead to permanent damage to your iPhone 12 Max internal components. Ensure you maintain even pressure and keep your tools at a shallow angle to minimise the risk of puncturing or bending delicate flex cables connecting the screen to the main logic board.
Step 4: Disconnect and Transfer Components to New Screen
Transferring delicate electronic components from the old screen to the new assembly requires meticulous attention and steady hands. This crucial step ensures that all essential parts are carefully moved without causing damage to sensitive connections.
Begin by using precision tweezers to carefully disconnect the existing flex cables from the original screen assembly. Pay close attention to the earpiece speaker, front camera, and display connectors. Take a photograph of the current configuration before disconnection to serve as a reference point. How to install a new phone screen guides recommend placing removed components on an anti static mat to prevent potential electrical damage. Inspect each component carefully for signs of wear or damage before transferring them to the new screen assembly. Ensure you align the flex cables precisely and press them gently into their corresponding connection points on the new screen, making certain each connector sits flush and secure.
Warning: Electronic components are extremely fragile. Work in a clean, well lit environment with good magnification if possible. Use gentle pressure when reconnecting components and avoid touching electronic contacts directly with your fingers. Static electricity can permanently damage sensitive electronics, so ground yourself and work on a non conductive surface throughout the component transfer process.
Step 5: Reassemble iPhone and Secure All Connections
The final stage of screen replacement involves carefully reconstructing your iPhone 12 Max, ensuring every component is precisely aligned and securely connected. This delicate process requires patience and methodical attention to detail to guarantee a successful repair.
Begin by applying a thin layer of adhesive around the device housing, making certain it matches the original factory specification. Gently lower the new screen assembly into position, applying even pressure across all edges to create a uniform seal. Use soft plastic prying tools to eliminate any air bubbles or misalignments. Replacement screen guides for iPhone models recommend checking all flex cable connections multiple times to confirm they are seated correctly and fully inserted into their respective logic board sockets.
Warning: During reassembly, work in a clean environment and use soft lint free cloths to prevent dust or debris from contaminating the internal components. Apply minimal pressure when reconnecting components to avoid bending or damaging delicate connectors. If you encounter significant resistance when inserting any connection, stop immediately and carefully realign the components to prevent potential permanent damage to your device.
Step 6: Test Replacement Screen and Ensure Proper Functionality
After meticulously replacing your iPhone 12 Max screen, comprehensive testing is essential to confirm that all components are functioning correctly. This final verification stage will help you identify any potential issues arising from the screen replacement procedure.
Begin by powering on the device and performing a systematic functionality check. Test the touch responsiveness across the entire screen surface, paying close attention to edge sensitivity and multi touch recognition. Examine the display for colour accuracy, brightness levels, and any potential dead pixels or visual anomalies. LCD screen replacement guides recommend running diagnostic tests through the device settings and using third party screen testing applications to thoroughly evaluate display performance.
Warning: During testing, be prepared to troubleshoot potential connectivity issues. Check front camera functionality, proximity sensor performance, and ensure all touch gestures work seamlessly. If you notice any irregular behaviour, carefully review your reassembly process and consider consulting professional repair technicians if persistent problems emerge. Minor calibration might be necessary to restore optimal screen performance after replacement.
Equip Yourself for Expert iPhone 12 Max Screen Replacement
Facing the challenge of carefully detaching and transferring delicate components during your iPhone 12 Max screen replacement calls for the right tools and trusted parts. This guide highlights crucial steps such as using precision screwdrivers, managing flex cables, and ensuring proper sealing and testing after assembly. Avoid common pitfalls like poor-quality parts or damage from static electricity by choosing reliable repair components designed specifically for your device.
At Buy2fix, we understand these pain points and offer a comprehensive range of professional-grade Mobile Phone Repair Parts including high-quality LCD screens, flex cables, and other essential components. Benefit from our free UK Mainland shipping, rigorous quality control, and one-year warranty to confidently complete your DIY repair. Start your repair journey with peace of mind by exploring our selection today and take the next step to restore your iPhone 12 Max’s performance with ease. Visit Buy2fix now and secure the exact parts you need for a flawless replacement.
Frequently Asked Questions
How do I gather the tools needed for iPhone 12 Max screen replacement?
To replace your iPhone 12 Max screen, begin by assembling a repair kit that includes precision screwdrivers, a suction cup, plastic prying tools, tweezers, and an anti-static wrist strap. Collect these items before starting your repair to ensure a smooth process and minimise the risk of damaging your device.
What steps should I take before removing the screen of my iPhone 12 Max?
Before detaching the screen, always power down your iPhone 12 Max and remove the SIM tray to protect your hardware. Power down by pressing and holding the side button and volume down button until the power off slider appears, then slide to turn off.
How do I safely detach the screen assembly from my iPhone 12 Max?
Carefully detach the screen assembly by applying low heat around the edges to soften the adhesive. Then, use a suction cup to lift the screen slightly and insert a plastic prying tool to gradually separate the display from the device housing, taking care to avoid damaging internal components.
How should I handle the electronic components during the transfer to the new screen?
When transferring components, use precision tweezers to disconnect them carefully from the old screen. It’s important to photograph the configuration before removal and place the components on an anti-static mat to prevent electrical damage.
What should I check after replacing the screen of my iPhone 12 Max?
After replacing the screen, power on your device and conduct a comprehensive functionality test including touch responsiveness, colour accuracy, and display performance. Ensure all tactile functions work and troubleshoot any issues that arise during testing, adjusting as necessary.
What if I encounter issues during the iPhone 12 Max screen replacement process?
If you experience any persistent problems after the screen replacement, double-check all connections and the reassembly process. Make any necessary adjustments and consider consulting a professional if issues continue, ensuring optimal performance and functionality.
Recommended
- Replacement Screen for iPhone 11: Step-by-Step DIY Guide – buy2fix
- iPhone 11 Pro Replacement Screen: Complete DIY Guide – buy2fix
- iPhone 10 Screen Replacement: Step-by-Step DIY Guide – buy2fix
- How to Replace Screen iPhone 11: Complete Step-by-Step Guide – buy2fix
- Akkus reparieren Guide: So bringen Sie Ihre Akkus zurück ins Leben - accu.blog
Let customers speak for us
For Samsung Galaxy A26 SM-A266B Original Earpiece Speaker with Cable

Very good communication throught. Good product

Well made part very strong easy to fit great value for the money

Well packed, with fast shipping :)

Exactly what the doctor ordered…great color, comfort, and durability. Trust this watch band!

Brilliant strap, second purchase, bought bracelet before. Excellent value. Thank you

Great item for splitting your Audio signal

Outstanding product!
Next level customer service.

Very satisfied but the delivery needs to get more faster...

Good price,quick delivery

Best phone case ever! This is my second one as I broke my first. Would defo recommend

Great fitting Apple Watch bands

For Apple Watch Ultra 3 / 2 / 1 49mm RedPepper Armor Metal Case Integrated Silicone Watch Band(Steel Black White)

Good price and quick postage

