

Restore your laptop: top fixes for a broken charging port
TL;DR:
- Diagnostic checks including cable testing and physical inspection help identify port issues.
- Proper tools and quality parts are essential for safe and effective DIY repair.
- Complex or burnt ports require professional repair to avoid further damage.
Your laptop suddenly won’t charge, and the clock is ticking. Whether you’re mid-project or preparing for an important meeting, a faulty charging port is one of the most disruptive hardware problems a laptop owner can face. The good news is that not every dead port means an expensive repair bill. Many issues are fixable at home with the right tools and a clear method. This guide walks you through diagnosing the fault accurately, gathering the correct parts, attempting safe DIY fixes, and knowing precisely when to hand things over to a professional.
Table of Contents
- How to diagnose a broken charging port
- Essential tools and parts for charging port repair
- DIY fixes for the most common charging port problems
- When to seek professional repair or replacement
- Our view: what every laptop owner should know before attempting charging port repair
- Need reliable charging port repair parts? We can help
- Frequently asked questions
Key Takeaways
| Point | Details |
|---|---|
| Check for simple fixes | Always diagnose with a different charger and clean the port before attempting repairs. |
| Use the right tools | Having proper repair kits and quality parts is essential for safe, successful results. |
| Know your limits | Recognise warning signs that require expert service and avoid DIY on complex, high-risk issues. |
| Protect your data | Back up your device before opening or repairing any hardware to prevent loss. |
How to diagnose a broken charging port
Before you reach for a screwdriver, you need to confirm the charging port is actually the problem. Jumping straight into disassembly without a proper diagnosis is one of the most common mistakes DIY repairers make, and it often leads to unnecessary damage.
Start with these quick checks:
- Try a different charger or cable. A frayed or failing cable mimics port failure almost perfectly. Swap it out first.
- Inspect the port for debris. Fluff, dust, and pocket debris are surprisingly common culprits. A blocked port prevents a solid connection.
- Wiggle the connector gently. If charging only works at a specific angle, the port is likely loose or physically damaged internally.
- Check the charging indicator. No light, no sound, and no battery icon response all point toward a port fault rather than a software glitch.
- Look for physical damage. Bent pins, a cracked housing, or a port that moves when touched are clear signs of mechanical failure.
Once you have ruled out the charger and cable, examine the port closely under good lighting. Look for blackening, melted plastic, or any discolouration around the socket. Burnt ports or an odd smell suggests internal trace damage that requires a professional, not a DIY attempt. Traces are the tiny copper pathways on the circuit board that carry power; once these are damaged, home repair becomes genuinely dangerous.
Pro Tip: Before assuming the port is dead, plug in your charger and gently move the cable in different directions. If the battery percentage briefly changes, the port is likely loose rather than completely failed, which is often a simpler fix.
For guidance on keeping ports in good working order, our article on cleaning charging ports covers safe techniques in detail. If you are already confident the port is faulty, our full charging port repair guide provides a thorough walkthrough.
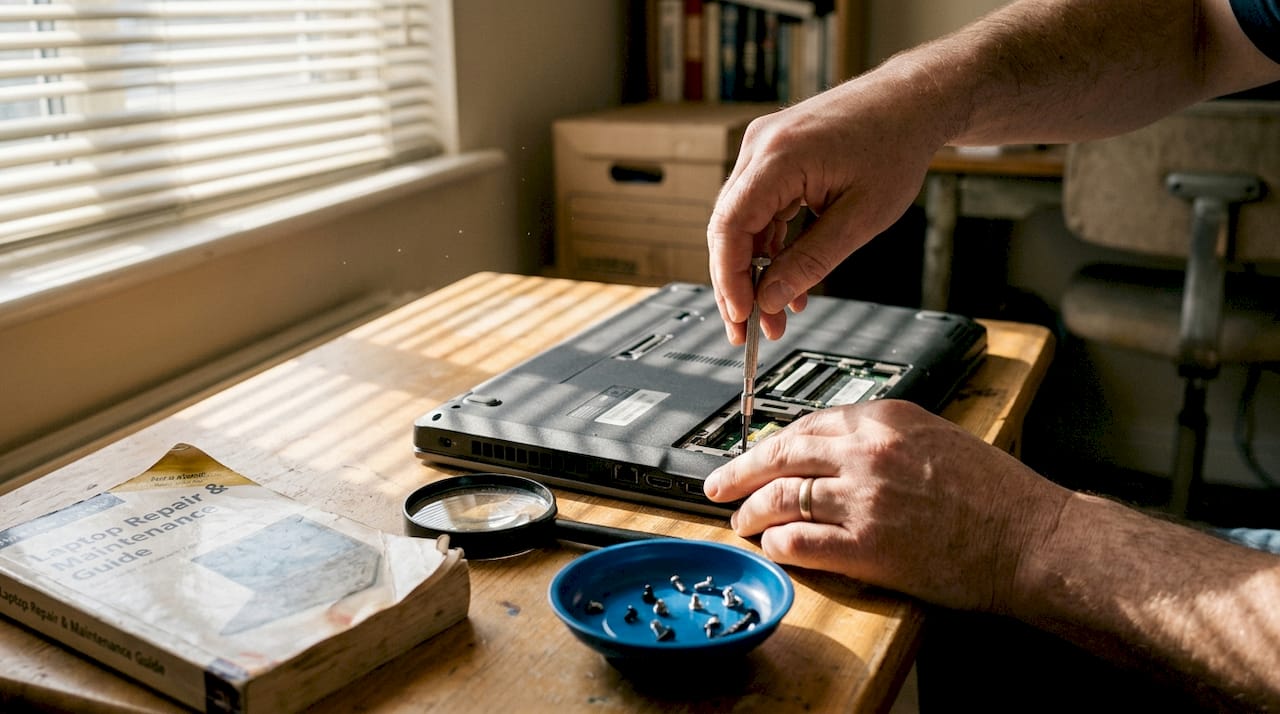
Essential tools and parts for charging port repair
With the fault confirmed, you need the right tools and parts before proceeding with any repair attempt. Attempting a repair with the wrong equipment is a fast route to stripped screws, broken clips, and cracked circuit boards.
Here is what a solid basic toolkit looks like:
- Precision screwdriver set (including Torx, Phillips, and pentalobe heads for Apple devices)
- Plastic spudgers and opening picks to separate panels without scratching or cracking housings
- Fine-tipped tweezers for handling small connectors and flex cables
- Magnifying glass or loupe to inspect tiny components and pin damage
- Isopropyl alcohol (90% or above) for cleaning contacts safely
- Compressed air canister for blasting debris from the port
For USB-C ports specifically, the repair stakes are higher. USB-C ports have fine, delicate pins and intricate internal structures, meaning a hot air rework station and fine soldering tools are often required for a proper repair. This is a significant step up from basic DIY and requires practice to execute safely.
Apple laptops add another layer of complexity. MagSafe and USB-C ports on MacBooks are typically integrated into an I/O board (a small secondary circuit board), meaning you are replacing a module rather than just a port socket. You will need the correct replacement I/O board or charging port flex cable for your specific model.
Pro Tip: Before ordering any part, cross-reference your laptop’s exact model number, which is usually found on the base of the device. A part designed for a slightly different model revision may not fit correctly, even if it looks identical.
Sourcing quality parts matters enormously. Generic, unbranded components from unknown suppliers frequently fail within weeks and can cause further damage to your laptop’s motherboard. Our guide on essential repair tools covers the full toolkit in more detail, and our charging port repair guide explains which parts suit which repair scenarios.
DIY fixes for the most common charging port problems
Once you have your tools and parts ready, it is time to address the issue using safe, effective DIY methods. Always power down your laptop and disconnect the battery before working on any internal component.
- Clean out debris. Use a wooden toothpick to gently dislodge compacted fluff from the port opening. Follow up with a soft brush or a short burst of compressed air. Never use metal objects inside the port.
- Straighten bent pins. If you can see a misaligned pin inside a USB-C or older barrel port, use a fine-tipped precision tool to carefully reposition it. Work slowly and use magnification.
- Reseat loose connectors. On some laptop models, the charging port is a plug-in module connected via a ribbon or flex cable. Opening the base panel and firmly reseating this connector resolves intermittent charging without replacing any parts.
- Replace the charging port module. If the port is physically broken and the connector is a removable type, order the correct replacement part and swap it out. Disconnect the old flex cable, connect the new one, and reassemble carefully.
- Replace the I/O board. On Apple and many modern laptops, the charging port is soldered to a small board. Apple and USB-C ports may need full I/O board replacement per official guidance, which involves removing several internal components in a specific sequence.
Important: If you notice burnt marks, discolouration, or a chemical smell at any point during your repair, stop immediately. Continuing with DIY on a thermally damaged board risks electrical shorts, data loss, and in rare cases, fire.
For a full walkthrough of safe cleaning methods before you open the device, our article on how to safely clean a charging port is an excellent starting point.
When to seek professional repair or replacement
If DIY fixes have not worked or you recognise a high-risk issue, it is vital to know when to turn to a professional. Some repairs simply exceed what is safe or practical at home, and recognising that boundary saves you money in the long run.
| Factor | DIY repair | Professional repair |
|---|---|---|
| Cost | Lower upfront, parts only | Higher, includes labour |
| Risk | Higher without experience | Lower with trained technician |
| Warranty | May void existing warranty | Often includes repair guarantee |
| Tools required | Basic to intermediate | Specialist soldering equipment |
| Turnaround | Immediate if parts are ready | Typically 1 to 5 working days |
Red flags that indicate you should seek professional help immediately:
- A burnt smell or visible heat damage around the port or motherboard
- The laptop does not respond to multiple different chargers
- Multiple USB or I/O ports have stopped working simultaneously
- You own an Apple MacBook with a MagSafe or USB-C port showing fault signs
- The port has physically broken away from the motherboard
Damaged traces, burnt ports, or complex USB-C and MagSafe repairs should always be referred to a qualified technician. When choosing a repair service, look for one that uses genuine or quality-tested aftermarket parts, provides a written repair warranty, and offers clear data safety assurances before they open your device.
Always back up your data before handing your laptop to any repair service. It is a simple step that many people skip, and it can save enormous stress if something unexpected happens during the repair process. Our step-by-step repair advice can help you decide which route is right for your specific situation.
Our view: what every laptop owner should know before attempting charging port repair
Most repair guides focus on the technical steps and stop there. What they rarely address is the honest self-assessment that should happen before you even open your laptop.
We have seen too many cases where a straightforward loose connector became a motherboard replacement because someone skipped the diagnosis phase or used the wrong tool for their specific model. Apple laptops in particular attract overconfident DIY attempts, largely because the repair looks simple from the outside. It rarely is.
The detail that catches most people off guard is data. A charging port fault feels like a hardware inconvenience, but the moment you start working near a motherboard without a recent backup, you are gambling with everything stored on that drive. Hardware can be replaced. Personal files, project work, and photographs often cannot.
Our honest advice: read the step-by-step port repair advice for your specific model before touching anything. Assess your actual skill level, not your optimistic one. And if the diagnosis points to burnt traces or a complex board-level repair, treat professional help as an investment rather than an admission of defeat. The cost of getting it wrong is almost always higher than the cost of getting it right the first time.
Need reliable charging port repair parts? We can help
Now you know how to tackle your charging port problem, finding the right parts should be the easy part. At buy2fix, we stock a wide range of quality charging port components, flex cables, and I/O board replacements for laptops and mobile devices. Every part is quality-checked before dispatch, and we offer free UK mainland shipping with a one-year warranty on components. Whether you are a confident DIY repairer sourcing a specific module or simply want reassurance that you are buying from a trusted UK supplier, we are here to help you get your device back up and running without unnecessary hassle or expense.
Frequently asked questions
Can I fix a laptop charging port myself?
You can resolve simple issues such as debris blockages or loose connectors at home, but burnt traces or complex ports require professional tools and expertise beyond typical DIY capability.
How do I know if my charging port is beyond DIY repair?
If you notice a burning smell, see blackened or melted areas around the port, or the laptop fails to respond to several different chargers, burnt ports indicate trace damage and you should seek expert assessment immediately.
Do Apple laptops require special steps to fix the charging port?
Yes, MagSafe and USB-C ports in Apple laptops are typically integrated into an I/O board, meaning replacement follows official model-specific procedures rather than a simple socket swap.
Will repairing the charging port void my warranty?
DIY repairs on a laptop that is still under manufacturer warranty can void your coverage, so it is worth checking your policy and opting for an authorised repair service if the device is still within its warranty period.
Is it safe to use my laptop if the charging port is damaged?
Using a laptop with a visibly damaged or burnt charging port carries real electrical risk and can cause further internal damage, so it is best to stop using it until the fault has been properly assessed and repaired.
Recommended
- How to Fix Charging Port: A Step-by-Step Guide – buy2fix
- Broken Charging Port iPad: 25% Repair Cases & Best DIY Fixes – buy2fix
- How to Clean Charging Ports for Optimal Device Performance – buy2fix
- Solve common mobile phone issues: practical repair guide – buy2fix
- Laptopscherm vervangen – De Complete Gids voor 2026 - TPPC Roeselare
Let customers speak for us
For Samsung Galaxy A26 SM-A266B Original Earpiece Speaker with Cable

Very good communication throught. Good product

Well made part very strong easy to fit great value for the money

Well packed, with fast shipping :)

Exactly what the doctor ordered…great color, comfort, and durability. Trust this watch band!

Brilliant strap, second purchase, bought bracelet before. Excellent value. Thank you

Great item for splitting your Audio signal

Outstanding product!
Next level customer service.

Very satisfied but the delivery needs to get more faster...

Good price,quick delivery

Best phone case ever! This is my second one as I broke my first. Would defo recommend

Great fitting Apple Watch bands

For Apple Watch Ultra 3 / 2 / 1 49mm RedPepper Armor Metal Case Integrated Silicone Watch Band(Steel Black White)

Good price and quick postage

