

How to Replace iPhone Screen Safely and Efficiently
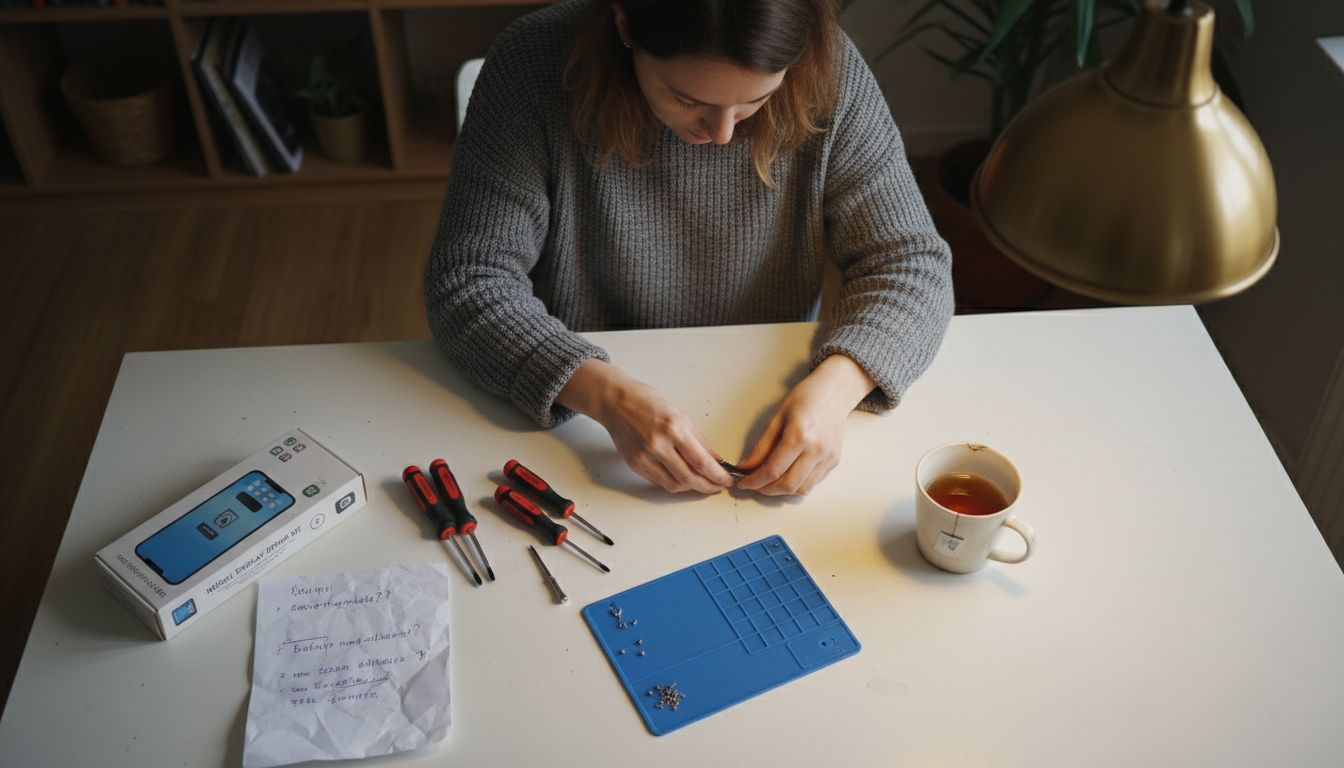
Cracked screens are a common frustration for iPhone users across the United Kingdom, but sourcing the right tools and parts can turn this headache into an opportunity for skill building and real savings. Learning how to perform your own screen replacement means controlling costs and getting hands-on experience with every step. With a carefully assembled toolkit and genuine compatible components, you can take charge of your repairs and confidently restore your device without paying professional repair fees.
Table of Contents
- Step 1: Gather The Correct Tools And Replacement Parts
- Step 2: Power Down And Secure Your iPhone For Repair
- Step 3: Remove The Damaged Screen Carefully
- Step 4: Install The New iPhone Screen Precisely
- Step 5: Test Display And Touch Functions Thoroughly
- Step 6: Reassemble Your iPhone And Confirm Quality
Quick Summary
| Key Point | Explanation |
|---|---|
| 1. Gather essential tools | Assemble a specialised toolkit to ensure a safe and effective screen replacement. Correct tools prevent damage during the process. |
| 2. Power down and secure device | Completely power off your iPhone to prevent electrical risks, and create a stable, well-organised workspace for the repair. |
| 3. Remove the damaged screen carefully | Use precision and patience during the screen removal to avoid damaging delicate components. Document each step with photographs. |
| 4. Install new screen accurately | Ensure correct component alignment and reinstallation to maintain functionality. Test functions before completing the assembly. |
| 5. Conduct thorough functional testing | Test all display and touch functions systematically to catch any issues early. Use diagnostic applications for comprehensive checks. |
Step 1: Gather the correct tools and replacement parts
Preparing for an iPhone screen replacement requires carefully assembling a specialised toolkit and compatible replacement screen. Your goal is to create a controlled, precise workspace that minimises potential damage during the repair process.
To successfully replace your iPhone screen, you’ll need several key tools and components. Specialised phone repair tools are critical for a safe and efficient repair. Essential equipment includes:
- Pentalobe Screwdriver (P2) for removing external screws
- Tri-Point Y000 Screwdriver for internal component access
- Plastic opening tools or spudger for careful component separation
- Precision tweezers for handling delicate electronics
- Suction cup to help lift the screen
- Electrostatic discharge (ESD) protection mat and wrist strap
- Isopropyl alcohol for cleaning adhesive residue
- Heat source like an iOpener or heat gun to soften adhesive
- Screw organiser to prevent losing small components
When selecting a replacement screen, ensure it is fully compatible with your specific iPhone model. Some screens come as complete assemblies, while others might require transferring small components like the home button, front-facing camera, and sensors.
To help you select the right replacement screen, here is a comparison of the two main screen types:
| Screen Type | Includes Components | Installation Effort | Typical Suitability |
|---|---|---|---|
| Complete Assembly | Home button, camera, sensors pre-fitted | Easier and quicker | Most users and beginners |
| Bare Screen | No pre-installed components | Requires parts transfer and precision | Experienced technicians only |
Careful preparation prevents costly mistakes during screen replacement.
Top tip: Always work in a clean, well-lit area with magnetic screw mats to prevent losing tiny screws during your repair.
Step 2: Power down and secure your iPhone for repair
Preparing your iPhone for screen replacement begins with a crucial safety step: completely powering down the device and securing it for careful disassembly. Powering down prevents electrical risks during the intricate repair process.
To power down your iPhone, follow these precise steps:
- Backup your device data to prevent potential loss
- Press and hold the side power button and either volume button
- Slide the power off slider when it appears on screen
- Wait 30 seconds to ensure complete shutdown
Once powered down, you’ll want to create a stable workspace for your repair. Choose a clean, well-organised surface with good lighting and minimal distractions. Consider using:
- A soft, lint-free work mat
- Magnetic screw organisers
- Good overhead lighting
- Anti-static workspace
Proper device preparation minimises the risk of accidental damage during screen replacement.
Professional tip: Take a high-resolution photo of your iPhone’s interior layout before disassembly to help with precise reassembly later.
Step 3: Remove the damaged screen carefully
Removing a cracked or damaged iPhone screen requires precision, patience, and careful technique. Screen removal involves strategic component handling to prevent additional damage during the repair process.
Begin by preparing your workspace with all necessary tools:
- Pentalobe screwdriver
- Plastic opening tools
- Suction cup
- Heating device (iOpener or heat gun)
- Tweezers
- Anti-static mat
Follow these detailed steps for safe screen removal:
- Remove external Pentalobe screws near the charging port
- Apply gentle heat to soften adhesive using iOpener
- Position suction cup carefully on the screen
- Create initial separation by gently lifting screen edge
- Disconnect battery connector to prevent electrical risks
- Carefully disconnect display cables
Precision and gentle handling are crucial during iPhone screen removal.
Professional tip: Take photographs of each disassembly stage to create a visual reference for reassembly and ensure you remember exact component placement.
Step 4: Install the new iPhone screen precisely
Precision is paramount when installing a new iPhone screen to ensure proper functionality and prevent potential damage. Screen installation requires meticulous component transfer and careful alignment of delicate electronic components.
Follow these critical steps for a successful screen installation:
-
Transfer sensitive components from old screen
- Home button
- Front-facing camera
- Proximity sensors
- Align display connectors carefully
- Reconnect battery connector
- Apply new adhesive strips
- Position screen precisely in device frame
- Secure with replacement screws
Key considerations during installation include:
- Use non-metallic tools to prevent short circuits
- Apply gentle, even pressure when connecting cables
- Ensure no cables are pinched or twisted
- Check screen sits completely flush with device frame
Precise alignment prevents future functionality issues and potential damage.
Professional tip: Test all screen functions thoroughly before fully sealing the device to catch any potential installation errors early.
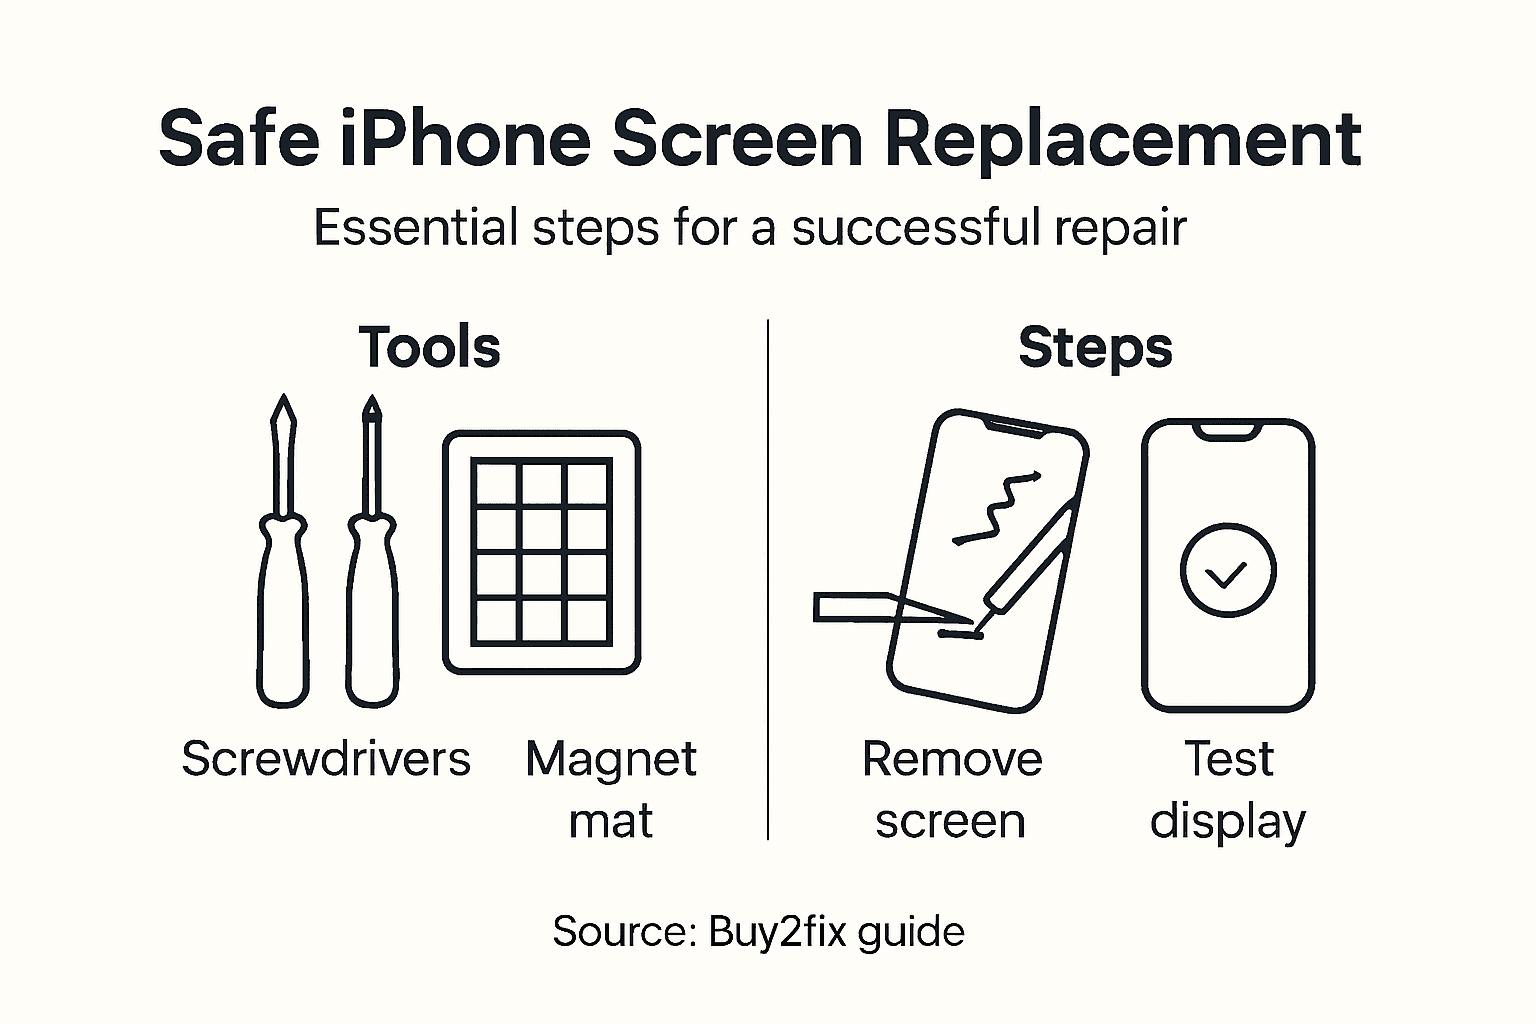
Step 5: Test display and touch functions thoroughly
After carefully installing your new iPhone screen, comprehensive functional testing becomes crucial to ensure everything operates correctly. Display testing requires systematic verification of all screen components and interactive features.
Conduct these detailed functional checks:
-
Power on and visual inspection
- Check screen illumination
- Verify no dead pixels
- Confirm colour accuracy
-
Touch responsiveness test
- Check all screen areas register touch
- Test multi-touch capabilities
- Verify gesture recognition
-
Sensor functionality
- Test proximity sensor
- Check auto-brightness
- Validate ambient light sensor
Key testing areas include:
- Screen brightness uniformity
- Colour rendering accuracy
- Complete touch sensitivity
- Seamless sensor integration
- Smooth display transitions
Thorough testing prevents future device performance issues.
Professional tip: Run multiple diagnostic applications to comprehensively verify screen performance across different usage scenarios.
Step 6: Reassemble your iPhone and confirm quality
The final stage of your iPhone screen replacement involves meticulously reassembling the device and verifying its complete functionality. Precise reassembly prevents potential device failures and ensures a successful repair.
Follow these critical reassembly steps:
-
Replace all original screws
- Use correct screw sizes
- Match original placement
- Apply gentle, consistent torque
-
Reconnect internal cables
- Ensure proper alignment
- Apply minimal pressure
- Check secure connections
-
Reapply adhesive strips
- Align screen precisely
- Ensure even adhesion
- Remove any air bubbles
Key quality confirmation checks include:
- Verifying screen alignment
- Testing all button functions
- Checking camera and sensor performance
- Confirming touch responsiveness
- Assessing display colour accuracy
A methodical approach guarantees a successful iPhone screen replacement.
Professional tip: Document your repair process with photographs and keep original components as potential troubleshooting references.
Here’s a quick summary of each critical phase in the iPhone screen replacement process:
| Step | Primary Objective | Main Risk | Professional Tip |
|---|---|---|---|
| Gather tools | Ensure all required equipment is available | Using incorrect tools can damage parts | Work in a clean, well-lit area |
| Power down & secure | Prevent electrical hazards and data loss | Starting repair while powered can cause shorts | Take photos of internal layout |
| Remove screen | Detach damaged screen without harming components | Damage to connectors or logic board | Document each stage with photographs |
| Install new screen | Position screen and connect components accurately | Misalignment can affect function | Test before full reassembly |
| Test functions | Verify display and touch response | Minor faults can be missed if skipped | Use diagnostic apps for thoroughness |
| Reassemble & confirm | Complete assembly and check device operation | Loose screws or misconnected parts | Retain old components for reference |
Get Ready to Replace Your iPhone Screen with Confidence
Replacing your iPhone screen safely and efficiently requires not only the right skills but also the right parts and tools. The article highlights key challenges such as carefully handling delicate display connectors, transferring sensitive components like the home button and front camera, and ensuring precise alignment to prevent functionality issues. If your goal is a seamless repair without risking further damage, choosing high-quality replacement parts and specialised tools is essential.
At Buy2fix, we understand these pain points and provide a comprehensive range of premium iPhone repair parts that include LCD screens, display assemblies, flex cables, and more. Our selection supports both DIY enthusiasts and professional technicians aiming for flawless results. Benefit from our free UK Mainland shipping, competitive pricing, and a one-year warranty to give you peace of mind during your repair. Explore our Mobile Phone Repair Parts category now and equip yourself with everything needed to complete your replacement efficiently and correctly.
Do not let uncertainty hold you back from fixing your device successfully. Visit Buy2fix today to access verified parts and expert-level components that make a difference. Start your repair project with confidence and avoid common pitfalls by sourcing trusted products at your fingertips.
Frequently Asked Questions
What tools do I need to replace my iPhone screen safely and efficiently?
To replace your iPhone screen, you will need a Pentalobe Screwdriver, a Tri-Point Y000 Screwdriver, plastic opening tools, tweezers, a suction cup, and an ESD protection mat. Gather these tools in a clean workspace to ensure a smooth repair process.
How do I prepare my iPhone before starting a screen replacement?
Begin by backing up your device data to prevent potential loss. Next, power down the iPhone completely by pressing and holding the side power button and a volume button, then sliding the power off slider when it appears.
What steps should I take when removing the damaged iPhone screen?
To remove the broken screen, first, remove the external Pentalobe screws located near the charging port using the screwdriver. Then apply gentle heat to soften the adhesive, use the suction cup to lift the screen, and carefully disconnect the internal cables to avoid damaging components.
How can I ensure proper installation of the new iPhone screen?
Align the display connectors carefully and transfer sensitive components like the home button from the old screen to the new one. After connecting everything, secure the screen in place with new adhesive strips and replace the screws to complete the installation.
What should I check after installing the new screen?
Conduct a thorough functional test to verify the display and touch responsiveness of the new screen. Check for any display issues, test touch capabilities across the entire screen, and confirm that all sensors are functioning properly before sealing the device.
How can I avoid issues during the reassembly of my iPhone?
During reassembly, replace all screws in their original positions and ensure that all internal cables are correctly connected. Take your time to verify that the screen is aligned correctly and that there are no loose connections to prevent future device issues.
Recommended
- iPhone Screen Replacement Near Me: Complete DIY Guide – buy2fix
- Replacement Screen for iPhone 11: Step-by-Step DIY Guide – buy2fix
- How to Replace Screen on iPhone 11 Easily and Safely – buy2fix
- How to Replace iPhone 11 Screen Safely and Easily – buy2fix
- How to Install Seiko Sapphire Crystal Step by Step – Ottoman Prieur
- Step by Step Stained Glass Repair for Restoration Success -
- Veiligheid bij Zonnepaneelinstallatie: Complete Gids – Holland Electric Duurzaam
Let customers speak for us
Well made part very strong easy to fit great value for the money

Well packed, with fast shipping :)

Exactly what the doctor ordered…great color, comfort, and durability. Trust this watch band!

Brilliant strap, second purchase, bought bracelet before. Excellent value. Thank you

Great item for splitting your Audio signal

Outstanding product!
Next level customer service.

Very satisfied but the delivery needs to get more faster...

Good price,quick delivery

Best phone case ever! This is my second one as I broke my first. Would defo recommend

Great fitting Apple Watch bands

For Apple Watch Ultra 3 / 2 / 1 49mm RedPepper Armor Metal Case Integrated Silicone Watch Band(Steel Black White)

Good price and quick postage

Perfect fit.

Absolutely necessary

Second Purchase and still a very happy customer. Keep up the good work.
