

Fixing iPad Mini screen: your complete DIY guide
TL;DR:
- Replacing the full LCD and digitizer assembly is the safest method for iPad Mini screen repairs, especially on laminated models.
- Using proper tools, maintaining controlled workspace conditions, and testing before sealing increase the chances of a successful DIY fix.
Fixing an iPad Mini screen sounds straightforward until you actually open one up. The compact form factor, the fused display assembly, and the ribbon cables packed into barely any space make this repair genuinely unforgiving for the unprepared. Whether you are dealing with a spiderweb crack across the glass, a totally dead display, or touch response that has stopped working entirely, this guide walks you through what you actually need to know. You will find realistic advice on tools, parts, process, cost, and when to hand it over to someone else.
Table of Contents
- Key takeaways
- Fixing iPad Mini screen: understanding the damage first
- Tools, parts, and workspace setup
- Step-by-step screen replacement process
- iPad Mini screen replacement cost: DIY vs professional repair
- Common pitfalls and post-repair checks
- My honest take on DIY iPad Mini repair
- Get the right parts from Buy2fix
- FAQ
Key takeaways
| Point | Details |
|---|---|
| Full assembly is safer | Replacing the full LCD and digitiser unit reduces risk of further damage compared to glass-only repairs. |
| Workspace conditions matter | A warm room and controlled heat source around 60°C for adhesive removal prevents cracking and poor adhesive release. |
| Test before you seal | Power the device and check touch, brightness, and Touch ID before applying final adhesive to avoid rework. |
| Parts quality varies widely | Source replacement screens from reputable suppliers with batch-tested assemblies to avoid premature failure. |
| DIY has clear cost benefits | Quality replacement parts typically cost far less than Apple out-of-warranty service fees, but skill and patience are required. |
Fixing iPad Mini screen: understanding the damage first
Not all screen damage is the same, and treating it as if it is will cost you time or the device itself. The iPad Mini display consists of two primary components: the digitiser (the touch layer) and the LCD (the image layer). On newer generations from the iPad Mini 4 onwards, these are laminated together as a single fused unit, which changes everything about how you approach the repair.
If your screen is cracked but touch still works and the image looks fine, you technically have glass damage only. On older non-laminated iPads, glass-only replacement was a realistic option. On the Mini 4, 5, and 6, digitiser-only replacements risk damaging the LCD or backlight films underneath, leading to permanent display defects. The two layers simply cannot be separated cleanly without specialist equipment.
The recommended approach for most DIY scenarios is to replace the full front assembly, meaning the glass, digitiser, and LCD as one unit:
- Glass crack with no image or touch issues: Could technically be glass-only, but risky on laminated models
- Touch unresponsive but display visible: Digitiser failure, full assembly replacement needed
- Blank or black screen with backlight visible: LCD failure, full assembly replacement needed
- Lines, colour banding, or dead pixels: LCD damage, full assembly replacement needed
- Both image and touch completely dead: Almost certainly requires full assembly replacement
Pro Tip: If your screen has any image at all, take a photo before disassembly. It helps you verify whether the new screen is correctly calibrated for brightness and colour after installation.
For most people attempting a DIY iPad Mini screen repair, sourcing a full assembly replacement and swapping it out as a single unit is both safer and more practical than attempting partial repairs.
Tools, parts, and workspace setup
You cannot do this repair with a kitchen knife and goodwill. The right tools make the difference between a successful fix and a device with a torn flex cable or a cracked new screen.
Here is what you need before you start:
- Heat gun or iOpener tool: For softening the adhesive around the screen perimeter
- Suction cups: To lift the screen gently once adhesive is softened
- Plastic pry picks or spudgers: To work around the frame without scratching or gouging
- Pentalobe and Phillips screwdrivers: Typically P2 and PH000 sizes for iPad Mini internals
- ESD-safe tweezers: For handling connectors and small components without static discharge
- Pre-cut adhesive strips: For resealing the screen after replacement
- Anti-static mat and wrist strap: To protect controller ICs from silent static damage during cable handling
Using correct tools such as plastic pry picks and ESD-safe tweezers significantly improves your chances of a clean repair. Metal tools against the iPad Mini frame cause scratches at best and frame warping at worst.
Sourcing your replacement screen deserves serious attention. Many third-party screens are reverse-engineered or refurbished, and quality varies enormously. Look for parts labelled as full assembly with pre-applied gasket tape and proper camera cutouts. Check whether the seller provides batch-testing documentation or any form of quality guarantee. Buying the cheapest option available is rarely a saving when you account for the labour of doing the repair twice.
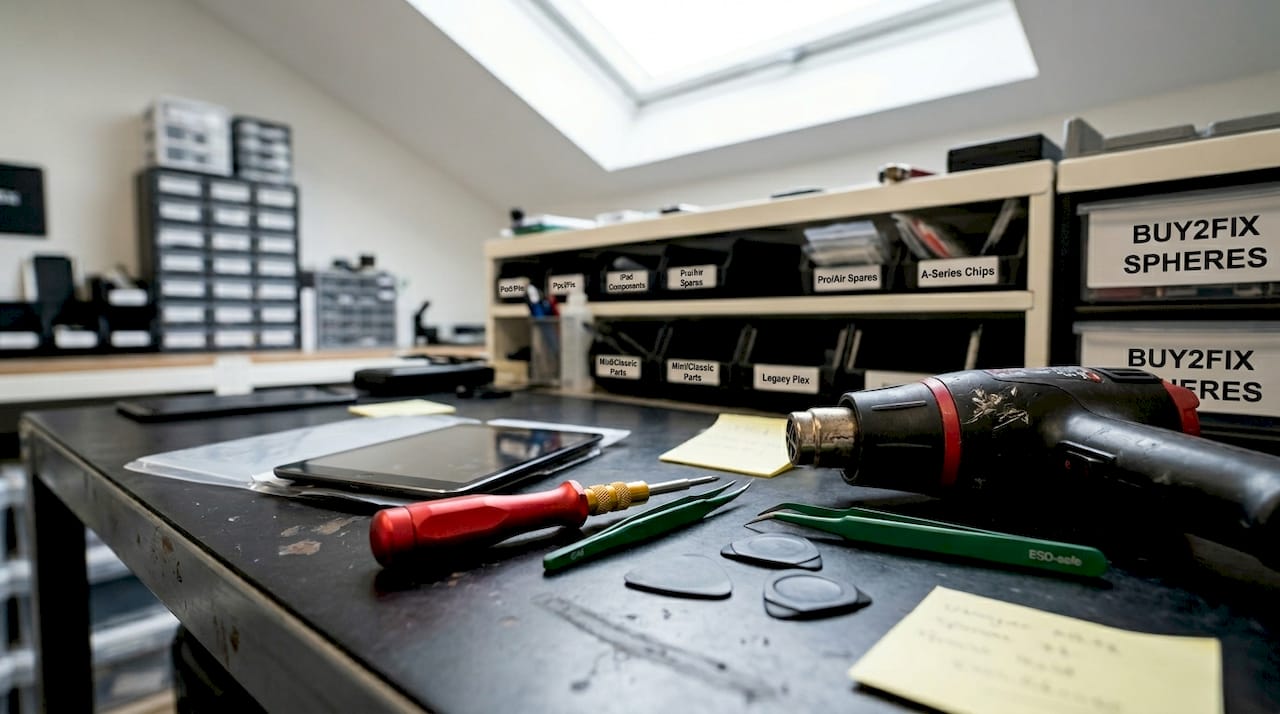
Workspace conditions are frequently overlooked. Ideal repair temperature is around 35°C for the room itself, and adhesive removal should use controlled heat of around 60°C applied for roughly 90 seconds rather than open flames or uncontrolled heat sources. Cold workshops below 18°C significantly increase the risk of cracking the existing glass during removal and cause adhesive to resist lifting cleanly. A warm room, a clean flat surface, good lighting, and a magnetic parts tray will serve you well.
Pro Tip: Before applying any heat, cover the device’s speaker grille and connectors with low-tack tape to prevent any displaced adhesive particles from entering the internals.
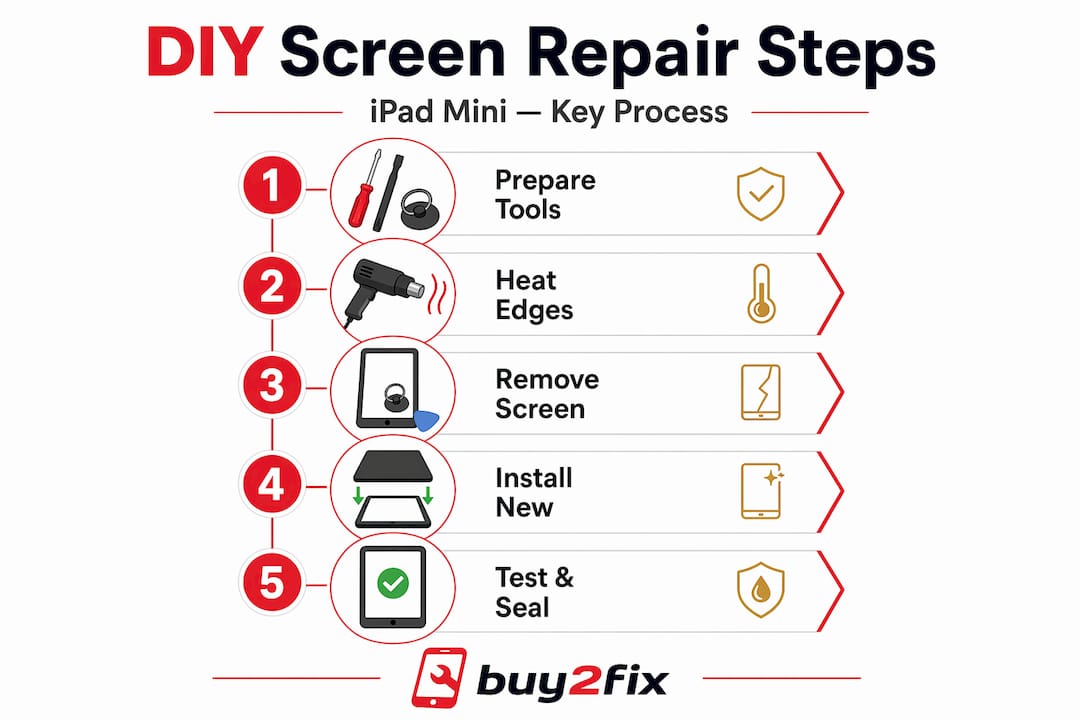
Step-by-step screen replacement process
This is a structured overview of the repair process. It is not a model-specific teardown, but these stages apply across iPad Mini generations with minor variations.
-
Back up and prepare the device. Save all data, disable Find My iPhone in iCloud settings, and charge the battery to at least 25%. Apple recommends disabling Find My before any service appointment to avoid issues with calibration or service eligibility.
-
Apply heat to the screen perimeter. Using your heat gun or iOpener, work slowly around all four edges, spending roughly 90 seconds per side. The goal is to soften the adhesive, not to cook the display. Keep the heat source moving.
-
Insert a suction cup and create a gap. Once adhesive is softened, place the suction cup near the bottom edge of the screen and pull gently upward to create a small gap. Slide a plastic pry pick into the gap immediately to hold it open.
-
Work around the perimeter with pry picks. Move incrementally around each edge, inserting additional picks to prevent re-adhesion. Go slowly at corners, as the glass is thinnest and most vulnerable there.
-
Open the screen like a book. The screen connects to the logic board via ribbon cables located at one end of the device. Do not pull the screen away fully. Prop it open carefully at around 45 degrees using a spare pry pick or a folded cloth.
-
Disconnect the ribbon cables. Using your ESD-safe spudger, carefully release each connector by lifting the locking tab and sliding the cable free. iPad Mini repairs require careful ribbon cable management at every stage. These connectors are fragile and a torn flex cable means a much more expensive repair.
-
Transfer components from the old screen. Depending on the replacement part you have sourced, you may need to move the front camera, earpiece mesh, or home button bracket to the new assembly. Do this before connecting the new screen.
-
Connect the new screen and test before sealing. This step saves considerable frustration. Test touch, display quality, sensors, and Touch ID before applying any adhesive. Power the device on while the screen is still loose. Check every function that matters to you.
-
Run Apple Repair Assistant if prompted. On supported iPad Mini models, Repair Assistant calibrates parts and verifies Touch ID and other biometric components after a repair. Allow it to complete before sealing the device.
-
Apply new adhesive and seal the screen. Remove the backing from your pre-cut adhesive strips and apply them to the clean frame. Standard adhesive tape for iPad Mini 6 assemblies runs between 0.3mm and 0.4mm thick. Press the screen down firmly and evenly, then apply gentle pressure for several minutes to let the adhesive set.
iPad Mini screen replacement cost: DIY vs professional repair
Understanding the cost landscape helps you decide whether to pick up the tools or pick up the phone.
| Option | Typical UK cost | Turnaround | Warranty |
|---|---|---|---|
| DIY full assembly part | £35 to £90 | Your own time | Depends on supplier |
| Local repair shop | £80 to £160 | Same day to 48 hours | Varies, typically 30 to 90 days |
| Apple out-of-warranty repair | £99 to £350+ | 3 to 5 business days | 90 days |
| AppleCare+ with excess | £29 to £39 per incident | Varies | Apple warranty |
DIY clearly wins on cost if you already own most of the tools. The parts themselves for a full assembly replacement are genuinely affordable. Where you have to be honest with yourself is on skill level and time. A repair that takes a trained technician 45 minutes can take a first-timer three hours, and the margin for error is real.
Local repair services offer a useful middle ground. They are typically cheaper than Apple and faster, though the quality of parts and the length of warranty varies considerably from shop to shop. If you go this route, ask specifically what brand of screen they are fitting and whether they offer a written guarantee on the repair.
Professional repair or even device replacement becomes the sensible choice when the iPad Mini is a newer, high-value model and the repair cost would approach 60% or more of the replacement value.
Common pitfalls and post-repair checks
Even experienced repairers make mistakes on iPad Mini devices. The compact design leaves almost no room for error.
The most frequent problems are:
- Torn ribbon cables during screen lift: Move slowly, apply adequate heat, and never pull the screen away from the body at more than a shallow angle
- Edge lifting after reassembly: Usually caused by insufficient adhesive or rushing the sealing process. Use fresh pre-cut tape, not ad hoc strips
- Touch ID not functioning post-repair: This may require calibration via Repair Assistant. Repair Assistant ensures Touch ID works as expected after a screen replacement on supported models
- Brightness sensor not responding: Check that the front camera flex and ambient light sensor are properly seated. These are often disturbed during disassembly
- Display showing faint lines or colour shift: This usually points to a connector not fully locked down. Power off, re-open, and reseat the display cable
Pro Tip: After sealing, leave the device under light pressure overnight. A stack of books works perfectly. This gives the adhesive time to bond properly and prevents early edge lifting.
If touch response, display brightness, or Face ID behaves abnormally after the repair and reseating cables does not resolve it, do not keep dismantling the device. At that point, a professional iPad screen repair service will save you from compounding the damage.
My honest take on DIY iPad Mini repair
I have seen a lot of DIY repairs go wrong, and the pattern is almost always the same. Someone buys a cheap screen, rushes the heating stage because they are excited to get started, and tears a ribbon cable in the first five minutes. The repair fails before it even begins.
The iPad Mini is genuinely one of the more challenging tablets to repair yourself. Its small dimensions mean every component is under greater tension. The ribbon cables are short, the frame tolerances are tight, and the laminated display on newer generations demands respect. That said, I do not think it is beyond a careful first-timer. What I would say is that patience is not optional here. It is the skill.
What enthusiasts often miss is that the parts quality decision matters as much as the technique. I have watched technically sound repairs fail within weeks because the replacement screen was sourced from a seller with no quality controls. The visual difference between a decent screen and a poor one may not be obvious in the listing, but you will feel it immediately in colour reproduction and touch sensitivity.
My view is that if you are prepared to spend time watching a detailed teardown video specific to your iPad Mini generation, source a full assembly from a trustworthy UK supplier, and work in a warm room with patience, you stand a genuinely good chance of a successful repair. If any of those conditions are not met, the professional repair route is simply the more sensible one. Replacing a screen is satisfying. Replacing a logic board because a cable was torn is not.
— Adewale
Get the right parts from Buy2fix
If you are ready to go ahead, sourcing from a reliable UK supplier takes a lot of uncertainty out of the process. Buy2fix stocks replacement screens and repair parts for a wide range of tablet models, with quality checks carried out before dispatch. Free UK mainland shipping and a 30-day return policy mean you are not taking a financial risk on the part itself. For more guidance on the repair process before you buy, the DIY repair tips guide covers sourcing and tools in practical detail. Getting the right component from a reputable source is genuinely the most important decision in this entire process.
FAQ
What is the best approach for DIY iPad Mini screen repair?
Replacing the full LCD and digitiser assembly as a single unit is the recommended approach. Attempting glass-only or digitiser-only repairs on laminated models risks permanent damage to the LCD layer underneath.
How much does iPad Mini screen replacement cost in the UK?
DIY parts typically range from £35 to £90 for a full assembly. Professional repair services charge between £80 and £160, while Apple out-of-warranty fees can reach £350 or more depending on the model.
Do I need special tools to replace an iPad Mini screen?
Yes. At minimum you need a heat gun or iOpener, suction cups, plastic spudgers, ESD-safe tweezers, and the appropriate screwdrivers. Anti-static equipment is also strongly recommended to protect internal components.
Will Touch ID still work after replacing the iPad Mini screen?
Touch ID functionality after a screen replacement may require calibration using Apple’s Repair Assistant on supported models. Running Repair Assistant after the repair verifies that biometric components are working correctly.
When should I use a professional repair service instead of DIY?
If you lack the tools, cannot source a quality replacement part, or are working on a high-value newer model, professional repair is the better choice. It is also the right call if any post-repair issues persist after reseating cables.
Recommended
Let customers speak for us
Well made part very strong easy to fit great value for the money

Well packed, with fast shipping :)

Exactly what the doctor ordered…great color, comfort, and durability. Trust this watch band!

Brilliant strap, second purchase, bought bracelet before. Excellent value. Thank you

Great item for splitting your Audio signal

Outstanding product!
Next level customer service.

Very satisfied but the delivery needs to get more faster...

Good price,quick delivery

Best phone case ever! This is my second one as I broke my first. Would defo recommend

Great fitting Apple Watch bands

For Apple Watch Ultra 3 / 2 / 1 49mm RedPepper Armor Metal Case Integrated Silicone Watch Band(Steel Black White)

Good price and quick postage

Perfect fit.

Absolutely necessary

Second Purchase and still a very happy customer. Keep up the good work.
