

Tablet screen replacement: A practical DIY guide for success
TL;DR:
- DIY tablet screen replacement can save money and restore device functionality with proper tools and patience.
- Choosing a quality full assembly is safer and more reliable than glass-only repairs for most users.
- Verifying connections, alignment, and screen quality after installation ensures a successful and lasting repair.
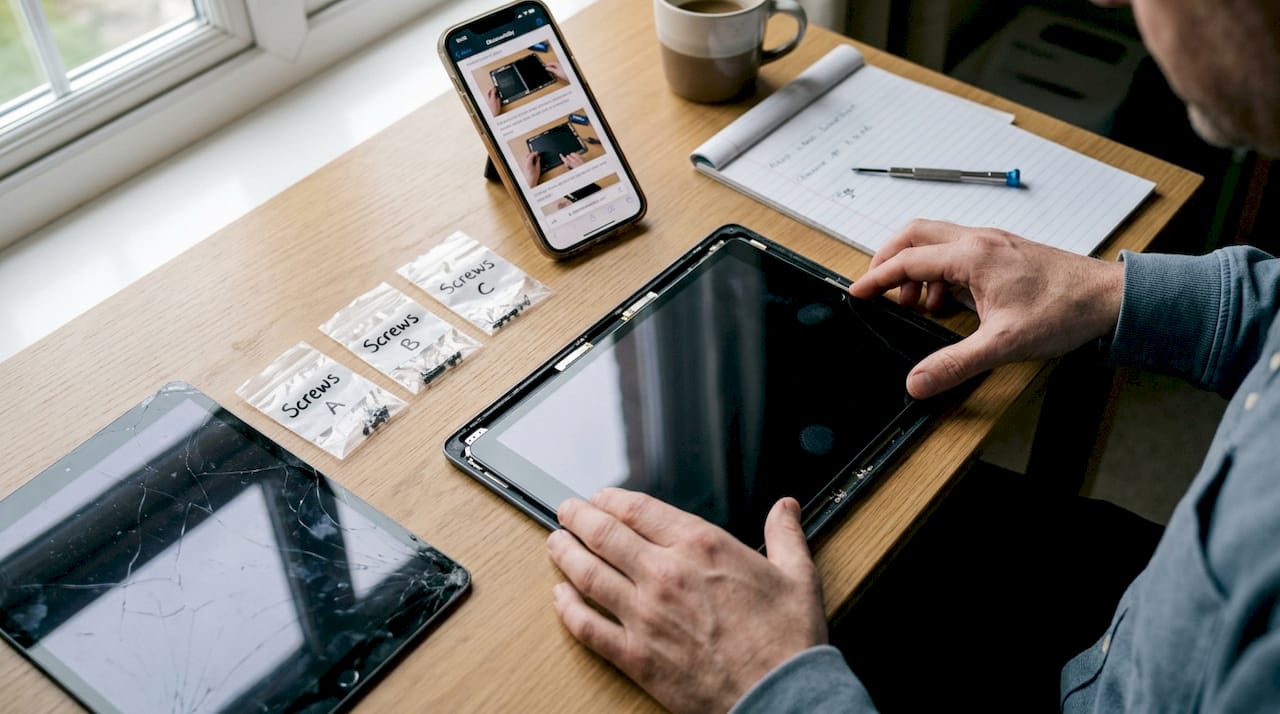
A cracked tablet screen can bring your work, entertainment, and daily routine to a grinding halt. Professional repair quotes often run into the hundreds of pounds, leaving many owners wondering whether it’s worth fixing at all. The good news is that a careful, methodical DIY screen replacement can save you a substantial sum and restore your device to full working order. This guide walks you through every stage of the process, from selecting the right components and gathering your tools, to fitting the new screen and verifying the repair. Follow each step closely and you will achieve a professional-quality result at home.
Table of Contents
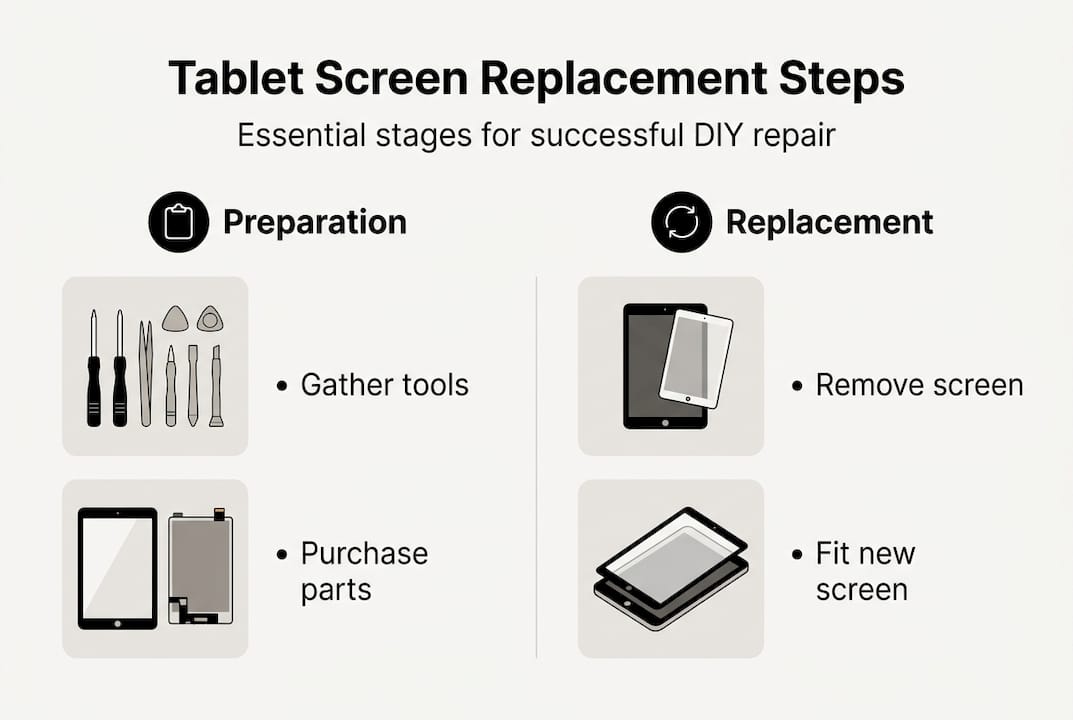
- Essential tools, parts and preparation
- Removing the damaged screen: Step-by-step process
- Fitting the new screen: Alignment, connections and assembly
- Verification and troubleshooting after replacement
- What most DIY guides miss about screen replacement
- Take your next step with trusted repair parts
- Frequently asked questions
Key Takeaways
| Point | Details |
|---|---|
| Preparation is paramount | Gather the correct tools and quality parts to avoid common DIY pitfalls. |
| Step accuracy matters | Follow each disassembly and reassembly step closely for effective and safe results. |
| Screen quality impacts outcome | Premium screens reduce risks of display or touch issues and extend the device’s lifespan. |
| Know when to get professional help | Complex or high-cost tablets may require expert repair to prevent expensive mistakes. |
Essential tools, parts and preparation
Before you touch a single screw, you need to understand what you are actually replacing. There are two main approaches to tablet screen repair: fitting a full screen assembly or attempting a glass-only replacement. A full assembly includes the LCD or OLED panel, digitiser, and sometimes the frame, all bonded together. It is the most straightforward option for DIY repairers. Glass-only replacement, by contrast, involves separating just the cracked outer glass from the display beneath. As glass-only replacement advances show, this method is lower in parts cost but demands precision equipment and significant experience. For most home repairers, the full assembly is the safer and more reliable route. You can read more about choosing replacement screens and the differences in screen assemblies before committing to a purchase.
Here is a quick-reference tool and parts checklist:
| Item | Purpose |
|---|---|
| Plastic pry tools / spudgers | Safely lifting screen edges without scratching |
| Suction cup | Gripping the screen for removal |
| Precision screwdriver set | Removing housing and bracket screws |
| Tweezers | Handling small connectors and cables |
| Heat gun or iOpener | Softening adhesive on glued screens |
| Isopropyl alcohol (90%+) | Cleaning adhesive residue |
| Replacement screen assembly | The core essential repair parts for your specific model |
| Anti-static wrist strap | Preventing electrostatic discharge damage |
| Pre-cut adhesive strips | Re-sealing the screen after fitting |
Your workspace matters as much as your tools. Choose a clean, well-lit surface and lay down an anti-static mat if possible. Power the device off completely and, where accessible, disconnect the battery before starting. Electrostatic discharge is a silent killer of tablet components, so always wear your anti-static wrist strap.
Safety note: Tablet batteries can swell, puncture, or release harmful gases if pierced or bent. Never apply excessive force near the battery and stop immediately if you notice swelling or an unusual smell.
Pro Tip: Photograph every stage of disassembly on your phone. When you are reassembling an unfamiliar device, those images are worth more than any written guide.
Removing the damaged screen: Step-by-step process
Once you have your tools assembled and workspace ready, it’s time to begin removing the broken screen. Patience here prevents costly secondary damage.
- Power off completely. Hold the power button until the device shuts down. Do not attempt removal on a live device.
- Remove external components. Take out the SIM tray, stylus, and any other removable parts. Set them aside safely.
- Remove screws. Using the correct screwdriver head, remove all visible housing screws around the perimeter. Keep them organised by position.
- Apply heat if needed. For glued screens, apply a heat gun or iOpener to the edges for 60 to 90 seconds. This softens the adhesive without damaging internal components.
- Insert the suction cup. Place it near a corner of the screen. Pull gently upward while inserting a plastic pry tool into the gap created.
- Work around the edges. Slide the pry tool carefully around the perimeter, releasing the adhesive or clips. Never use metal tools directly on the screen edge.
- Lift the screen slowly. Once the adhesive releases, lift the screen at a shallow angle. Do not pull it fully free yet.
- Disconnect the cables. Locate the ribbon cable connectors attaching the screen to the motherboard. Use a spudger to gently release each connector clip before lifting the screen away.
Most average repair times fall between one and three hours, with success depending heavily on the model. Older devices and models like the Samsung Tab A series tend to be more forgiving for first-timers. Newer flagship tablets with edge-to-edge displays and stronger adhesive require considerably more care. Reviewing DIY replacement tips specific to your model beforehand helps you avoid common repair mistakes that catch many beginners out.
Glued screen warning: Some modern tablets use industrial-strength adhesive across the entire display surface. Rushing this stage is the single most common cause of damaging the display beneath the cracked glass. Slow, steady heat application and incremental prying are essential.
Pro Tip: Use a small piece of masking tape to label each screw’s location on a sheet of paper as you remove them. Mixing up screw lengths during reassembly can strip threads or crack the housing.
Fitting the new screen: Alignment, connections and assembly
After safely detaching the old, damaged screen, you’re ready to install the new one. Accuracy and care now matter most.
Before fitting anything, pre-test the new screen. Connect it loosely to the motherboard, power the device on, and check for display output, colour accuracy, and touch response. Discovering a fault at this stage saves you the frustration of full reassembly only to find a defective part. Replacement quality advice consistently highlights that poor-quality parts lead to colour and touch issues. Choosing a Service Pack or premium-grade screen from a reputable supplier is not optional if you want lasting results. Research into quality replacement screens and screen assembly impact on device longevity makes a compelling case for investing in the right component from the outset.
Up to 40% of DIY repair issues stem from low-quality or incompatible screens, making part selection arguably more important than technique.
Follow these steps for installation:
- Clean the frame. Remove all old adhesive residue from the tablet frame using isopropyl alcohol and a lint-free cloth.
- Position the new screen. Align it carefully over the frame without pressing it down yet.
- Seat the ribbon cables. Route each cable through its designated channel and press the connectors firmly into place until you feel a click.
- Apply adhesive strips. Peel and position pre-cut adhesive around the frame perimeter before pressing the screen down.
- Press firmly and evenly. Apply even pressure around all edges to bond the adhesive. Use a soft cloth to avoid marking the new display.
- Replace screws and brackets. Refit all brackets and screws in reverse order of removal, using your photographs as reference.
Here is a quick reassembly check:
| Check | What to confirm |
|---|---|
| Cable connections | All ribbon cables clicked securely into connectors |
| Screen alignment | Even gaps around all four edges |
| Adhesive coverage | No lifted corners or gaps in the seal |
| Screw count | All screws returned to correct positions |
| Battery reconnected | Battery connector reseated before powering on |
Verification and troubleshooting after replacement
With your new screen fitted, it’s essential to confirm everything is working before celebrating a successful repair. Power the device on and work through this checklist methodically.
- Power on: Device boots without error messages or bootloops
- Touch response: Test all areas of the screen, including corners and edges
- Colour accuracy: Check for dead pixels, discolouration, or backlight bleed
- Brightness and auto-brightness: Confirm both manual and automatic adjustment work
- Front camera: Verify the image is clear and unobstructed
- Volume and power buttons: Confirm physical buttons respond correctly
- Connectivity: Test Wi-Fi, Bluetooth, and mobile data if applicable
If something is not right, here are the most common issues and their likely causes:
- No display at all: Ribbon cable not fully seated. Power off, open the device, and reseat the connector.
- Touch not responding: Digitiser connector loose or screen incompatible with your model. Verify the part number.
- Ghost touches: Adhesive pressing on the digitiser, or a faulty replacement screen. Allow the adhesive to cure fully.
- Backlight bleed: Normal in some aftermarket screens, but severe bleed suggests a low-quality part.
- Intermittent display: Flex cable partially connected. Requires reopening and reseating.
For complex flagship models or persistent display issues, when to choose professional repair is a genuine consideration. Professionals have calibration tools and model-specific experience that reduce the risk of further damage. Exploring cost-effective repair tips and display assembly insights can help you decide whether to proceed independently or hand the job over.
Pro Tip: Leave the device running for at least 30 minutes before pressing the screen edges down permanently. This lets you catch intermittent faults before the adhesive sets.
What most DIY guides miss about screen replacement
Most online tutorials focus on the mechanical steps and gloss over the decisions that actually determine whether a repair lasts six months or six years. The uncomfortable truth is that technique accounts for perhaps half of the outcome. The other half is parts quality and honest self-assessment.
Many guides treat glass-only replacement as a straightforward alternative to full assembly. It is not. Without a professional-grade bonding machine and experience reading adhesive cure times, glass-only repairs frequently result in air bubbles, delamination, and touch sensitivity problems within weeks. The screen assembly differences between these approaches are significant enough that recommending glass-only to a first-timer is genuinely irresponsible.
Experienced repairers also know that the cheapest screen on the market is rarely the most cost-effective choice. A substandard part that fails within three months costs you more in time, frustration, and repeat parts than a quality component purchased correctly the first time. Invest in your parts the same way you invest in your tools. That mindset separates repairers who build a reputation from those who constantly redo their own work.
Take your next step with trusted repair parts
Sourcing the right components is the foundation of every successful tablet repair. At Buy2Fix, we stock a wide range of quality replacement screens, full display assemblies, adhesive kits, and precision tools for tablets from all major brands. Every part undergoes quality checks before dispatch, and all orders to UK mainland addresses include free shipping. Whether you are replacing a single screen at home or running a small repair business, we offer the parts and one-year warranty cover that give your repairs a professional finish. Browse our full range and find the exact component your repair needs.
Frequently asked questions
Can I replace just the glass on my tablet, or do I need the full assembly?
Glass-only replacement is possible but suited to advanced DIYers with specialist bonding equipment. For most home repairers, a full screen assembly delivers more reliable and lasting results.
How long does a tablet screen replacement usually take?
Most repairs take between one and three hours, depending on the tablet model and your experience level. Newer flagship devices with heavy adhesive will take longer than older, clip-based designs.
Why does screen quality matter in DIY repairs?
Poor-quality parts frequently cause colour inaccuracies, reduced touch sensitivity, and early display failure. Choosing a Service Pack or premium-grade screen protects your repair investment and the device’s usability.
When should I seek professional help instead of DIY?
Professional repair is recommended for complex flagship models, persistent display faults after replacement, or when you lack the specialist tools and hands-on experience required to avoid further damage.
Recommended
- Tablet screen replacement guide: UK DIY repair tips – buy2fix
- DIY Phone Screen Replacement: Step-by-Step Guide to Success – buy2fix
- Ultimate Mobile Device Screen Replacement Guide for 2025 – buy2fix
- Replace a phone screen safely: complete DIY guide 2026 – buy2fix
- DIY Projector Screen Ideas: Transform Your Space Easily - Projector Display
Let customers speak for us
Well made part very strong easy to fit great value for the money

Well packed, with fast shipping :)

Exactly what the doctor ordered…great color, comfort, and durability. Trust this watch band!

Brilliant strap, second purchase, bought bracelet before. Excellent value. Thank you

Great item for splitting your Audio signal

Outstanding product!
Next level customer service.

Very satisfied but the delivery needs to get more faster...

Good price,quick delivery

Best phone case ever! This is my second one as I broke my first. Would defo recommend

Great fitting Apple Watch bands

For Apple Watch Ultra 3 / 2 / 1 49mm RedPepper Armor Metal Case Integrated Silicone Watch Band(Steel Black White)

Good price and quick postage

Perfect fit.

Absolutely necessary

Second Purchase and still a very happy customer. Keep up the good work.
