

Avoid the most common smartphone repair mistakes: 9 errors
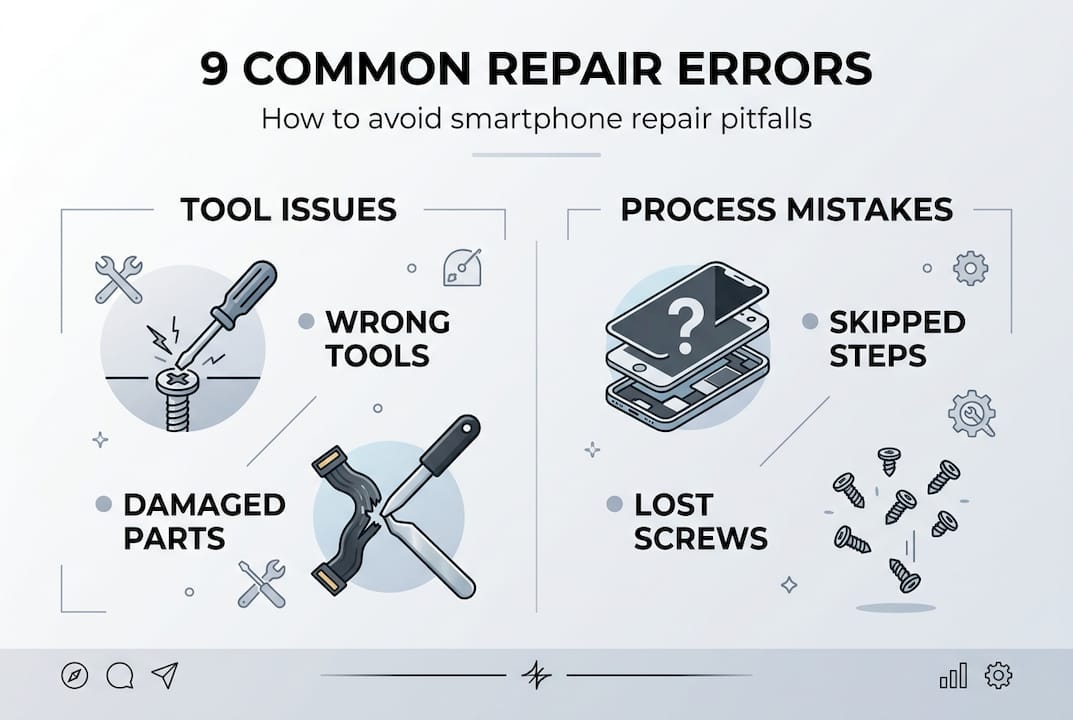
Smartphone repair looks straightforward until something goes wrong. You follow a YouTube tutorial, grab a flathead screwdriver, and suddenly you have a cracked ribbon cable and a phone that no longer turns on. The reality is that ~50% of DIY repairs fail due to avoidable errors, most of which stem from poor preparation rather than lack of skill. This article walks you through the nine most damaging mistakes, explains exactly why they happen, and gives you the practical knowledge to avoid them every single time.
Table of Contents
- Why do so many smartphone repairs go wrong?
- The top 9 common smartphone repair mistakes
- Why quality tools and parts matter most
- Expert process: Steps for safe and successful DIY repairs
- Adapting repairs for modern smartphones and tricky situations
- Upgrade your results with trusted repair tools and resources
- Frequently asked questions
Key Takeaways
| Point | Details |
|---|---|
| Right tools matter | Using quality tools reduces damage risk and ensures proper repairs. |
| Always disconnect battery | Disconnect your phone’s battery first to avoid short circuits and hazards. |
| Don’t skip testing | Test components before and after assembly to catch faults early. |
| Follow model-specific instructions | Manufacturer guides prevent hidden damage from generic repair methods. |
| Take it slow, stay safe | Patience and safety precautions are key for successful DIY smartphone repairs. |
Why do so many smartphone repairs go wrong?
Most failed repairs share a pattern. The repairer either rushed in without the right tools, skipped a critical safety step, or used a guide meant for a different model. These are not random accidents. They are predictable outcomes of predictable shortcuts.
The DIY repair pitfalls that cause the most damage tend to cluster around three root causes: inadequate preparation, incorrect tools, and ignoring model-specific instructions. Understanding these patterns is the first step to breaking them.
| Root cause | Common outcome | Risk level |
|---|---|---|
| Wrong or cheap tools | Stripped screws, scratched components | High |
| Skipping safety steps | Short circuits, fire risk | Critical |
| Using wrong guide | Incompatible technique, broken parts | High |
| Counterfeit parts | Early failure, further damage | Medium to high |
The financial stakes are real. A botched screen replacement can turn a £60 fix into a £300 motherboard repair. Beyond cost, there are genuine safety risks. Lithium batteries that are punctured or short-circuited can catch fire. These are not edge cases.
Professionals emphasise methodical diagnosis over rushing, and beginner repair errors almost always trace back to skipping that diagnostic phase entirely. Slow down, and your success rate climbs dramatically.
The top 9 common smartphone repair mistakes
Let us break down each mistake with real-world consequences and clear guidance on how to avoid it.
1. Using poor-quality or incorrect tools
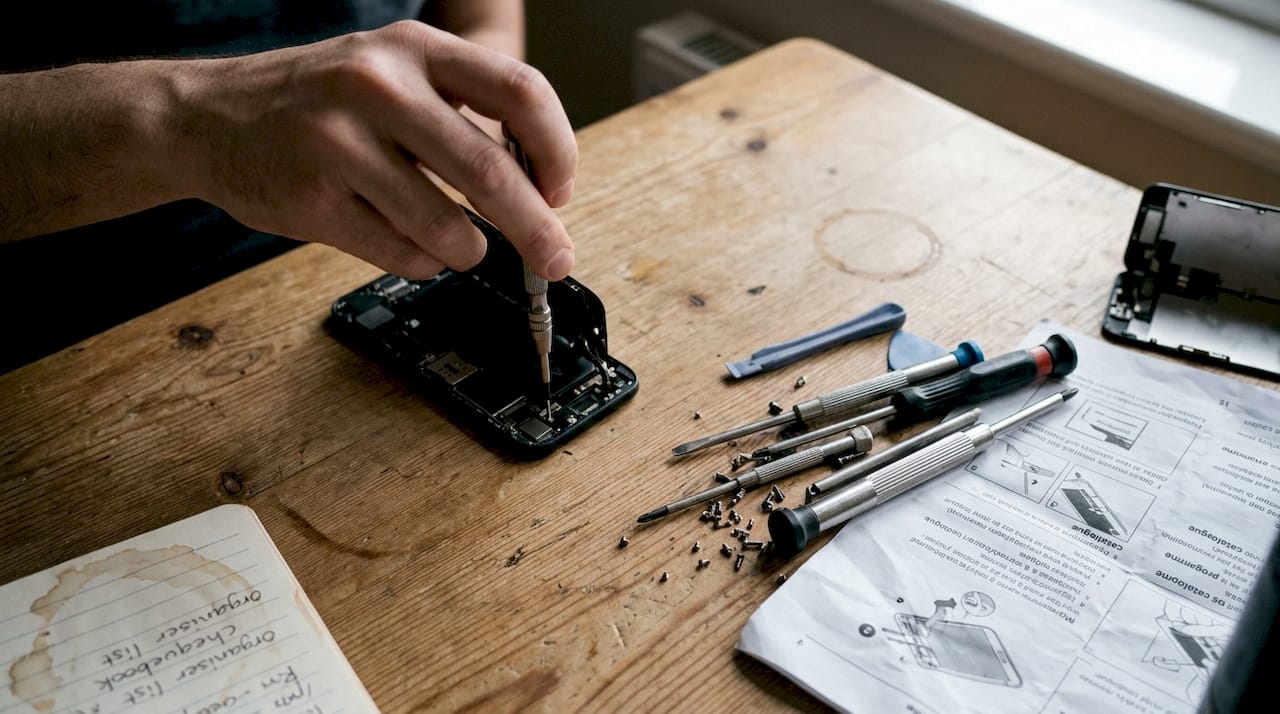
A standard screwdriver set is not a phone repair kit. Smartphones use Pentalobe, Tri-point, and Phillips 000 screws, among others. Using the wrong driver strips the screw head instantly, and a stripped screw can mean drilling it out or abandoning the repair entirely. Investing in essential repair tools designed specifically for mobile devices is non-negotiable.
2. Skipping battery disconnection
This is the single most dangerous shortcut. Failing to disconnect the battery first risks short circuits, fried components, or fire hazards. Always discharge the battery below 25% before starting, then disconnect it as your very first internal step.
3. Failing to ground against electrostatic discharge (ESD)
ESD, or electrostatic discharge, is invisible and instant. A single static spark from your fingertip can destroy a logic board component worth more than the phone itself. Wear an anti-static wrist strap and work on a non-conductive surface. This takes thirty seconds to set up and can save you hundreds of pounds.
4. Installing untested or counterfeit parts
The market is flooded with cheap replica screens, batteries, and charging ports. Many look identical to genuine parts in photos. Counterfeit parts cause compatibility issues, short lifespans, and can introduce new faults. Always source from reputable suppliers who test their stock before dispatch.
5. Rushing disassembly or using excessive force
If something is not moving, it is either still screwed down or held by an adhesive strip you have not released yet. Forcing a component is almost always wrong. Modern phones use layered adhesive extensively, and prying without heat or the correct opening tool tears flex cables and cracks frames.
6. Mixing up or losing screws
This one catches even experienced repairers off guard. Many phones use screws of slightly different lengths in adjacent positions. Fitting a longer screw into a shorter hole can puncture the battery or damage the motherboard. Use a magnetic mat or a piece of paper with a drawn outline of the phone to keep every screw in its exact position.
Pro Tip: Photograph each stage of disassembly before moving to the next. A quick photo takes two seconds and gives you a reference map for reassembly that no written guide can match.
7. Not following model-specific repair guides
A guide for the iPhone 13 does not apply to the iPhone 14. Apple changed the internal layout significantly between those two models. The same applies across Android brands. Always find a guide written specifically for your exact model number, not just the product family. Check repair skills and risks before starting any unfamiliar model.
8. Skipping pre-assembly testing
You have replaced the screen. Before you seal everything back up, connect the battery and test every function: touch response, brightness, front camera, earpiece, and proximity sensor. Discovering a fault after full reassembly means opening the phone again. Test first, close second.
9. Inadequate cleaning after water damage
Rice is a myth. Placing a water-damaged phone in rice does almost nothing for the corrosion already forming on the logic board. Proper water damage repair requires opening the device, removing the board, and cleaning it with isopropyl alcohol (90% or higher) and a soft brush. Skipping this step means the corrosion continues invisibly until the phone fails weeks later.
“The most overlooked mobile repair mistakes are not the dramatic ones. They are the quiet shortcuts that seem harmless in the moment but cause failures days or weeks later.”
Why quality tools and parts matter most
There is a reason professional repair shops invest in proper toolkits. Incorrect or low-quality tools lead to scratches, stripped screws, and damaged components that were perfectly fine before the repair started. The tool is not just a means to an end. It is part of the repair itself.
The same logic applies to parts. Low-quality or counterfeit parts cause compatibility issues, short lifespans, and further damage. An OEM (original equipment manufacturer) or high-grade aftermarket part fits correctly, performs as expected, and lasts. A cheap replica may fit loosely, drain the battery faster, or fail within weeks.
Here is what separates a professional toolkit from a consumer one:
- Precision screwdrivers with correct bit profiles for each manufacturer
- Spudgers and opening picks made from nylon or carbon fibre to avoid scratching
- ESD-safe tweezers with fine tips for handling flex cables and connectors
- Heat gun or iOpener for softening adhesive without cracking glass
- Magnetic work mat to organise and label screws during disassembly
Familiarise yourself with technician repair tools before purchasing anything. Buying a complete kit upfront is almost always cheaper than replacing damaged components caused by improvised tools.
Pro Tip: If you are unsure whether a part is genuine, check the smartphone repair terms glossary to understand the difference between OEM, aftermarket, and refurbished grades before ordering.
Expert process: Steps for safe and successful DIY repairs
Professionals use OEM parts, ESD-safe tools, and thorough testing protocols that DIY repairers often skip entirely. Here is the sequence that separates a successful repair from a costly mistake:
- Research your exact model before touching the phone. Find a guide specific to your device’s model number.
- Gather all tools and parts before starting. Stopping mid-repair to find a missing tool is how mistakes happen.
- Discharge the battery to below 25% and power off the device completely.
- Set up your workspace: clean, well-lit, non-conductive surface, anti-static wrist strap on.
- Photograph each disassembly stage so you have a visual reference for reassembly.
- Disconnect the battery as your first internal action, before touching any other component.
- Work slowly and methodically, releasing adhesive with heat where needed rather than forcing parts.
- Keep screws organised on a magnetic mat, labelled by position.
- Install the new part and reconnect the battery before closing the case.
- Test all functions thoroughly: screen, cameras, speakers, buttons, and charging.
- Seal the device only after confirming everything works correctly.
Following these essential repair steps in order removes most of the risk from DIY repairs. The sequence is not arbitrary. Each step protects the next one.
Pro Tip: Keep a beginner repair guide bookmarked for your first few repairs. Even experienced technicians refer back to guides when working on unfamiliar models. There is no shame in checking twice.
Adapting repairs for modern smartphones and tricky situations
Modern smartphones present challenges that older devices simply did not have. Fused display modules are one of the biggest. Screens are fused units on most current flagships, meaning the glass, digitiser, and OLED panel are bonded together. Attempting to separate just the cracked glass from the display underneath almost always destroys both layers. Unless you have a UV bonding station and separator machine, replace the full assembly.
Manufacturer differences also matter enormously:
- iPhone repairs often require proprietary screwdrivers and face software pairing restrictions on certain components
- Samsung Galaxy devices use heavy adhesive on back covers and displays, requiring controlled heat
- Huawei and Xiaomi models vary significantly between generations, making model-specific research essential
- Budget Android phones sometimes use non-standard connectors that are easy to damage if you assume they follow common layouts
For water-damaged devices, attempting repairs without full cleaning misses corrosion that continues to spread after the phone appears to be working again. The phone may boot fine for two weeks, then fail permanently as corrosion reaches a critical connector.
If you are moving into tablet repair techniques, the same principles apply but the scale changes. Larger adhesive surfaces, bigger batteries, and more fragile display assemblies mean the margin for error is even smaller. Know when a repair is within your skill level and when it is not. Sending a device to a professional is not failure. It is good judgement.
For battery health, understanding when to replace your battery before it becomes a safety issue is part of responsible device ownership.
Upgrade your results with trusted repair tools and resources
Every mistake covered in this article is avoidable with the right preparation. The difference between a repair that lasts and one that fails within a month almost always comes down to the quality of the tools and parts used. At Buy2fix, we stock hand-picked repair components and accessories for iPhone, Samsung, Huawei, Xiaomi, and many more brands, all tested before dispatch and backed by a one-year warranty. Whether you are replacing your first screen or running a small repair business, you will find trusted phone repair tools and quality parts with free UK mainland shipping. Start your next repair with the right foundation.
Frequently asked questions
What is the most common smartphone repair mistake?
The most common mistake is using the wrong tools or poor-quality parts, which can damage components or cause early failure. Getting these two things right resolves the majority of DIY repair problems.
Can I repair my phone without disconnecting the battery?
No. You should always disconnect the battery before repairs to avoid short circuits or fire risks. Failing to disconnect the battery is one of the most dangerous shortcuts in DIY repair.
Are third-party phone parts safe to use?
Some third-party parts are reliable, but many are counterfeit or low-quality, risking compatibility problems and a shorter device lifespan. Counterfeit parts cause compatibility issues and can introduce new faults into a previously working device.
Why is ESD protection important when repairing smartphones?
Electrostatic discharge can destroy sensitive circuits instantly, so grounding yourself with a wrist strap is vital for safe repairs. Ignoring ESD precautions damages sensitive electronics in ways that are often invisible until the device fails.
How can I avoid damaging my phone during repair?
Use the correct tools, follow a device-specific guide, and take your time with every step to reduce risks. Skipping model-specific guides is one of the fastest ways to apply an incompatible technique and break a component that was working fine.
Recommended
Let customers speak for us
For Samsung Galaxy A26 SM-A266B Original Earpiece Speaker with Cable

Very good communication throught. Good product

Well made part very strong easy to fit great value for the money

Well packed, with fast shipping :)

Exactly what the doctor ordered…great color, comfort, and durability. Trust this watch band!

Brilliant strap, second purchase, bought bracelet before. Excellent value. Thank you

Great item for splitting your Audio signal

Outstanding product!
Next level customer service.

Very satisfied but the delivery needs to get more faster...

Good price,quick delivery

Best phone case ever! This is my second one as I broke my first. Would defo recommend

Great fitting Apple Watch bands

For Apple Watch Ultra 3 / 2 / 1 49mm RedPepper Armor Metal Case Integrated Silicone Watch Band(Steel Black White)

Good price and quick postage

