


News
Screen replacement checklist for shops: the full guide
TL;DR:
- A shop’s screen replacement success depends on strict adherence to a detailed workflow, including quality control, disassembly, testing, and warranty procedures. Documenting defects immediately and negotiating clear warranty terms with suppliers are essential to minimize losses and ensure consistent repair quality. Following a full assembly replacement and maintaining thorough records leads to faster repairs and fewer warranty rejections.
A screen replacement checklist for shops is a structured, step-by-step protocol covering incoming quality control, safe disassembly, functional testing, and warranty documentation for every mobile screen repair job. Without it, defect rates climb, warranty claims fail, and customer trust erodes. The industry term for this process is a repair quality assurance workflow, and the best shops treat it as non-negotiable. This guide covers every stage of that workflow, from the moment a screen shipment arrives to the point a repaired handset leaves the counter.
1. Screen replacement checklist for shops: incoming quality control
Incoming quality control is the first line of defence against defective parts reaching customers. Incoming QC for phone screens takes approximately 4 minutes and 30 seconds per unit, broken down across four distinct checks. Skipping any stage means defects only surface after installation, which costs far more time and money to resolve.
The four stages and their target durations are:
- Package inspection (30 seconds): Check the outer carton for crush damage, moisture marks, or torn corners. A damaged carton often signals rough transit handling that may have stressed the screen inside.
- Visual inspection (1 minute): Examine the display surface under a bright light for dead pixels, backlight bleed, discolouration, and cracked digitiser glass. Suppliers typically allow 0–3 dead pixels as within tolerance. Any screen exceeding that threshold is defective and must be set aside immediately.
- Dry-test power-on (2 minutes): Connect the screen to a test jig without installing it. Confirm the display powers on, shows uniform brightness, and produces no flickering or colour banding.
- Sensor and Face ID check (1 minute): Test touch responsiveness across the full display surface and verify that Face ID components initialise correctly where applicable.
Pro Tip: Record every defect with a photo, the batch number, and a short written note at the time of inspection. Doing this later from memory produces incomplete records that suppliers will reject.
| Stage | Duration | Key check |
|---|---|---|
| Package inspection | 30 seconds | Carton damage, moisture |
| Visual inspection | 1 minute | Dead pixels, backlight bleed |
| Dry-test power-on | 2 minutes | Brightness, flicker, colour |
| Sensor and Face ID | 1 minute | Touch response, Face ID init |
2. How to safely disassemble devices and transfer components
Safe disassembly is where most avoidable damage happens. The correct mobile screen replacement process begins with a full power-down, not just a screen lock. Residual charge during disassembly is a genuine risk to flex cables and logic board components.
Follow this sequence for consistent results:
- Power the device fully off and remove any SIM tray.
- Use a heat plate or heat gun set to around 70°C to soften the adhesive around the screen perimeter. Do not exceed this temperature on modern OLED panels.
- Apply a suction cup to the lower portion of the screen and create a small gap. Insert a plastic spudger or guitar pick into the gap and work slowly around the edges.
- Disconnect the battery flex cable before touching any other connectors. This single step prevents the majority of short-circuit damage.
- Transfer the earpiece mesh, front camera assembly, and proximity sensor bracket to the new screen. On iPhone models with Face ID, these components are paired to the logic board and cannot be substituted.
Full assembly replacement is preferred by industry experts over glass-only repair. It delivers higher reliability, faster turnaround, and a better result for the customer. Glass-only repair requires specialist equipment and carries a higher risk of damaging the underlying digitiser.
Pro Tip: Keep a labelled parts tray for each job. Mixing screws from different models is one of the most common causes of post-repair faults, particularly stripped threads and cracked housings.
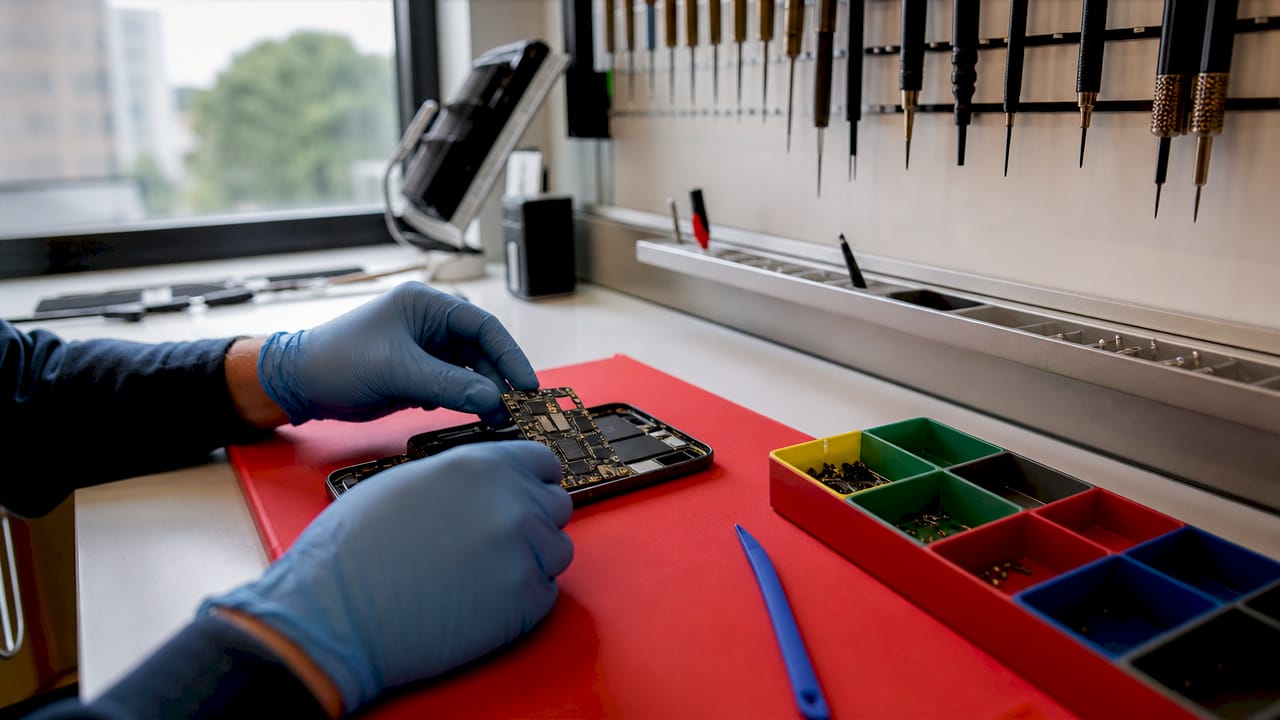
Sensor transfers on newer iPhone models add meaningful complexity to the repair. DIY repairs on these models carry a higher risk of sensor failure, which is why professional service is the better choice for Face ID-dependent handsets.
3. What functional tests should follow screen installation?
Post-installation testing is not optional. It is the checkpoint that separates a completed repair from a verified repair. Run every test before the device goes back into its case or into the customer’s hands.
- Touchscreen responsiveness: Swipe across all four corners and the centre of the display. Tap small targets to confirm digitiser accuracy. Dead zones in the corners are a common sign of a poorly seated connector.
- Display quality check: Set brightness to maximum and check for uneven backlight, colour shifts, or pixel anomalies under white and black screens. A solid white screen reveals backlight bleed; a solid black screen reveals dead pixels.
- Face ID enrolment and verification: On compatible iPhones, re-enrol Face ID after installation. Post-install tests must confirm Face ID, True Tone activation, and proximity sensor functionality before sign-off.
- True Tone and auto-brightness: Enable True Tone in display settings and confirm it adjusts colour temperature correctly. Disable and re-enable auto-brightness to confirm the ambient light sensor is responding.
- Proximity sensor: Make a test call and confirm the screen blanks when the handset is held to the ear. A failed proximity sensor causes accidental screen presses during calls and is a common complaint if missed at this stage.
A repair is only complete when every sensor and display function has been tested and the result has been recorded. Verbal confirmation from a technician is not a substitute for a written test log.
Document every test result against the device’s serial number. This record protects the shop if a warranty dispute arises later.
4. How to handle warranty claims and negotiate DOA policies with suppliers
Dead-on-arrival policies define what happens when a screen fails before or during installation. Shops that negotiate these terms upfront spend far less time chasing credits later.
Key practices for managing warranty claims effectively:
- Define DOA windows clearly. Negotiate a 24-hour response time for initial DOA claims and 48 hours for other defect reports. Suppliers who cannot commit to these windows are a liability.
- Prefer credit or replacement over returns. Returns add shipping costs and delay resolution. A credit against the next order or a direct replacement is faster and cheaper for both parties.
- Document everything at the point of discovery. Failing to document defects with clear photos and batch numbers is the primary reason warranty claims are denied. Photograph the defect, the batch label, and the original packaging before touching anything else.
- Retain defective screens in original packaging. Keep defective parts boxed and stored until the claim is fully resolved. Disposing of packaging voids most supplier warranty terms.
- Track defect rates by batch. If the failure rate for a given batch doubles your normal baseline, that is a supplier-side quality issue, not random variance. Raise it formally with data.
Pro Tip: Build a simple spreadsheet tracking supplier name, batch number, defect type, claim date, and resolution. After three months, patterns become visible and you have evidence to renegotiate terms or switch suppliers.
Shops that treat warranty management as an administrative afterthought consistently lose money on defective parts. The shops that treat it as a core business process recover those costs reliably.
Key takeaways
A shop’s screen replacement workflow is only as strong as its weakest documented step, and the weakest step is almost always the one that was skipped under time pressure.
| Point | Details |
|---|---|
| Incoming QC takes 4.5 minutes | Allocate the full time per unit; shortcuts create downstream defects. |
| Dead pixel tolerance is 0–3 | Any screen exceeding supplier tolerance must be set aside before installation. |
| Document defects immediately | Photos and batch numbers at the point of discovery are required for successful claims. |
| Full assembly beats glass-only | Replacing the full display assembly delivers better reliability and faster repairs. |
| Negotiate DOA terms upfront | Secure 24-hour response windows and prefer credit or replacement over returns. |
What I’ve learned from watching shops skip the boring parts
The most expensive repairs I have seen were not caused by bad parts. They were caused by good parts that were never properly checked. A technician installs a screen that passed a five-second visual, the customer returns two days later with a dead touch zone, and the shop eats the cost of a second repair plus a replacement unit. The incoming QC step that takes four and a half minutes would have caught it.
The same pattern shows up in warranty claims. Shops that photograph defects and log batch numbers get their credits. Shops that rely on a quick email saying “this screen was faulty” get ignored. Suppliers are not being obstructive; they genuinely cannot process a claim without evidence. The documentation habit is the difference between a recoverable loss and a written-off part.
One thing I would add that most screen repair guides do not emphasise enough: negotiate your DOA policy before you place your first order, not after your first bad batch. Suppliers are far more flexible before money has changed hands. Once you have a dispute in progress, the conversation becomes adversarial. Get the terms in writing, including response times and preferred resolution methods, and keep that document somewhere accessible.
The shops that run the tightest operations are not necessarily the fastest. They are the most consistent. A written checklist, followed every time, is what makes consistency possible.
— Adewale
Quality screens and repair parts from Buy2fix
Buy2fix supplies replacement screens and repair parts for iPhone, Samsung Galaxy, Huawei, Xiaomi, OPPO, and a wide range of other devices. Every order benefits from free UK mainland shipping, a 30-day return policy, and warranty support on eligible items. Whether you are stocking up on display assemblies or sourcing specific components for a single job, Buy2fix carries parts that meet the quality standards your repair workflow demands. For technicians who follow a rigorous shop screen service checklist, starting with reliable parts is the step that makes every other step easier.
FAQ
What does a screen replacement checklist for shops include?
A screen replacement checklist for shops covers incoming quality control, safe disassembly and component transfer, post-installation functional testing, and warranty documentation. Each stage has defined steps and time targets to maintain consistent repair quality.
How long does incoming QC take per screen?
Incoming quality control takes approximately 4 minutes and 30 seconds per unit, covering package inspection, visual check, dry-test power-on, and sensor verification.
How many dead pixels make a screen defective?
Suppliers typically allow 0–3 dead pixels as within tolerance. Any screen with more than three dead pixels is considered defective and should be set aside for a warranty claim.
Why do warranty claims get rejected?
The most common reason for rejection is missing documentation. Claims require clear photos of the defect, the batch number, and the original packaging to be processed successfully.
Should shops replace the full display assembly or just the glass?
Industry experts recommend replacing the full display assembly rather than the glass only. Full assembly replacement is faster, more reliable, and produces a better result for the customer.
Recommended
Let customers speak for us
item was packaged safely, no damage. it’s now October and since replacing it in January i’ve had no issues.

Great

They had what I was looking for ... ordering was easy, payment was easy, delivery was as promised.
-

Absolutely love this case! Heavy, sturdy and full coverage

Thank You! I really love it! 😊

For Garmin Forerunner 165 20mm Two Color Textured Silicone Watch Band(Teal)

For Samsung Galaxy S26+ 5G R-JUST Sliding Camera Life Waterproof Holder Phone Case(Black)

I ❤️ love it, it's absolutely amazing I'm sooo happy 😊

Great

I saw this item and it was just what I was looking for. I found it here but not in Amazon or e-bay. However, it was in UK, I was surprised to find that they were able to ship it to the US. Excellent company, would do business with again

This is great for when out and about, to sharpen either coloured pencils, or watercolour pencils….would order again.

Great items would bye again

I have purchased several items from this store before. Recently, I encountered an issue with my latest order. After reporting the problem to customer support, they were consistently attentive and made every effort to resolve the situation. Upon investigation, they acknowledged the issue and promptly fixed it. This experience has increased my level of trust in this store.
Thank you so much. I'm so happy.
