

Replace iPhone XR screen: complete 2026 DIY guide
Cracked iPhone XR screens are frustrating and expensive to repair professionally. Many UK repair enthusiasts and small business owners face this challenge regularly, seeking reliable solutions that balance quality with cost effectiveness. This guide walks you through selecting quality replacement screens, performing the replacement step by step, and troubleshooting common issues. You’ll learn which screen grades offer the best value, how to preserve critical features like True Tone, and what tools you need for a lasting repair that satisfies customers or keeps your personal device running smoothly.
Table of Contents
- Prepare For Your iPhone XR Screen Replacement
- Step By Step Guide To Replacing The iPhone XR Screen
- Common Problems And How To Fix Them After Replacement
- Expectations And Maintenance After Replacing Your iPhone XR Screen
- Discover Quality iPhone XR Replacement Screens And Tools
- FAQ About Replacing iPhone XR Screen
Key takeaways
| Point | Details |
|---|---|
| Screen quality matters | OEM refurbished screens preserve True Tone and last over 2 years, whilst budget options fail within 6 to 12 months |
| Face ID preservation is complex | Transferring the original front sensor module is risky and difficult, making Face ID loss nearly inevitable with DIY replacements |
| Proper tools prevent damage | Pentalobe screwdrivers, suction cups, spudgers, and anti-static equipment protect delicate components during disassembly |
| iOS 18 triggers warnings | Non-genuine screens disable True Tone and may display verification warnings after recent software updates |
| Testing before sealing saves time | Verify touch response, display quality, and all connections before applying final adhesive strips |
Prepare for your iPhone XR screen replacement
Successful screen replacement starts with gathering the right tools and understanding screen quality differences. You need a Pentalobe P2 screwdriver to remove the two screws near the charging port, a suction cup to lift the display, plastic spudgers and picks to separate adhesive safely, and fresh adhesive strips for reassembly. An anti-static wrist strap protects internal electronics from static discharge. A magnetic mat helps organise tiny screws during disassembly.
Screen quality varies dramatically across price points. OEM refurbished screens costing £70 to £110 offer the longest lifespan and maintain True Tone functionality, making them ideal for customers expecting professional results. Grade A aftermarket screens between £45 and £75 provide good touch response and acceptable colour accuracy but may lose True Tone after iOS updates. Budget screens at £20 to £35 seem attractive initially but typically fail within months, leading to repeat repairs and frustrated customers.
| Screen type | Price range | Expected lifespan | True Tone support | Best for |
|---|---|---|---|---|
| OEM refurbished | £70 to £110 | 2+ years | Yes | Professional repairs |
| Grade A aftermarket | £45 to £75 | 12 to 18 months | Limited | Cost-conscious repairs |
| Budget aftermarket | £20 to £35 | 6 to 12 months | No | Temporary solutions |
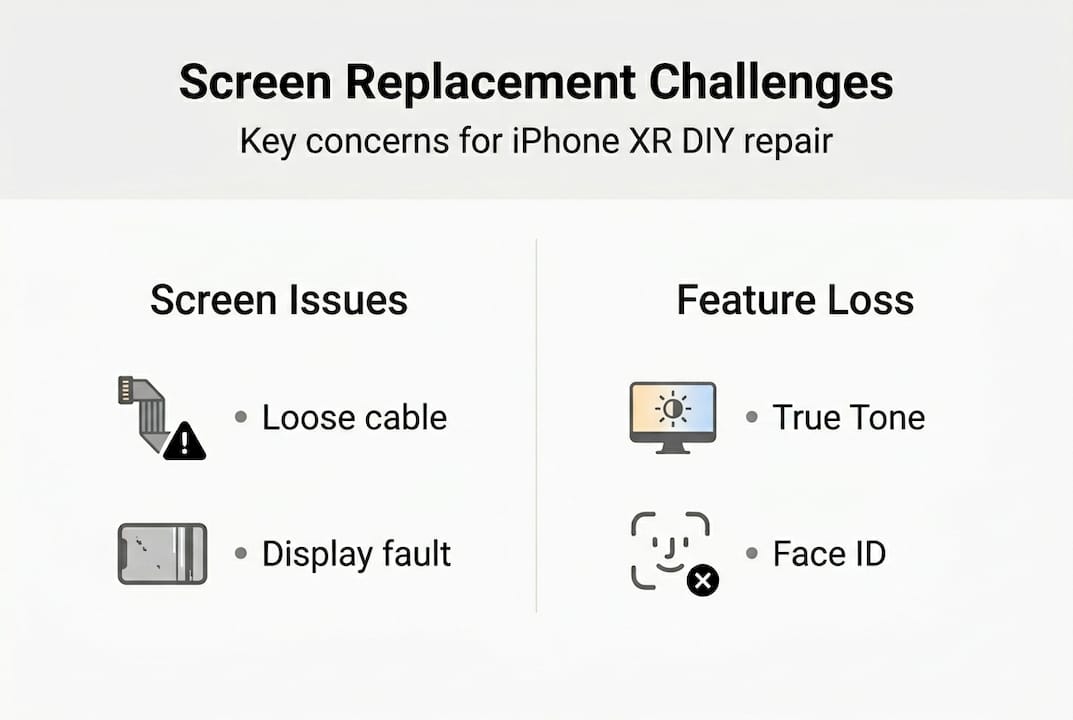
True Tone adjusts screen colour temperature based on ambient light, creating a natural viewing experience. Non-genuine screens disable this feature after iOS 18 updates, displaying “Unable to verify this iPhone has a genuine Apple display” warnings. Whilst the screen functions normally, losing True Tone affects user satisfaction and resale value. Understanding the iPhone XR screen repair cost trade-offs between price and features helps you choose appropriately for your situation.
Face ID presents another challenge. The front sensor array containing Face ID components pairs uniquely to each iPhone’s logic board during manufacturing. Replacing the screen without transferring the original sensor module permanently disables Face ID. Transferring requires micro-soldering skills and specialised equipment, making it impractical for most DIY repairs. Customers must accept this limitation or seek professional micro-soldering services.
Pro tip: Investing in quality screens prevents recurring repairs and builds customer trust if you operate a repair business, whilst budget options create frustration through early failures and feature loss.
Step by step guide to replacing the iPhone XR screen
Proper technique prevents damage to fragile components and ensures reliable results. Follow these steps carefully, working slowly and deliberately.
-
Power off the iPhone completely by holding the side button and volume button simultaneously, then sliding to power off. Remove the two Pentalobe screws flanking the Lightning port using your P2 screwdriver. Place screws on your magnetic mat in the order removed.
-
Position a suction cup near the bottom edge of the screen, away from the Home button area. Pull gently whilst inserting a plastic pick between the screen and frame. The adhesive requires patient, steady pressure rather than force. Slide the pick around the perimeter, cutting through adhesive strips. Avoid inserting picks deeper than 3mm to prevent cable damage.
-
Open the display like a book, hinging from the left side. Prop it at roughly 90 degrees using a stand or box. Locate the battery connector beneath a metal bracket secured by four tri-point screws. Remove the bracket and disconnect the battery immediately to prevent short circuits during subsequent steps.
-
Remove the metal plate covering the display cable connectors using a tri-point screwdriver. Disconnect the three display cables by lifting each connector straight up with a spudger. The digitiser cable, LCD cable, and earpiece sensor cable all require gentle, perpendicular lifting. Forcing angled disconnection breaks fragile sockets.
-
If attempting to preserve Face ID, you must transfer the earpiece speaker and sensor array from the old screen to the new one. This involves removing tiny screws, carefully lifting fragile flex cables, and precisely aligning components. Transferring the front module is extremely risky and often damages the delicate components, permanently disabling Face ID. Most DIY repairs accept Face ID loss rather than risk further damage.
-
Connect the new screen’s cables to the logic board in reverse order: earpiece sensor cable first, then LCD cable, then digitiser cable. Press each connector firmly until you feel it seat completely. Replace the metal connector plate and screws. Reconnect the battery temporarily and power on the device to test functionality before final assembly. Verify touch response across the entire screen, check display brightness and colour, and confirm all sensors respond correctly.
-
If testing reveals issues, disconnect the battery again and recheck all cable connections. Once satisfied with functionality, power off, disconnect the battery, apply fresh adhesive strips around the screen perimeter, and press the display firmly into place. Reinstall the two Pentalobe screws at the bottom. The replacement is complete.
Pro tip: Work on a clean, well-lit surface with an anti-static mat to protect sensitive electronics, and organise screws meticulously since different lengths serve different positions.
Common problems and how to fix them after replacement
Post-replacement issues often stem from connection problems or screen quality limitations. Understanding these helps you diagnose and resolve them quickly.
True Tone disabled appears in Settings when iOS detects a non-genuine display. iOS 18 and later versions disable True Tone automatically with aftermarket screens, displaying warnings in the Settings app. This limitation is permanent with non-OEM screens. Only genuine Apple displays or OEM refurbished screens maintain True Tone functionality after iOS updates. Customers must accept this trade-off when choosing aftermarket options.
Unresponsive touch or dead zones indicate poor screen quality or connection issues. First, verify all display cables seat properly by reopening the device and reseating each connector firmly. If connections are secure but problems persist, the screen itself is likely defective. Quality aftermarket screens occasionally have manufacturing defects affecting touch sensitivity. Contact your supplier for warranty replacement.
“Unable to verify this iPhone has a genuine Apple display” warnings appear in Settings and occasionally as pop-up notifications. These warnings don’t affect functionality but remain visible indefinitely with non-genuine screens. You can dismiss pop-ups, but the Settings warning persists. Educate customers about this limitation before performing repairs to manage expectations.
Face ID not working after screen replacement is expected unless you successfully transferred the original sensor module. The “Face ID is not available” message appears because the new screen lacks the paired sensor array. No software fix exists for this hardware limitation. Professional micro-soldering services can transfer the module, but this adds significant cost and risk.
Warning: Attempting to transfer the front sensor module without proper training and equipment frequently damages the delicate components permanently, leaving you unable to restore Face ID even with professional help later.
Display colour issues like yellow tint, poor contrast, or incorrect brightness suggest low-quality screens or defective units. Grade A screens should display accurate colours comparable to the original. Budget screens often exhibit colour shifts and poor viewing angles. If you purchased a quality screen but see colour problems, request warranty replacement. Refer to affordable iPhone XR screen replacements to understand quality expectations at different price points.
Backlight bleeding around screen edges indicates improper seating or poor screen quality. Reopen the device and verify the display sits flush against the frame with adhesive strips positioned correctly. Excessive bleeding suggests a defective screen requiring replacement.
Pro tip: Test screens thoroughly before final sealing by using the device normally for 10 to 15 minutes, checking touch response in all areas, adjusting brightness across the full range, and verifying sensor functionality.
Expectations and maintenance after replacing your iPhone XR screen
Understanding screen longevity and proper maintenance helps you deliver lasting repairs and satisfied customers. Different screen grades perform differently over time.
OEM refurbished screens last over 2 years with proper care, maintaining colour accuracy and touch sensitivity throughout their lifespan. Grade A aftermarket screens typically last 12 to 18 months before showing degradation like reduced brightness or touch sensitivity issues. Budget screens fail within 6 to 12 months, often developing dead pixels, touch problems, or complete failure.
| Screen grade | Expected lifespan | True Tone after iOS 18 | Typical cost | Warranty period |
|---|---|---|---|---|
| OEM refurbished | 2+ years | Supported | £70 to £110 | 12 months |
| Grade A aftermarket | 12 to 18 months | Not supported | £45 to £75 | 6 to 12 months |
| Budget aftermarket | 6 to 12 months | Not supported | £20 to £35 | 3 to 6 months |
Maintaining your replacement screen extends its lifespan significantly. Apply a tempered glass screen protector immediately after replacement to prevent scratches and absorb impact from drops. Clean the screen gently using microfibre cloths slightly dampened with water, avoiding harsh chemicals that damage oleophobic coatings. Keep the device in a protective case that raises edges above the screen, preventing direct contact when placed face down.
Avoid exposing the iPhone to extreme temperatures, which accelerate screen degradation. Don’t leave it in direct sunlight or hot vehicles, and avoid using it in freezing conditions when possible. Temperature extremes affect LCD performance and can separate adhesive layers over time.
If you operate a repair business, set clear customer expectations about screen quality differences. Explain that budget screens save money initially but require replacement sooner, whilst OEM refurbished screens cost more upfront but deliver better long-term value. Discuss the True Tone limitation with iOS 18 and the Face ID trade-off before performing repairs. Transparent communication builds trust and prevents dissatisfaction.
Monitor iOS updates for changes affecting screen compatibility. Apple periodically adjusts how iOS handles non-genuine components. Staying informed helps you advise customers accurately about potential issues. Check the iPhone XR screen replacement cost guide regularly for updated information on quality tiers and pricing.
Resale value considerations matter for customers planning to sell their devices eventually. iPhones with genuine screens command higher resale prices than those with aftermarket screens, particularly when the Settings app displays verification warnings. Factor this into your screen selection decision based on how long the customer plans to keep the device.
Regular inspection helps catch problems early. Check screen edges periodically for adhesive separation, which compromises water resistance. If gaps appear, reapply adhesive strips promptly to maintain seal integrity. Test touch sensitivity across the entire screen monthly to identify degradation before it becomes severe.
Discover quality iPhone XR replacement screens and tools
Sourcing reliable replacement screens and professional tools makes the difference between successful repairs and frustrating failures. Buy2Fix specialises in supplying UK repair enthusiasts and small businesses with quality iPhone XR screens across all grades, from OEM refurbished to budget options. You’ll find complete tool kits with everything needed for safe disassembly, plus individual components like adhesive strips and replacement screws. Free UK mainland shipping ensures quick delivery without added costs, whilst international shipping serves customers in over 40 countries. Professional customer support helps you select appropriate screen grades for your requirements and budget. Visit the Buy2Fix homepage to browse replacement screens, repair tools, and accessories that deliver reliable, long-lasting results for your DIY projects or repair business today.
FAQ about replacing iPhone XR screen
What are the best quality replacement screens for iPhone XR?
OEM refurbished screens offer the best quality, maintaining True Tone functionality and lasting over 2 years with proper care. They cost £70 to £110 but deliver professional results. Grade A aftermarket screens provide good value at £45 to £75 for cost-conscious repairs, though they lose True Tone after iOS 18 updates.
Can I preserve Face ID when replacing the screen myself?
Preserving Face ID requires transferring the original front sensor module from the old screen to the new one, which demands micro-soldering skills and specialised equipment. Most DIY repairs result in permanent Face ID loss because the transfer process is extremely delicate and risky. Professional micro-soldering services can attempt the transfer, but success isn’t guaranteed.
How long do aftermarket iPhone XR replacement screens typically last?
Grade A aftermarket screens typically last 12 to 18 months before showing degradation, whilst budget screens fail within 6 to 12 months. OEM refurbished screens last over 2 years. Lifespan depends on screen quality, usage patterns, and maintenance practices like using screen protectors and protective cases.
What tools do I need to replace the iPhone XR screen safely?
You need a Pentalobe P2 screwdriver, tri-point screwdriver, suction cup, plastic spudgers and picks, anti-static wrist strap, magnetic mat for organising screws, and fresh adhesive strips. These tools prevent damage to delicate components during disassembly and ensure proper reassembly. Working without proper tools risks breaking cables or stripping screws.
Where can I buy reliable replacement screens and tools in the UK?
Buy2Fix supplies quality iPhone XR replacement screens and professional repair tools with free UK mainland shipping. They stock OEM refurbished, Grade A, and budget screens to suit different requirements and budgets. Their customer support helps you select appropriate components for your repair projects. Check the iPhone XR screen repair cost guide for detailed pricing and quality comparisons.
Recommended
Let customers speak for us
Well made part very strong easy to fit great value for the money

Well packed, with fast shipping :)

Exactly what the doctor ordered…great color, comfort, and durability. Trust this watch band!

Brilliant strap, second purchase, bought bracelet before. Excellent value. Thank you

Great item for splitting your Audio signal

Outstanding product!
Next level customer service.

Very satisfied but the delivery needs to get more faster...

Good price,quick delivery

Best phone case ever! This is my second one as I broke my first. Would defo recommend

Great fitting Apple Watch bands

For Apple Watch Ultra 3 / 2 / 1 49mm RedPepper Armor Metal Case Integrated Silicone Watch Band(Steel Black White)

Good price and quick postage

Perfect fit.

Absolutely necessary

Second Purchase and still a very happy customer. Keep up the good work.
