

Essential guide to iPhone 11 damage and DIY repairs
TL;DR:
- Screen damage remains the most common issue despite iPhone 11’s tough reputation.
- Accurate damage assessment and quality parts are crucial for effective repairs.
- Following proper tools and procedures enhances repair success and avoids further damage.
The iPhone 11 earned a reputation for being one of Apple’s tougher handsets, with its IP68 water resistance rating and reinforced glass. But toughness is relative. Drop it once on the wrong surface and you’re looking at a cracked display. Leave it on charge overnight for two years and the battery quietly deteriorates. The truth is, the iPhone 11 is just as vulnerable to everyday wear as any other smartphone. This guide walks you through the most common damage types, how to assess what’s actually wrong, how to source quality parts, and how to carry out repairs safely whether you’re a hobbyist or running a small repair business.
Table of Contents
- The most common iPhone 11 damage types
- How to assess the extent of your iPhone 11 damage
- Choosing quality replacement parts for iPhone 11 repairs
- DIY repair steps and best practices for iPhone 11
- What experienced repairers wish they knew sooner
- Find trusted parts and help for every iPhone 11 repair
- Frequently asked questions
Key Takeaways
| Point | Details |
|---|---|
| Battery checks are vital | Monitor battery health via Settings to know when replacement is needed. |
| Choose quality parts | Opt for genuine or high-quality third-party components to avoid future faults. |
| DIY can save money | With the proper guide and tools, many iPhone 11 repairs are manageable at home. |
| Be prepared for challenges | Some repairs are more complicated than expected, so take precautions and don’t cut corners. |
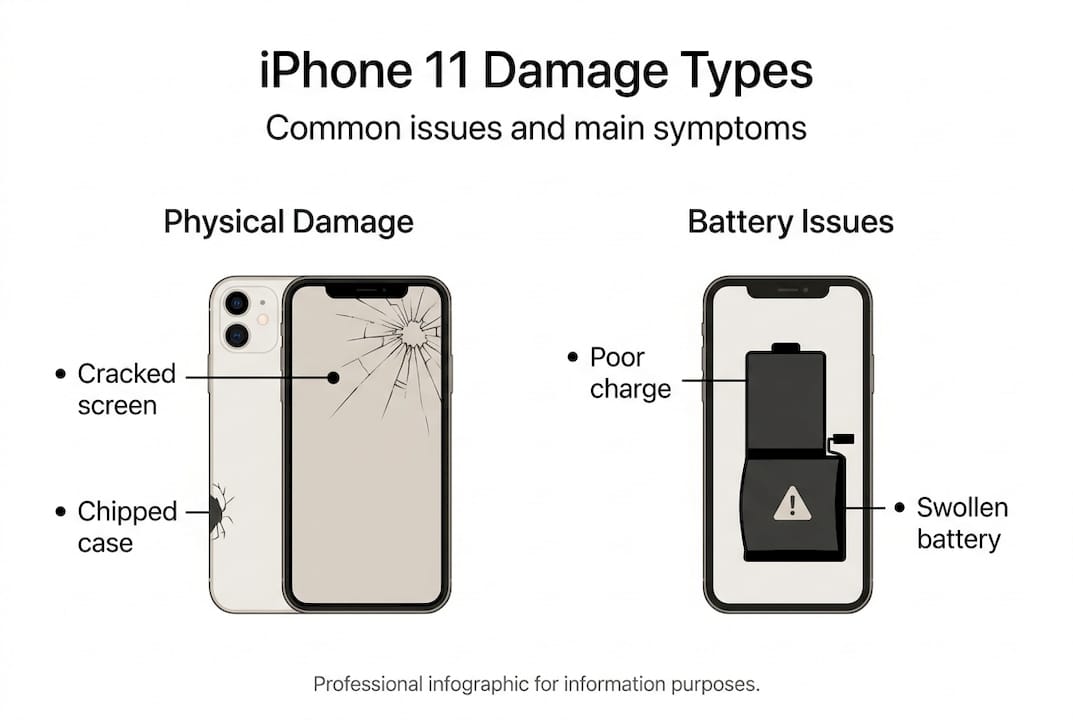
The most common iPhone 11 damage types
The iPhone 11 launched with Apple’s toughest glass at the time, yet screen damage remains the single most reported issue. A cracked display is obvious, but an unresponsive touchscreen or discolouration around the edges can point to damage beneath the surface. If your screen shows black patches, flickering, or dead zones that don’t respond to touch, the LCD or digitiser layer may be compromised. Understanding the screen replacement cost before you start helps you budget realistically.
Battery degradation is the second major culprit. Apple designs the iPhone 11 battery to retain 80% capacity at 500 cycles, but heavy users can hit that threshold well within two years. Symptoms include rapid drain, unexpected shutdowns at 20% or higher, and the phone becoming warm during light use. Knowing the battery replacement cost upfront saves you from being caught off guard.
Water damage is trickier to spot. The IP68 rating offers protection up to two metres for thirty minutes, but it does not cover saltwater, chlorinated water, or a device with a compromised seal from a previous repair. Warning signs include a muffled speaker, a greyed-out camera, or the liquid contact indicator inside the SIM tray turning red or pink.
Other common hardware faults include:
- Rear camera blur or black screen: Often caused by a dislodged camera module or cracked lens
- Side button or volume buttons not responding: Usually a worn flex cable underneath
- Charging port not recognising cables: Lint compaction or a damaged Lightning connector
- Face ID failure: Frequently linked to a poorly fitted screen replacement damaging the dot projector
| Damage type | Visible signs | Functional signs |
|---|---|---|
| Cracked screen | Spiderweb fractures, chips | Dead touch zones, flickering |
| Battery fault | Swelling (rare) | Rapid drain, shutdowns |
| Water damage | Corrosion, red indicator | Muffled audio, camera failure |
| Charging port fault | Lint, bent pins | No charge, intermittent connection |
| Camera damage | Cracked lens | Blurry photos, black viewfinder |
A useful starting point: run a quick visual inspection under good lighting before assuming the worst. Many faults that seem catastrophic are actually isolated to one component.
How to assess the extent of your iPhone 11 damage
Knowing the type of damage is only half the story. Assessing severity determines whether a quick DIY fix will do the job or whether you need to factor in professional support.
Start with a structured visual and functional check:
- Screen: Swipe across every corner of the display. Test pinch, scroll, and tap gestures. A screen that cracks but remains fully functional is lower priority than one with dead touch zones affecting usability.
- Battery: Navigate to Settings > Battery > Battery Health and Charging. Apple advises replacing below 80% capacity for reliable performance. Note the cycle count if your iOS version surfaces it.
- Charging: Try two different cables and two different power adaptors before concluding the port is faulty. Cables fail far more often than ports.
- Cameras: Open the camera app and test all three lenses individually. Check front and rear. A blurry rear camera may simply need a lens clean.
- Speakers and microphone: Make a test call and play audio at full volume. Muffled output after water exposure can sometimes resolve itself once the device dries fully.
Pro Tip: Before opening your iPhone 11, back it up via iCloud or Finder. Repairs occasionally go sideways, and losing data on top of a hardware fault is a frustrating double blow.
The table below helps you decide whether to DIY or seek help:
| Symptom | DIY suitability | Notes |
|---|---|---|
| Cracked screen, touch intact | Moderate | Follow a screen assessment guide |
| Battery below 80% | High | Straightforward swap with right tools |
| Water damage signs | Low | Internal corrosion needs specialist cleaning |
| Face ID not working | Low | Dot projector calibration is Apple-only |
| Charging port fault | Moderate | Fiddly but doable with patience |
For battery faults specifically, checking the battery replacement price against the cost of a new device is a sensible step before committing to any repair.
Choosing quality replacement parts for iPhone 11 repairs
Once you’ve diagnosed the problem, sourcing quality parts is the next crucial step. This is where many DIY repairs go wrong, not during the repair itself, but before it even starts.

The genuine versus aftermarket debate is real. Genuine Apple parts offer guaranteed compatibility and performance, but they are only available through Apple’s Self Repair programme at a premium price. High-quality aftermarket parts from reputable suppliers can match or come very close to OEM performance at a fraction of the cost, provided you know what to look for. Apple’s own replacement part guidance outlines what to expect from genuine components, which gives you a useful benchmark when evaluating alternatives.
Here’s what to check when vetting a supplier:
- Warranty coverage: Any credible supplier offers at least a 90-day warranty on parts. A one-year warranty is a strong signal of confidence in quality.
- Compatibility confirmation: Parts must be listed specifically for the iPhone 11, not a generic “iPhone 11 series” catch-all that may include the Pro or Pro Max.
- Customer reviews: Look for verified reviews that mention fit, colour accuracy, and touch sensitivity, not just delivery speed.
- Return policy: A 30-day return window is the minimum acceptable. It protects you if the part is faulty on arrival.
- UK-based stock: Ordering from UK-based suppliers means faster delivery, easier returns, and compliance with consumer rights legislation.
Pro Tip: Avoid parts listed with vague descriptions like “high copy” or “OEM grade” without further detail. These are often low-quality components dressed up in marketing language. Ask the supplier directly about the panel type, whether it uses an OLED or LCD assembly, and whether touch sensitivity has been tested.
For screen repairs in particular, the quality difference between a poor panel and a good one is immediately noticeable. Colours look washed out, touch response lags, and brightness caps are often lower. Reading up on replacement screen advice before purchasing helps you ask the right questions and avoid costly mistakes.
Budget accordingly. Spending a little more on a quality part is nearly always cheaper than buying a cheap part twice.
DIY repair steps and best practices for iPhone 11
With quality parts in hand, let’s move step by step through the actual repair process.
Essential tools checklist:
- Pentalobe P2 screwdriver (for the two bottom screws)
- Phillips #000 screwdriver
- Plastic spudger and opening picks
- Suction cup handle
- Anti-static wrist strap
- Tweezers
- Adhesive strips (for screen resealing)
Screen replacement sequence:
- Power off the device completely before touching any screws.
- Remove the two Pentalobe screws flanking the Lightning port.
- Apply a suction cup to the lower screen edge and gently pull while working an opening pick around the perimeter. The iPhone 11 uses adhesive, not clips, so patience matters here.
- Open the screen like a book from the bottom, rotating upward. Do not pull it away from the body as the flex cables are still attached at the top.
- Disconnect the three screen connectors in order, starting from the bottom of the bracket.
- Transfer the earpiece mesh, front camera bracket, and home button flex to your new screen.
- Reconnect, test touch and display before resealing, then apply new adhesive strips and press firmly.
For a detailed walkthrough, the safe screen replacement guide covers each step with additional visuals, and the screen replacement process article is worth bookmarking before you start.
Always test the new part before full reassembly. Powering on with the screen loosely connected lets you confirm touch and display function without committing to the adhesive seal.
Pro Tip: Wear an anti-static wrist strap throughout. Static discharge can silently damage the display driver IC or touch controller, turning a successful repair into a mystery fault.
Battery replacement follows a similar process but adds the challenge of adhesive pull tabs beneath the battery. Pull them slowly at a low angle. Rushing this step is the most common cause of a torn tab, which then requires isopropyl alcohol to soften the remaining adhesive.
What experienced repairers wish they knew sooner
Here’s something the repair community rarely says out loud: the “easy” repairs are only easy once you’ve done them three or four times. That first screen swap on an iPhone 11 will take you longer than any YouTube video suggests, and that’s completely normal.
The hidden cost is time. A repair that saves you £60 on labour can easily consume two hours if you’re unfamiliar with the process. Factor that in honestly, especially if you’re running a repair business where time directly affects profitability.
Shortcuts with tools are where most damage happens. Using a flathead screwdriver instead of a proper Pentalobe bit strips the screw head instantly. Once stripped, removal requires a specialist extractor kit and adds thirty minutes to a job. Proper tools pay for themselves after one repair.
Small parts matter more than people expect. The earpiece mesh, the front camera bracket, and the adhesive strips are easy to skip or reuse. But a loose bracket causes Face ID failures. Old adhesive causes poor water resistance. These small oversights generate callbacks and unhappy customers.
Checking screen repair costs before every job keeps your pricing honest and your customers informed. Transparency about parts quality and realistic timelines builds the kind of trust that generates repeat business and referrals.
Find trusted parts and help for every iPhone 11 repair
Ready to put your knowledge into practice? At Buy2fix, we stock a wide range of iPhone 11 replacement parts including screens, batteries, charging ports, and camera modules, all backed by a one-year warranty and free UK mainland shipping. Whether you’re a hobbyist tackling your first screen swap or a repair technician sourcing parts in volume, our catalogue covers everything you need. Every part is quality checked before dispatch, and our 30-day return policy means you’re never left out of pocket if something isn’t right. Browse our full range and repair guides to get your iPhone 11 back in top condition.
Frequently asked questions
How can I tell if my iPhone 11 battery needs replacing?
Go to Settings > Battery > Battery Health and Charging. Apple recommends replacing the battery if capacity falls below 80% or if the device has exceeded 500 charge cycles.
Is it safe to replace an iPhone 11 screen at home?
Yes, provided you follow a reliable step-by-step guide, use the correct tools, and handle the flex cables carefully to avoid damaging Face ID components.
Will using third-party parts void my iPhone 11 warranty?
Apple may decline service or warranty support if non-genuine parts are detected, so always source from reputable suppliers and retain proof of purchase.
What should I do if my iPhone 11 won’t turn on after a DIY repair?
Check that all connectors are fully seated, confirm no screws are missing from the bracket, and if the fault persists, consult a professional as deeper hardware damage may be present.
Recommended
Let customers speak for us
Well made part very strong easy to fit great value for the money

Well packed, with fast shipping :)

Exactly what the doctor ordered…great color, comfort, and durability. Trust this watch band!

Brilliant strap, second purchase, bought bracelet before. Excellent value. Thank you

Great item for splitting your Audio signal

Outstanding product!
Next level customer service.

Very satisfied but the delivery needs to get more faster...

Good price,quick delivery

Best phone case ever! This is my second one as I broke my first. Would defo recommend

Great fitting Apple Watch bands

For Apple Watch Ultra 3 / 2 / 1 49mm RedPepper Armor Metal Case Integrated Silicone Watch Band(Steel Black White)

Good price and quick postage

Perfect fit.

Absolutely necessary

Second Purchase and still a very happy customer. Keep up the good work.
