

Solve battery terminal problems: diagnosis, repair, and parts
TL;DR:
- Faulty battery terminals can mimic dead batteries, causing charging and powering issues.
- Diagnosing involves visual inspections, cleaning, reshaping pins, and multimeter tests for shorts.
- Using OEM parts and thorough testing ensure long-lasting, reliable repairs.
Solve battery terminal problems: diagnosis, repair, and parts
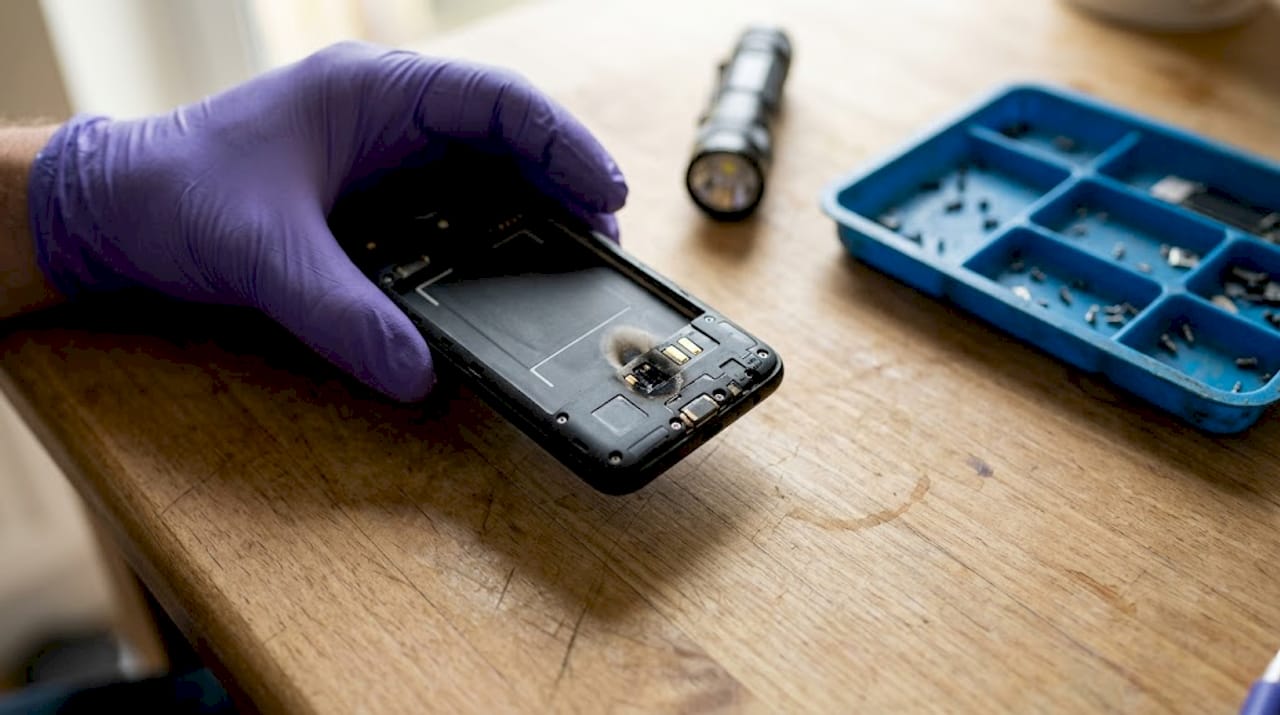
Battery terminal faults are one of the most frustrating problems in smartphone repair. You fit a brand-new battery, reassemble the device, press the power button, and nothing happens. Or the phone charges for five minutes, then drops to zero. These symptoms are common, and more often than not the culprit is not the battery at all. It is the connector or terminal that links the battery to the motherboard. This guide walks through how to recognise terminal problems, why they occur, how to diagnose them properly using the right tools, and how to make the right call between a DIY fix and a full connector replacement.
Table of Contents
- How to recognise battery terminal problems
- Main causes of battery terminal faults
- Diagnosing battery connector problems: tools and techniques
- Repair or replace? Choosing the best fix and parts
- What most guides miss about battery terminal problems
- Find reliable parts and guides for your repair
- Frequently asked questions
Key Takeaways
| Point | Details |
|---|---|
| Diagnose before replacing | Symptoms can be misleading—always test and inspect terminals before buying new parts. |
| Quality parts matter | Low-quality or mismatched connectors often cause repeat problems or poor fits in UK mobiles. |
| Prevention saves effort | Avoid repeated removal, moisture exposure, and heavy handling to extend terminal lifespan. |
| Test all repairs twice | Always validate with a multimeter and fit test before full reassembly of your phone. |
How to recognise battery terminal problems
Before you order parts or reach for a soldering iron, you need to be certain that battery terminals are actually causing the fault. Misdiagnosis is one of the biggest reasons repairs fail the first time around. The symptoms of a bad terminal are surprisingly easy to mistake for a dead battery, a faulty charging port, or even a software fault.
Common symptoms of faulty terminals include the phone failing to power on despite a known-good battery, charging that cuts in and out, loose or rattling battery movement, random restarts when the handset is shaken, and visible burn marks or greenish corrosion near the connector area. Any one of these warrants a close look at the terminals before anything else.
Here is a quick checklist of what to look for during initial inspection:
- Device will not power on even after fitting a fully charged, tested battery
- Erratic or interrupted charging, where the phone may charge briefly then stop
- Loose battery movement inside the chassis, suggesting a weak physical connection
- Random restarts or shutdowns, especially when the handset is moved or tapped
- Visible corrosion, often a greenish or white residue around metal contacts
- Burn marks or discolouration near the connector, which may indicate a past short circuit
If a newly installed battery still produces intermittent charging or random shutdowns, do not assume the new battery is faulty. The terminal connection is the first thing to revisit.
Visual inspection under good lighting, ideally with a magnifying loupe or jeweller’s glass, is your first practical step. Look at the condition of the connector pins, the solder joints around the battery connector on the PCB, and any signs of heat damage. Faulty terminals can mimic a dead battery so convincingly that even experienced technicians replace a perfectly good cell. Slow down and inspect before spending money on parts.
Burn marks deserve special attention. A blackened or melted area near the connector is not just cosmetic; it may indicate a past short circuit that has damaged the PCB tracks beneath. That changes the repair from a simple connector swap to a more involved board-level job.
Main causes of battery terminal faults
Understanding why terminals fail helps you judge how serious the fault is and what is likely to fix it permanently. Terminal faults rarely happen out of nowhere. There are consistent, well-documented causes, and most of them are avoidable once you know what to look for.
Common causes of battery connector damage include wear from repeated battery removal, corrosion caused by moisture or humidity, physical damage from drops, and connector melting due to excessive heat or current from poor-quality chargers.
- Repeated removal and refitting of the battery gradually weakens the terminal fit. Each reconnection flexes the pins slightly, and over time this causes micro-fatigue and loose contacts.
- Moisture and humidity are silent destroyers. Even a brief exposure to condensation can leave corrosion behind that builds up over weeks and causes unreliable charging.
- Drops and impacts crack, bend, or snap fragile connector pins that are often less than a millimetre wide. The damage may not be visible until you inspect under magnification.
- Poor-quality chargers or batteries can push excessive current through the circuit. Over time this overheats the connector, softening the plastic housing and melting the pin contacts.
Knowing why batteries and terminals fail is especially useful for professional technicians who handle the same device models repeatedly. If you see a pattern of terminal failures on a particular handset, the design of that connector is worth investigating.
Pro Tip: If you are working on a device that has been used in a kitchen, bathroom, or outdoor environment, treat moisture damage as the default assumption until inspection proves otherwise. Corroded contacts often look clean under basic lighting but reveal themselves instantly under a loupe.
For specialist devices such as Imin Swift1 replacement batteries, the same principles apply: always check the quality of the connector interface before assuming a battery swap alone will resolve the fault.
Understanding repair terms like PCB track damage, cold solder joint, and short circuit will help you communicate fault details accurately, whether you are working solo or briefing a customer.
Diagnosing battery connector problems: tools and techniques
Once you understand the causes, methodical diagnosis is the bridge between suspicion and certainty. Guessing wastes time and risks further damage. The right approach uses visual checks, chemical cleaning, and electronic testing in a defined sequence.
The recommended repair methodology follows five steps: inspect under magnification, clean with isopropyl alcohol, reshape bent pins, re-solder loose joints, and replace if components are broken or melted. Always confirm the repair with a multimeter continuity test.
Here is a practical step-by-step process:
- Inspect under magnification. Use a loupe or USB microscope. Check every visible pin, the solder joints around the connector base, and the PCB pads for cracks or lift.
- Clean all contacts. Apply 90% to 100% isopropyl alcohol with a fine anti-static brush. Work in short strokes and allow the alcohol to evaporate fully before proceeding.
- Reshape bent pins. Use fine-tipped tweezers or a spudger. Work slowly under magnification; the pins are fragile and will snap if forced.
- Re-solder any lifted joints. A temperature-controlled soldering station set between 300°C and 320°C works best for this kind of SMD (surface-mount device) work.
- Replace the connector if pins are melted, broken, or if the plastic housing is deformed. Cleaning or reshaping will not restore a structurally compromised connector.
Pro Tip: When checking replacement battery tips, always run a continuity check between the battery connector pads on the PCB before fitting the new cell. A broken pad that you missed will waste your new part.
Multimeter testing for shorts and continuity
A multimeter is non-negotiable for professional-grade diagnosis. The table below shows how to interpret readings when checking battery connector circuits.
| Test | Method | Result | Interpretation |
|---|---|---|---|
| Continuity | Buzzer mode across known-good track | Beep | Connection intact |
| Continuity | Buzzer mode across broken track | No beep | Open circuit or broken solder joint |
| Short check (forward) | Resistance across battery connector positive/negative | ~25 ohms | Possible half-short on PCB |
| Short check (both directions) | Buzzer mode forward and reverse | Beep both ways | Full short circuit confirmed |
For PCB short-circuit checks, use the multimeter in buzzer mode on the battery connector in both forward and reverse orientation. A low resistance reading in one direction may indicate a half-short; a beep in both directions confirms a full short. Once a short is identified, a regulated DC power supply can help locate the heating component.
For guidance on choosing connector types for specific models, it is worth understanding whether the device uses a Board-to-Board (BTB) connector, a flex cable connector, or a direct-solder design. Each type has different failure modes and different repair requirements. POS hardware troubleshooting shares overlapping diagnostic principles with smartphone battery circuits, particularly around connector integrity.
Repair or replace? Choosing the best fix and parts
With your diagnosis complete, the next decision is practical: repair what is there, or fit a new connector? Both approaches are valid, but only in the right circumstances.
| Fault type | Recommended action | DIY feasibility |
|---|---|---|
| Dirty or oxidised contacts | Clean with IPA | High |
| Slightly bent pins | Reshape with tweezers | Medium |
| Lifted solder joints | Re-solder | Medium to high |
| Melted or snapped pins | Replace connector | Low to medium |
| Damaged PCB pads | Board-level repair | Low (specialist) |
Expert repair guidance consistently highlights a few practices that separate successful repairs from repeated failures. Always connect the battery connector before adhering the battery in place, so you can confirm fit before committing to adhesive. Use 90% or higher isopropyl alcohol for all cleaning. Test the device before full reassembly, not after. And if you have fitted a new battery, run a few full charge and discharge cycles to calibrate it properly.
Key considerations when choosing parts:
- OEM (original equipment manufacturer) connectors offer the most reliable fit and the lowest risk of boot loops or charging errors after installation
- Aftermarket connectors vary enormously in quality. Aftermarket part quality variance is well-documented and can cause connector mismatch, boot failures, or intermittent faults that are hard to trace
- Explore OEM vs aftermarket parts in detail if you are unsure which grade suits your repair
- Always test before full reassembly; catching a fault at this stage takes two minutes rather than twenty
- For devices like the Imin M2 Series, confirming the exact connector variant before ordering is essential to avoid costly mismatches
For a thorough grounding in what tools and consumables to keep on hand, the battery replacement essentials guide covers everything from prying tools to adhesive strips.
What most guides miss about battery terminal problems
Most repair guides treat battery terminal faults as simple, isolated problems. Clean the contact, reshape the pin, swap the connector, done. In practice, that approach leaves out the most common reason repairs come back to the bench a week later.
The real issue is diagnostic discipline. Technicians, especially those under time pressure, often stop investigating the moment they spot one possible fault. A dirty contact gets cleaned and the device tests okay for thirty seconds, so it goes back to the customer. But if there is also a cold solder joint nearby, or a PCB track with a hairline crack, the fault will return.
We have seen this pattern repeatedly: a phone returns after a “successful” terminal repair with the same intermittent fault, and the root cause turns out to be a fractured solder pad that was never tested with a multimeter. Skipping the continuity check costs far more in repeat labour and customer dissatisfaction than the two minutes it would have saved.
Part quality is the other blind spot. The market is saturated with connectors that look correct in photographs but differ in pin pitch or housing depth by fractions of a millimetre. That is enough to cause intermittent contact or prevent the housing from sitting flush on the PCB. Demanding verified, tested parts is not overcautiousness; it is the baseline for work that lasts.
Slowing down, measuring properly, and insisting on the right parts every single time will always beat the shortcut.
Find reliable parts and guides for your repair
Successful battery terminal repairs depend on two things: the right diagnosis and the right parts. At Buy2fix, we stock tested batteries, connectors, and replacement kits for a wide range of smartphones including iPhone, Samsung Galaxy, Huawei, Xiaomi, and OPPO. Every order ships free to UK mainland addresses, and our 30-day return policy means you can order with confidence. If you want a practical walkthrough before you start, our step-by-step battery replacement guide takes you through the entire process with clear, tool-specific instructions. Whether you are a DIY enthusiast tackling your first repair or a technician looking for a dependable UK supplier, we have the parts and guidance to get the job done properly.
Frequently asked questions
What are the first signs of battery terminal problems in a smartphone?
Phones failing to power on, charging issues, and visible corrosion are typical first indicators of terminal issues. Random restarts when shaking the device are also a reliable early warning.
Can I reuse a smartphone battery after repairing its terminal?
Yes, if the battery itself is undamaged and the repair is thorough, reusing the original cell is perfectly safe. Always confirm with a multimeter continuity check before reassembly.
How do I know if a short circuit is causing battery issues?
Check resistance with a multimeter; low readings or a beep in both forward and reverse directions typically confirms a short circuit on the PCB.
Is it better to use OEM battery connectors or can aftermarket parts work?
OEM parts are the safest choice, but well-sourced aftermarket connectors can work. Aftermarket quality variance is a genuine risk, so always verify the pin pitch and housing dimensions before fitting.
Should I calibrate my phone’s battery after replacing the connector?
Yes. Run a few full charge and discharge cycles after the repair to calibrate the battery and ensure accurate power readings on the device.
Recommended
Let customers speak for us
Well made part very strong easy to fit great value for the money

Well packed, with fast shipping :)

Exactly what the doctor ordered…great color, comfort, and durability. Trust this watch band!

Brilliant strap, second purchase, bought bracelet before. Excellent value. Thank you

Great item for splitting your Audio signal

Outstanding product!
Next level customer service.

Very satisfied but the delivery needs to get more faster...

Good price,quick delivery

Best phone case ever! This is my second one as I broke my first. Would defo recommend

Great fitting Apple Watch bands

For Apple Watch Ultra 3 / 2 / 1 49mm RedPepper Armor Metal Case Integrated Silicone Watch Band(Steel Black White)

Good price and quick postage

Perfect fit.

Absolutely necessary

Second Purchase and still a very happy customer. Keep up the good work.
