

How to Get Phone Screen Fixed Safely and Efficiently
Most british phone owners are surprised to learn that over 60 percent of smartphone repairs can be done at home with the right approach. Cracked screens, dead pixels, and shattered displays often seem like problems only a professional can solve. By understanding each step carefully, anyone can navigate the process from assessing screen damage to a full repair with greater confidence and far less worry about compatibility or costly mistakes.
Table of Contents
- Step 1: Assess Screen Damage And Identify Model
- Step 2: Source Quality Replacement Parts And Tools
- Step 3: Power Down And Prepare Work Area
- Step 4: Remove Broken Screen Carefully
- Step 5: Install New Screen And Test Functionality
- Step 6: Verify Repair Quality And Reassemble Device
Quick Summary
| Key Point | Explanation |
|---|---|
| 1. Assess screen damage accurately | Identify specific damage types and model to ensure a successful repair and avoid incompatible parts. |
| 2. Source quality replacement parts | Choose high-quality OEM parts over aftermarket ones to ensure longevity and proper functionality of the repair. |
| 3. Prepare your workspace properly | Create a clean, organized space to prevent accidents and maintain focus during the repair process. |
| 4. Remove the broken screen carefully | Use professional tools and techniques to avoid damaging internal components during removal. |
| 5. Verify repair quality thoroughly | Test device functionality thoroughly before reassembly to ensure everything works correctly after the repair. |
Step 1: Assess Screen Damage and Identify Model
Successfully fixing a phone screen begins with accurate damage assessment and precise device identification. Understanding the specific type of damage and your smartphone’s exact model will streamline the entire repair process and help you select appropriate replacement components.
Start by carefully examining your device’s screen under good lighting. Look for distinct damage patterns using smartphone screen repair techniques to categorise the problem accurately. Common damage types include surface scratches, spiderweb cracks, complete shattering, or dead pixel zones. Note the precise location and extent of damage identifying whether it affects touch responsiveness, display clarity, or structural integrity.
To identify your specific phone model, check the device settings or locate the model number printed on the original packaging or device backside. Understanding the model helps determine screen replacement complexity as some smartphones require specialised repair approaches. Professional technicians recommend taking high resolution photographs of the damage to assist with accurate diagnostics and potential remote consultations.
Warning: Attempting repairs without proper model identification can lead to purchasing incompatible replacement parts, potentially causing further device damage. Always confirm your exact smartphone model before proceeding with any screen repair strategy.
Step 2: Source Quality Replacement Parts and Tools
Selecting the right replacement parts and tools is crucial for a successful phone screen repair. This step requires careful research and understanding of your specific device requirements to ensure compatibility and optimal performance.
When sourcing replacement components, understanding the differences between OEM and aftermarket parts becomes essential. Original Equipment Manufacturer (OEM) parts are manufactured by the phone’s original producer and typically offer the highest quality and precision. Aftermarket parts are produced by third party manufacturers and can vary significantly in quality and performance. Your choice will impact the overall repair outcome and your device’s future functionality.
To source quality parts effectively, consider these key strategies. Research reputable suppliers specialising in mobile device components. Check for detailed product specifications, warranty information, and customer reviews. Invest in professional grade repair tools such as precision screwdriver sets, spudgers, suction cups, and anti static wrist straps. Selecting appropriate phone repair parts requires careful comparison of compatibility specifications, including model number, screen resolution, and connector types.
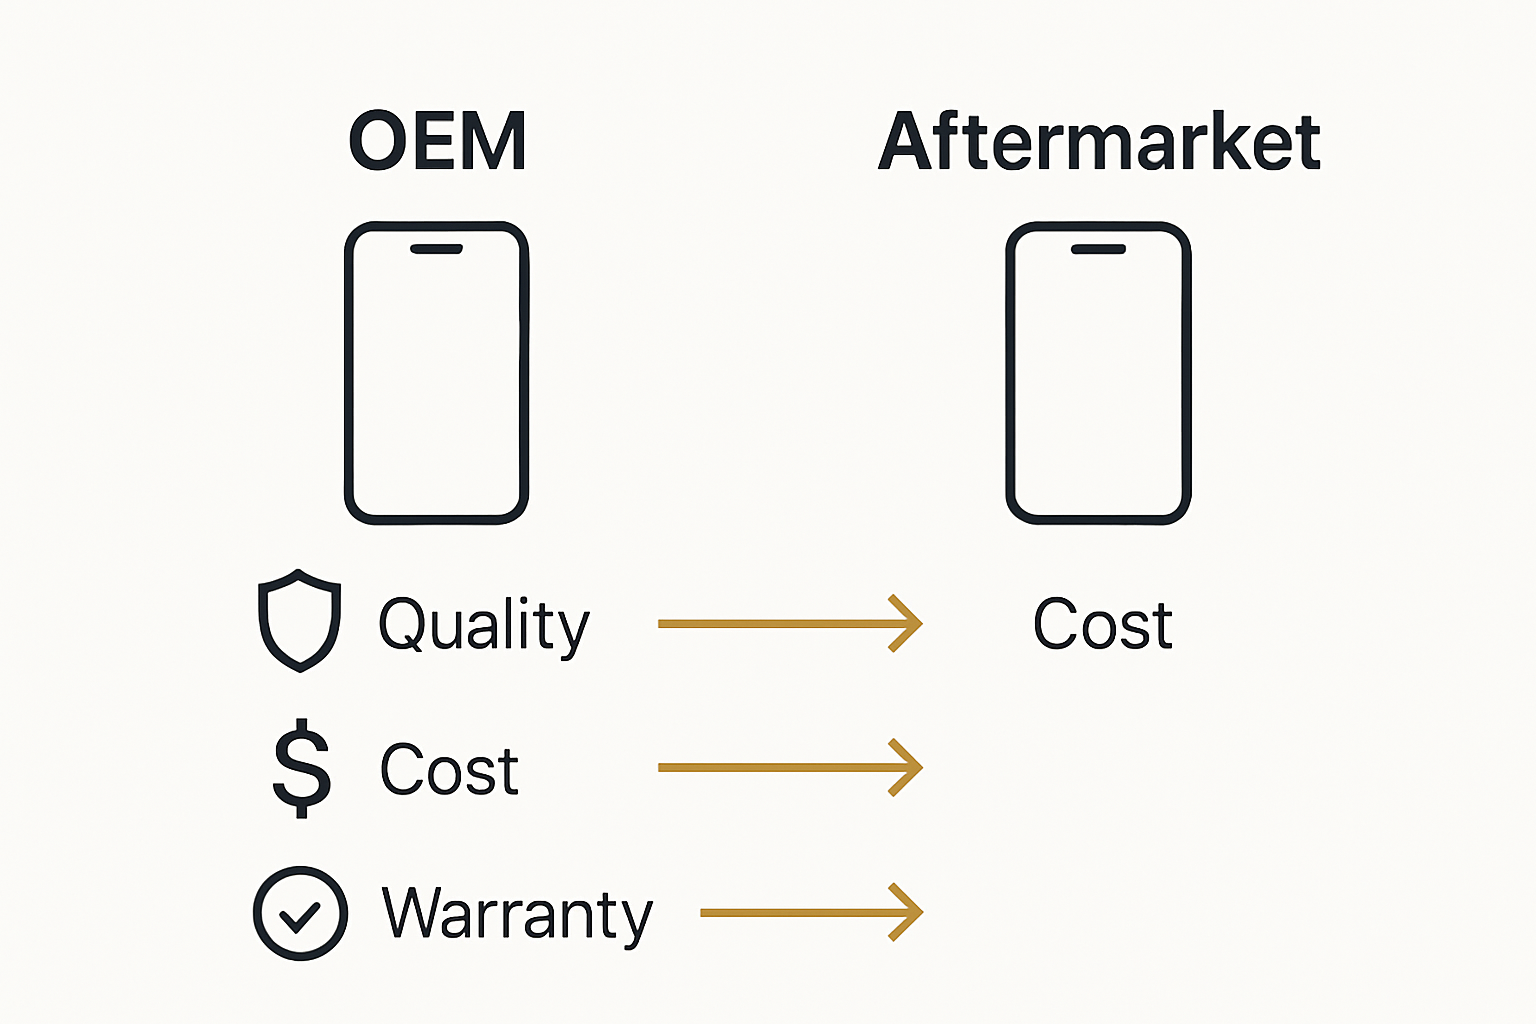
Warning: Purchasing incompatible or low quality replacement parts can permanently damage your smartphone. Always verify part specifications and purchase from trusted suppliers with robust return policies and quality guarantees.
Step 3: Power Down and Prepare Work Area
Before beginning any phone screen repair, establishing a safe and organised workspace is fundamental to preventing potential device damage and ensuring a smooth repair process. Proper preparation involves careful device handling and workspace organisation.
Start by completely powering down your smartphone. Remove the battery if possible or ensure the device is completely switched off to prevent electrical shorts or accidental activation during repair. Clear a clean flat surface with ample lighting and space to organise your tools and components. Lay out a soft antistatic mat or clean white cloth to protect your device and provide a clear workspace. Gather essential repair tools including precision screwdrivers, plastic spudgers, tweezers, suction cups, and an anti static wrist strap to minimise potential electrostatic discharge.
Systematic workspace preparation is critical for successful device repairs, so take time to organise your equipment methodically. Group your tools by type and ensure everything is within easy reach. Keep a small container nearby to store screws and small components to prevent loss. Wear clean cotton gloves to minimise skin oils transferring to delicate electronic components.
Warning: Never attempt repairs in a cluttered or unstable environment. Dropping tools or components can cause irreparable damage to your smartphone. Work in a well lit area with minimal distractions to maintain focus and precision throughout the repair process.
Step 4: Remove Broken Screen Carefully
Removing a broken smartphone screen requires precision, patience, and strategic technique to prevent further damage to your device. Carefully disassembling the screen involves specialised tools and methodical approach.
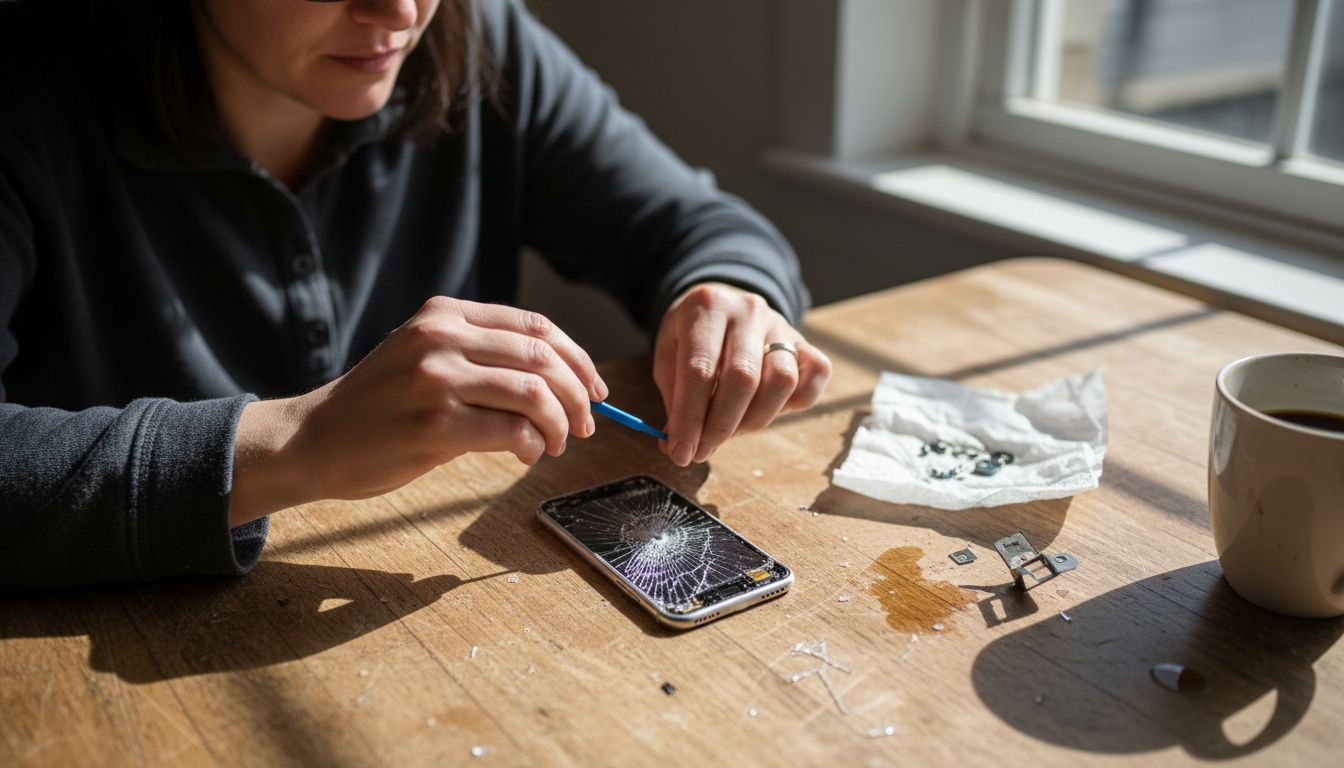
Utilising professional tools like suction cups and plastic prying implements makes screen removal more manageable. Begin by applying gentle heat around the screen edges using a hairdryer to soften the adhesive securing the display. Attach a quality suction cup near a corner of the screen and apply steady upward pressure while carefully sliding a plastic spudger between the screen and device frame. Work slowly and incrementally around the edges to release the screen without causing internal component stress.
Proceed with extreme caution when disconnecting internal cable connectors. Use fine tipped tweezers and apply minimal pressure to prevent bending or breaking delicate ribbon cables. Keep track of each screw and component placement by arranging them on a magnetic mat or labelled section of your workspace. Professional DIY screen replacement techniques recommend documenting your disassembly process through photographs to assist with reassembly.
Warning: Rushing or using excessive force can permanently damage your smartphone’s internal electronics. Take your time and maintain consistent gentle pressure throughout the screen removal process.
Step 5: Install New Screen and Test Functionality
Installing a new smartphone screen represents the critical moment where precision and patience converge to restore your device’s functionality. Successful screen replacement requires methodical reassembly and comprehensive testing.
Begin by carefully reconnecting the ribbon cables and securing them in their original positions using gentle pressure. Align the new screen precisely with the device frame, ensuring no dust or debris interferes with the connection. Apply gentle even pressure around the screen edges to activate the adhesive, creating a secure seal. Professional screen installation techniques recommend checking each connection point meticulously before final placement.
Once installed, perform comprehensive functionality tests. Power on the device and check touchscreen responsiveness across all areas of the display. Verify colour accuracy, screen brightness, and tactile sensitivity. Test multiple applications, keyboard inputs, and screen rotation to confirm complete functionality. Examine screen edges for any gaps or misalignments that might compromise the device’s structural integrity.
Warning: Rushing the installation process can lead to permanent device damage. Take your time, work in a clean environment, and verify each step of the reassembly carefully.
Step 6: Verify Repair Quality and Reassemble Device
Final device verification represents the critical moment where your repair skills are put to the ultimate test. Comprehensive testing ensures the integrity of your smartphone repair.
Begin by methodically reassembling all device components in their precise original configuration. Professional repair techniques recommend careful alignment and gentle pressure during reconnection. Check each connection point to ensure secure attachment. Insert screws with consistent torque, avoiding overtightening which could damage delicate internal mechanisms. Restore any protective covers or seals that were removed during the disassembly process.
Conduct a thorough functionality assessment across multiple parameters. Test touchscreen responsiveness by navigating through different applications. Verify screen brightness settings, colour calibration, and touch sensitivity. Check camera functionality, sound output, and wireless connectivity. Run diagnostic tests to confirm all hardware components function correctly. Document any persistent issues or anomalies that might require further professional intervention.
Warning: Incomplete reassembly or overlooking subtle functional discrepancies can compromise your device’s long term performance. Patient and meticulous verification is essential to guarantee a successful repair.
Safely Repair Your Phone Screen with Confidence and Quality Parts
Facing the challenge of accurately assessing and replacing a broken phone screen can feel daunting. This article highlights the importance of proper model identification, sourcing quality replacement parts, and careful reassembly to avoid costly mistakes and frustration. You want your device restored with dependable components that guarantee long term performance and full functionality.
At Buy2fix, we understand these critical steps and offer a comprehensive selection of mobile phone repair parts including LCD screens, flex cables, and connectors for all major brands like iPhone and Samsung Galaxy. Our products undergo rigorous quality checks to ensure you receive one of the best quality aftermarket or genuine parts available. With free UK mainland shipping and a robust one year warranty included, you can proceed with repairs knowing you have the right tools and trusted components.
Take control of your phone screen repair today by visiting Buy2fix. Explore our extensive inventory of mobile repair parts designed for professional and DIY technicians alike. Don’t risk further damage with incompatible parts or poor quality tools. Get the right parts now and fix your phone screen safely and efficiently.
Frequently Asked Questions
How do I assess phone screen damage before repair?
Start by examining your screen under good light to identify the type of damage. Look for surface scratches, cracks, or dead pixels, and note the location and severity to choose the correct repair strategy.
What tools and parts do I need for phone screen repair?
Gather professional-grade tools such as precision screwdrivers, suction cups, and plastic spudgers. Ensure you source quality replacement parts that match your specific phone model to ensure a successful repair.
How do I prepare my workspace for phone screen replacement?
Establish a clean, well-lit area and lay out a soft mat for device protection. Ensure you have all tools organised within easy reach to promote a smooth and efficient repair process.
What is the method for safely removing a broken screen?
Gently apply heat around the screen edges to soften the adhesive, then use a suction cup and plastic spudger to carefully lift the screen. Proceed slowly to prevent damage to the internal components during removal.
How can I verify that the new screen installation is successful?
After installing the new screen, power on your device and test touchscreen responsiveness, display clarity, and connectivity features. Conduct a thorough functionality assessment to confirm that all hardware operates correctly before finalising the reassembly.
What steps should I take if I encounter issues after reassembling my phone?
If you face issues, systematically check each connection and test functionality across different features. Document any anomalies and consider seeking professional help if necessary to avoid further damage.
Recommended
- How to Install a New Phone Screen Like a Pro – buy2fix
- How to Fix My Phone Screen: Complete Step-by-Step Guide – buy2fix
- Mobile Screen Replacement Guide: Achieve Pro Results – buy2fix
- Ultimate Mobile Device Screen Replacement Guide for 2025 – buy2fix
- Mirror Phone to Projector: Easy Ways for Malaysians 2025 - Projector Display
- Microwave repair or Installation service From Broken to Baking: How We Fixed Faulty Microwaves - MDTech Services
Let customers speak for us
For Samsung Galaxy A26 SM-A266B Original Earpiece Speaker with Cable

Very good communication throught. Good product

Well made part very strong easy to fit great value for the money

Well packed, with fast shipping :)

Exactly what the doctor ordered…great color, comfort, and durability. Trust this watch band!

Brilliant strap, second purchase, bought bracelet before. Excellent value. Thank you

Great item for splitting your Audio signal

Outstanding product!
Next level customer service.

Very satisfied but the delivery needs to get more faster...

Good price,quick delivery

Best phone case ever! This is my second one as I broke my first. Would defo recommend

Great fitting Apple Watch bands

For Apple Watch Ultra 3 / 2 / 1 49mm RedPepper Armor Metal Case Integrated Silicone Watch Band(Steel Black White)

Good price and quick postage

